Category Archives: Uncategorized

All things good at Home!

My wife and I took a small vacation to go home to the Reno and Sparks area to visit my mom, my sister and my nieces at the beginning of March 2016 and had a great time. Going to the area I grew up and spent the most of my college years is always bitter sweet… many of the places we went as kids have closed and even the new places have been hit hard by the economics in the area.  I was glad to see the Pirate ship was still standing (not torn down to become another useless parking lot) but has been closed now for over 7 years…. a place that (from the outside) seemed like a bit of a dive was still fun with good food and drinks that made you feel like for the hour you ate and drank that you just might be a pirate!

IMG_0194

Our first night was the famous Lounge Night… the friday night cocktail experience that everyone wants to be apart of and share in a few cocktails and talk about the inconsequential. Listening to jazzy up beat music in the back \ground and the table full of “orse’s dervesies “… My sister invited her friend and I invited a few of my friends… fun, great conversation and laughter  was had by all.

IMG_0196

My Niece and my wife share the same birthday so it was birthday ladies picture time…

IMG_0201

My sister with me and her best friend. (Hi Leslie!)

IMG_0204

It was good to see my best friend from high school and the Marine Corps… it is hard to believe we are getting older and still look the same from our younger days…

IMG_0208

Quit taking photos and order more drinks someone!

IMG_0207


Lego Photos

LEGO BUILDS for the past 5 weeks. I am still sorting but a few of the builds are the Police boat, the wind mill and the fire station. Most are still missing 2 to 3 pieces and i add them to the build when I find them during sorting. It feels like a major accomplishment when you find the one or two bricks that complete a build!

3D DIY Printer part 4 Axis

After taking some time away from the project to think about how I was going to fabricate the X, Y and Z axis mechanical aspect, I finally rolled up my sleeves and tried out my first idea. Using the aluminum stock and a drill press I fashioned some very solid mounts for the  roller bearings and the thread stock.

Having the goal of just getting my first axis working and thus allow me to review how the assembly works, before committing to having all of them done this way ( in case there is an issue).

IMG_0147
The frame that will hold the items I am working on in this post. (you can see the two brackets that I will be drilling into in the next picture)


IMG_0151
Take your time… goggles are a must, use a clamp.

Drilling out the center of the beam… this will house the roller bearing.

IMG_0152
Lining up the thread rod and checking it if it is smooth turning.

IMG_0153

Posting the other end where the stepper motor will mount.

IMG_0154
Top down view of the mounting hole for the roller bearing.

IMG_0156

IMG_0157
First idea  for mounting … which I didn’t like in case I needed to disassemble… this would be a nightmare.
IMG_0159
a single nut hammered into the stock aluminum… seems easy!

Keeping it simple is my goal… so hammering in a single nut into the plate bracket made sense… and if needed I can adjust it.

IMG_0160

IMG_0161
Stepper motor with a CV axle to mitigate vibration if the motor isn’t exactly lined up.

Of course I am back to building now so i will be sure to post the next stage of the X axis. and how things are progressing. It seems like this will be a fall project as right now the weather is great for riding my old scooter.

I think once this axis is fully assembled I can experiment with the motors, the  controllers, the emergency stop and limit switches… the wiring harness will be interchangeable thus I can try each section of the harness only using the X axis. Check each electronics board will be the next post… hope to have you reading it very soon!

Bar Build

Wanting to have a bar for the patio, I started with reclaimed wood from a torn down fence, some pallets and some wood dowels.

The sides I bought some pine planks… the fence posts had the slots and the wood dowels i used to pin all the 4×4 posts together. I will have to finish up the build with a counter and a few wine crates to go underneath to hold glasses and bottles. A good thick coat of polyurethane and I will be done. I was thinking I should stain it and then distressed the wood with chains and a hammer to give it an old school appearance… but I will see how the finish “clean” looks and go from there… I am sure the weather here will make this happen for me.

I will be sure to take some more photos when it is complete. I am thinking a few string of lights on it too for the patio will make it stand out.

LEGO Revival (Part 2)

So I started with the Yellow Castle, LEGO Kit # 375LEGO 375

It was easy to find the bricks and sorting helped me build the walls quickly, but now the search will be for the Knights and Guard men. IMG_0077


IMG_0079IMG_0089

Here it is below about 95% complete…

IMG_0090

I also started the the motorcycle sales and repair shop… LEGO Kit #6373… Still missing a few roof pieces, and a front door. the 2 LEGO mini figures that come with this kit I have not searched for, but I know I have them somewhere in my many bins.

IMG_0104

Since I had started the shop I figure this little kit with the trailer for the motorcycle would be a good addition. LEGO kit #6654… and like the other builds… I have not found the driver.

IMG_0106

The police station brought back some memories… one of the first big LEGO kits that started my collection. LEGO # 588. It still needs some work… a helicopter, the garage doors and the jail cell windows.

The Space Cruiser #487, was my first LEGOLAND Space kits… the white and red Space men are ready for an adventure. This kit I am pretty sure was given to me by my Grandmother and was when I was about 3 or 4 living in Stead Nevada.

Finding my Shadow

While in college during the week I would typically have one day off from classes that I would use to work around the house, do chores, and study, but for the most part I kept busy with the basics and never really worked out in my wood shop I had set up in the garage.

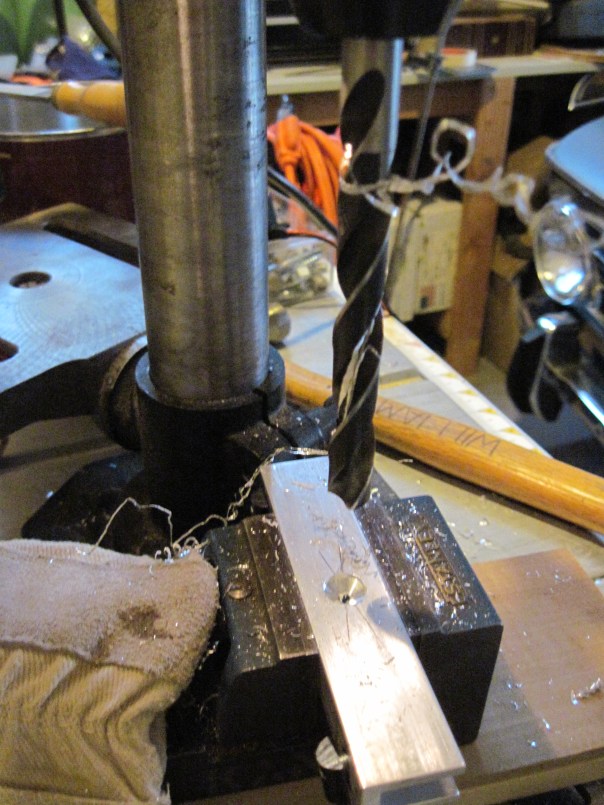
One such day off, I decided that I would work in the garage and make some cuts on the table saw, as I was always building speaker cabinets as a hobbyist in the audiophile world. This day the weather in Reno was warm and sunny, with the spring in full bloom. With the temperature still warm outside, anytime out in the garage would require I open the large bay door up and allow the soft breeze to cool my work area. With hearing protection in and my dusty goggles on, I got to work.

The desert land around our house just north of Sparks was being developed and made for some interesting run-ins with all kinds of wild things. Rabbits, field mice, snakes and plenty of bugs. These items of the wild kingdom would be searching for shelter and looking for a cool safe place, so we always were keeping an eye out for Mother Nature’s creatures.  After finishing up with my project, I turned on the radio and sat at my bench. With my heighten awareness I was not startled to hear a ruffle under my car parked on the other half of the garage. I figured that during my time with the garage door open that a rabbit had made its way into the cool and shady garage to get out of the afternoon sun. Grabbing my long broom stick and crawling down onto all four, I could get a good look to see where I needed to scoop the creature back into the wild with a gentle poke of the broom.

Looking underneath the car I could see a very small furry animal, and upon closer inspection I could see it trembling. Not wanting to hurt it I made my way closer under the car. As it slowly was scooted out from under the car it made no moves to try and escape as it was curled up into a little ball. Emerging a puppy poodle… covered in weeds and mud on his paws, he looked as if he had been on a great adventure and with wirery black and gray fur he looked bigger that he really was, being small enough to fit into both of my hands comfortably I brought him out into the day light.

Cleaning the little puppy off in the lawn with some dish soap, a plastic container and the garden hose I could tell that he could not be much more the a few months old, underweight and needing some food and water. Playful and I am sure very excited to have found someone to take care of him after his big adventure in the Nevada desert.

Not having any dog food and none of my neighbors having any pets… I decided to get some water to drink and a uncooked hot dog for the little guy to eat. He quickly devoured the hot dog and began lapping up the cool water from the small bowl. He was here to stay.

After Adrienne and I determined my first check and diagnose of the puppy being a female puppy was wrong, we were now proud adopted parents to this very tiny and very cute poodle puppy. But what to name him. He would follow me around with great excitement, as if I was going to feed him another hot dog, and my wife determined that he would be forever my shadow.  And so it was…his name would be… Shadow. Now almost 12 year has gone by since we took in our smart and kind puppy. He will always be my puppy. Shadow still runs around and prances like the first time feeding him, even if it isn’t a hot dog, but he will do the same for a treat, or if I walk in from work or if we have been out for the day, he still has his magical skill of being our “Shadow”

.

LEGO Revival

With a very large collection of LEGO kits from my youth I decided to start the very long process of sorting all of my unassembled bricks.  I have some new rules that I will follow from here on out, as this experience of sorting is mind boggling and painful… the time it will take to sort, clean and rank each brick will take me a year or more. The reason for the ranking is I want to try and determine the old brick and use them in the older kits from the early 80 since  those bricks will be older, less vibrant in color and thus provide the vintage look I am going for when I put all the kits on display. With that in mind the process of finding the instructions is fun, and rediscovering the plans of my past. When I would sit for hours building a LEGO town with enough fire protection and police protection in my small world that I was able to forget the world around me and be at peace.

My first build will be the original police station my parents got me when I approximately 6 or 7.

police 588

As the builds become reality I will post the kits. I think that if I did one a month that it will take me about 6 to 7 years to build ALL of my LEGO kits… sorting is my first task… but some other rules I will start with my collection…

1. Leave kits built, if the kit is to be taken apart for storage or transportation, then it will be placed into a ziplock bag and the instructions will be placed with the bricks.

2. I will never mix new bricks with old bricks.

3. Bricks that have not been put with a kit will be organized.. (I am going to try and put all build bricks, plates, tiles, roof sloped bricks into the correct color bins with tools, mini figures, etc. into the  same type of sorted bins… vintage, new, and  unknown)

I also will be cataloging these kits… here is a start of the process in excel format.

Well back to sorting… more pictures as they become complete kits, cleaned, assembled and ready for display.


Kit Number Kit Name Plans Built own original kit / QTY
1 6390 Main street x 2
2 6378 gas station x no
3 6364 Urgent care 1
4 car repair x no
5 6373 motorcycle shop x 1
6 police station #1 x 1
7 police station #2 x 1
8 police station #3 1
9 6382 Fire station x 1
10 old town main street x no
11 exxon truck x 1
12 fire snorkel truck 1
13 police van 1
14 ambulance 1
15 fire truck x 3
16 snack shop x no
17 ice cream store x no
18 rafting camp x ?
19 6392 airport x 1
20 6372 town house x no
21 train station x no
22 train #1 x 1
23 train #2 1
24 train #3 1
25 375 yellow castle x 1
26 6383 public works x no
27 8865 test car 1
28 6377 delivery center x no
29 6362 post office x no
30 6345 airplanes 1
31 6680 ambulance 1
32 487 space cruiser yes 1
33 bus station x

3D DIY Printer part 3 extra hardware/harness

Over the weekend I did a quick schematic for all components that would need to be on the main frame of the 3D printer. This allowed me to quickly get a wire count and make a harness. DC power, stepper motor signals, limit switch signal, power for the heater for the plate and extruder, LED lighting and an encoder will all be using this harness and will be routed and zip tied on the frame to minimize the interference. Using my new label maker, I labeled each pair and will make for an easy install once the mechanical structure starts to take form.

IMG_0047

Digging around in my electronics bins I found great limit switches that will tell the controller when the limits of the axis has been mechanically reached, thus stopping the stepper motors from getting damaged. I went to Ace Hardware (one of my favorite places) and bought my thread rod 1/4 inch which will work great with my 6mm ball bearing paired sets.

IMG_0058

Molex connectors will be used for the stepper motor connections and the washers and nuts  hardware will be used to mount the heat plate, extruder, and axis arm to the thread rod.

IMG_0059

Close up of the limit micro switches, below.

IMG_0060

I am having fun with my new label maker… ebay for 10 bucks.

IMG_0061

The Denver area is going to get a big rain/snow storm event this weekend, so I hope to work a bit more on my 3D Printer. I have  to determine the best way for coding allowing for some freeware to convert G-code into data my Arduino will understand and move the stepper motors. I also will try and finish up the mechanical frame and how i plan to mount the limit switches, thread rod, stepper motors and the power supply.

Finishing the Bass Tube build (part 2)

With some scrap speaker box carpet, a hot glue gun and the sub woofer delivered.. I finished the bass tube for my commuter car. The Boss amplifier was a deal at $55.00 on sale on-line… free delivery, and at more that 75% off I thought I would take a chance. I was skeptical about the rated 1500 watts Peak into a two Ohm load, but after hooking it up in the basement and running it for a while I was very pleased with the clean  sound and more than enough power. The amp also met many requirements: must have active variable crossover, RCA OR Speaker level inputs, soft start turn on and stable at 2 Ohm… (Nothing like the amps I used to have back in highschool!) so for the 55 dollars I felt like i got a very good deal for a good subwoofer amplifier.

My next post on this project will be a detailed test using a frequency sweep from the 20Hz range up to the 75Hz range. Taking a sample at 5 Hz increments and plotting the speaker output for a comparison and a detailed analysis of the ported tube enclosure of “My Design”.

3D DIY Printer part 2 (Motor Control)

After some research I found some very inexpensive servo motor control electronic boards. Easy Driver stepper motor drivers… these PCBs will allow me to control the motors for each axis, allowing microstepping resolution to full, half, quarter and eighth steps.

I also found a simple schematic which I will use to start basic programming, testing and explore the Sketch code required to allow G Code to be processed. The feed motor for the extruder (A group of parts which handles feeding and extruding of the build material. Consists of two assemblies: a cold end to pull and feed the thermoplastic from the spool, and a hot end that melts and extrudes the thermoplastic.) will be run on another stepper motor and is not detailed in this schematic. I started the layout of all the components on a prototype bread board, and I might just keep it that way for the final build to simplify troubleshooting and modifications.

Next I will prep the computer power supply and run the needed power lines to a breakout board with fuses and a selector switch to allow for a voltage display for each power bus line.