Tiny home Fun

On our trip to Denver we stayed in Louisville in a tiny home for two nights. The inside was very nice and had everything you would need for a week long stay. it was within walking distance to old town Louisville which was great. the weather was perfect and sunny. the day before the area had a small snow storm but by time we got there it had all melted off. I wish I would have taken a picture of the house outside, but it was very much a tiny home… done very well and beautiful upon walking up.


IMG_1742
Bed room in the back

We had just finished up with a small lunch snack of cheese turkey and crackers…

IMG_1744
Photo from the loft
IMG_1745
Dining room
IMG_1746
Front Porch

The back yard of the host home was very nice and had a fenced off section so we had a small yard of our own. A seating area was off to the right side but we did not sit out as it was still damp from the snow.

IMG_1748
Kitchen

The kichen had everything you would need for a dinner or to cook up some breakfast.

IMG_1750
Kitchen Sink

I didn’t take a photo of the bath room as it was very small, it had a very small shower, a half sink and of course a very awkward toilet, but it did the job. The door to the right in this photo is the bath room, so if you wanted to you could make some breakfast while you sat in the bathroom…. to funny.

Laser Cue Pinball!

With the move over and settling in almost done I was going to set up and reconnect all of the harness for the pinball machine I had  in November of 2018 repaired. In a haste I was quickly setting up the score board box, the glass, the legs and the harness.  One little over sight and you can damage a Williams 1984 pinball machine in about as quick as you can turn it on…

Well the damage this time was to the mother board MPU and the driver board…. it was a big let down and I had to really regroup and accept my mistake. It was several months of check ICs, looking at signals, trying to see which driver PIA chip was going to need replacing or if it was all of them.

Checking power supplies and fuses, and really learning all the functions of each zone.

It was a good lesson and a lesson in the design and function of a pinball machine. The Williams 1984 System 7 machines were still pretty much analog for all of the outputs, the lights, the bell, the thud maker, and simple switches. The only digital came in logic ICs and the Micro processor unit, RAM, ROM ICs and a hand full of specialized programmed ICs.

How I wished the engineers at Williams would have redesigned the two main connectors so that NO ONE would ever be able to plug the High Voltage into the Low Voltage connectors. Sure color codes are done for a reason, pin Keying is done for a reason… but in the dark corner of an office at night while rushing (my part of the failure) to get the ball rolling and the flippers flipping and the solenoids popping… it can lead to total disappointment…  and I am able to fix things like this… imagine if you were a Pin Ball Wizard how just is a master at playing and new cared to learn the maze of wires and each type of component. You just got it home and to your surprize, it will cost you another 200 to 500 dollars to get it running again (depending on labor, who you select to do the repairs, and if you EVEN trust them), not to mention the day will feel like it will never come that it is finally repaired and ready to play again!  UHG!

Well it is fixed… it was good to learn so much… it is something that makes you feel good AFTER you get it fixed but that time in between… I would rather just go play Laser Cue!

More photos to follow and maybe a list of ICs that got fried on my machine.

lasercue

2002 BMW 325XI repair


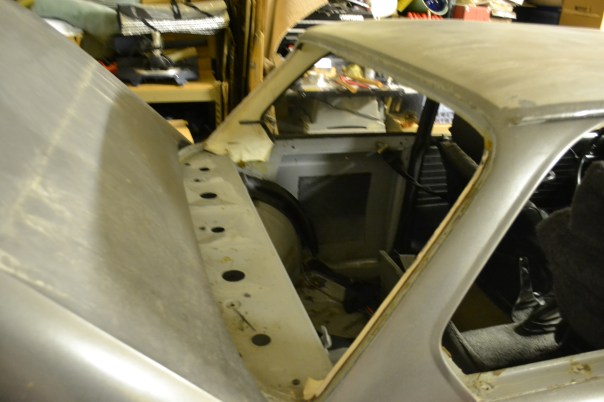
Driving home on Wednesday I heard a noise getting on the freeway… making my way home with everything normal and trying to avoid the flooded roads, I get home with no issues on the dash board or over heating. Once stopped the puddle starts to form under the car… I put a finger into the Liquid puddle to find out it is coolant. i open the hood and peer into the engine compartment to find the shroud and the fan in a million pieces and black plastic chunks everywhere… The radiator now peeing out the coolant where two fan blades had pierced the metal fins of the radiator. How did I make it home? How was this explosion of the fan blade not a belt breaker, coolant emptying event?

The world may never know but I had enough coolant int he car to maintain temp and once i stopped the car, the event of cooling may have allowed metal to shrink just enough to let the remaining fluid to ooze out.

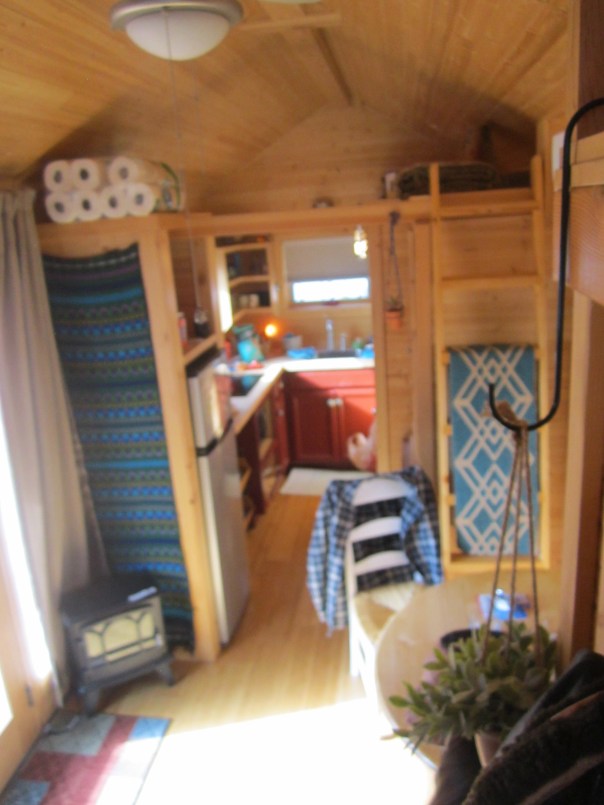
My wife says that once this car is back on the road I have to go buy a used truck if I plan on driving through flood waters… I guess I could really use a truck, but I want one I can work on and not too new and too nice, it is a truck so I will be using it accordingly.

20190925_062225

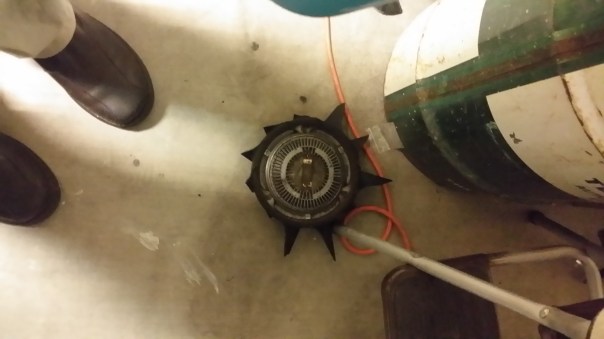
The fan blades that are missing on the thing that kinda looks like a fan.

DSC_0003

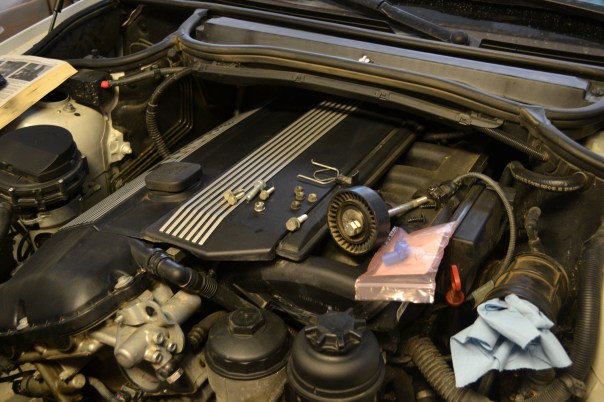
Finished prepping the engine for the new parts.

DSC_0004

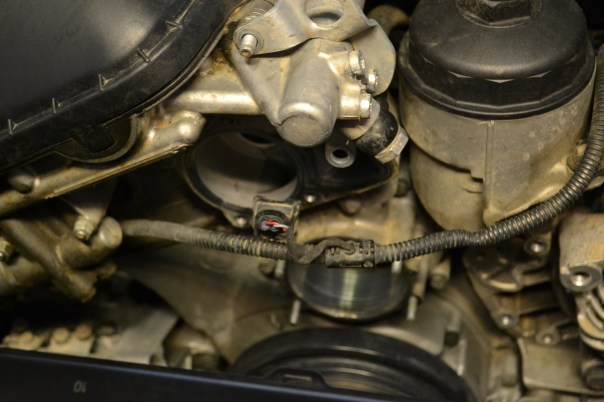
Old thermostat out and removal of the original water pump.

DSC_0005

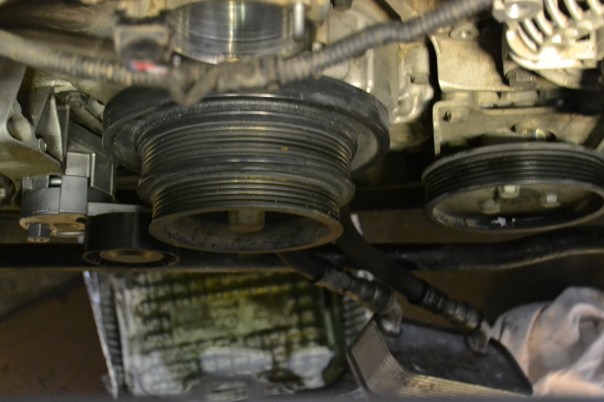
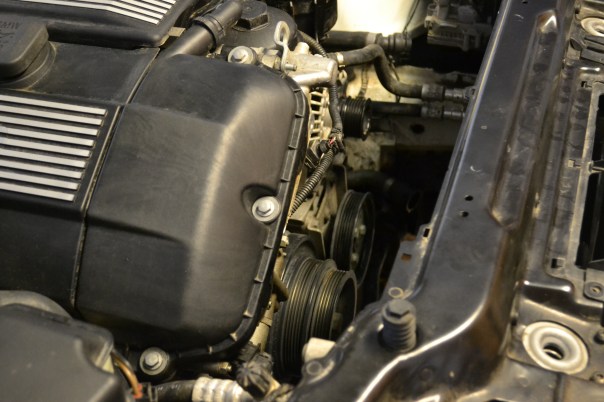
New belts will be the easy part of this project. Left is the new tension pulley wheel and  DSC_0006

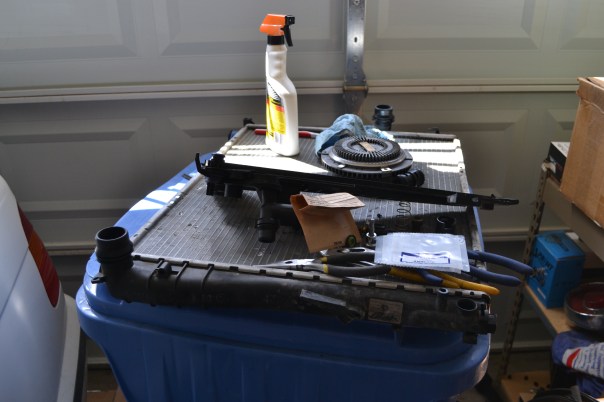
Old radiator and miscellaneous parts that will be replaced.
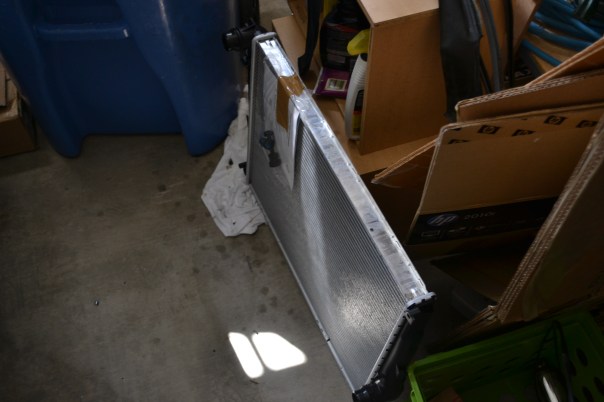
DSC_0007

New radiator!

DSC_0009

Gaskets will be replaced as well, I real like that Ace True value carries rubber gaskets, both metric and standard.DSC_0010

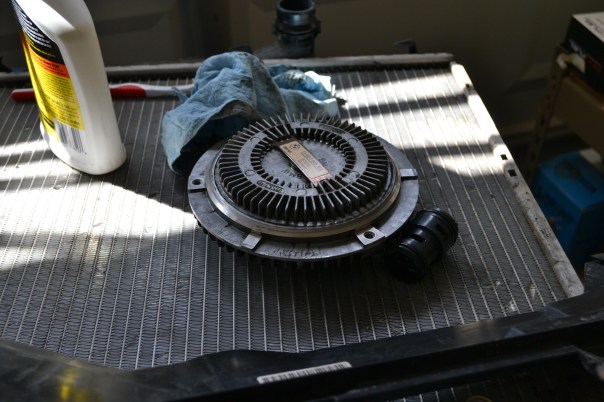
Still amazed that the fan clutch assembly did not fail.

DSC_0011

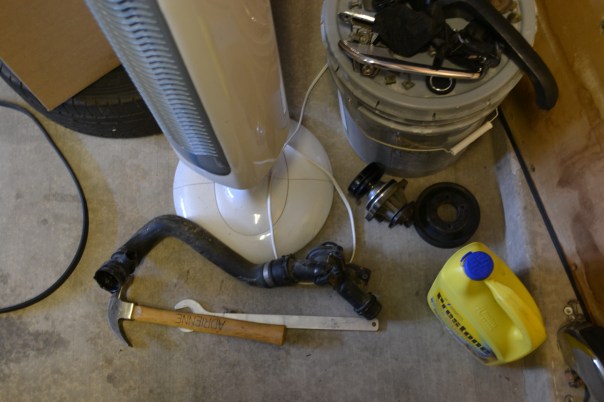
Old water pump and old hoses, still don’t know how they didn’t get punctured, even the water pump pulley wheel was damaged (cracked housing) by a fan blade.

DSC_0013

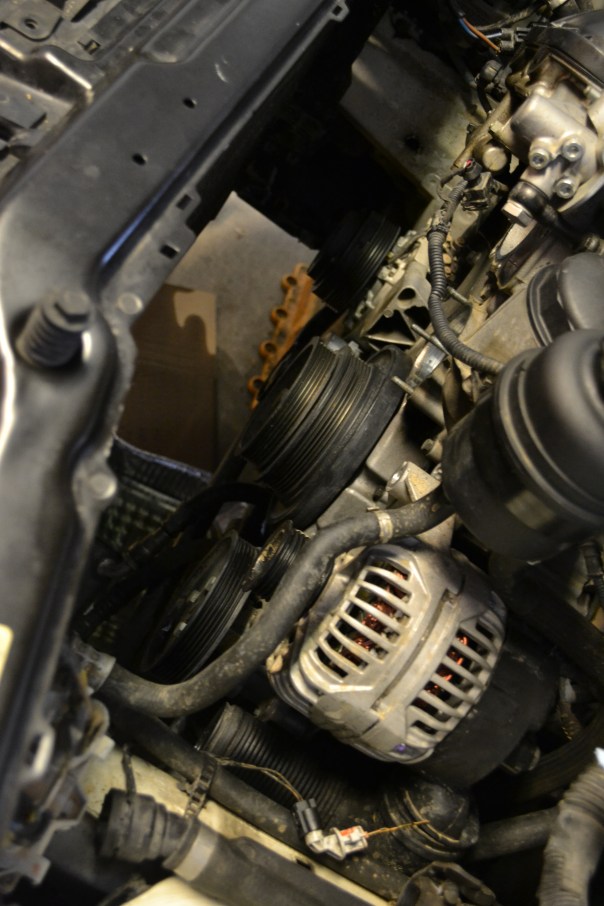
Hello again alternator! I just replaced this guy about three months ago!

DSC_0014

Parts and level sensor awaiting install. Going to get up early Saturday morning and put all the parts in!

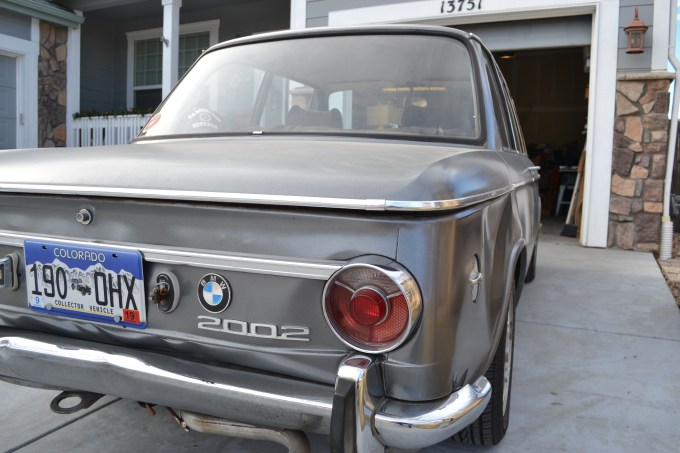
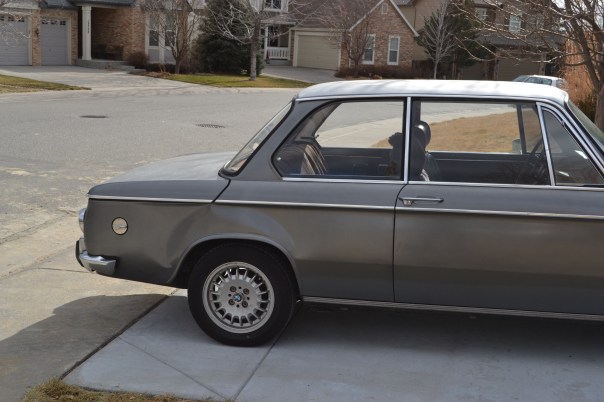
For a 17 year old car… this Bimmer still looks new!

DSC_0015

Lots of water, as it is still hot in the garage here in Green Valley. 85 Today.

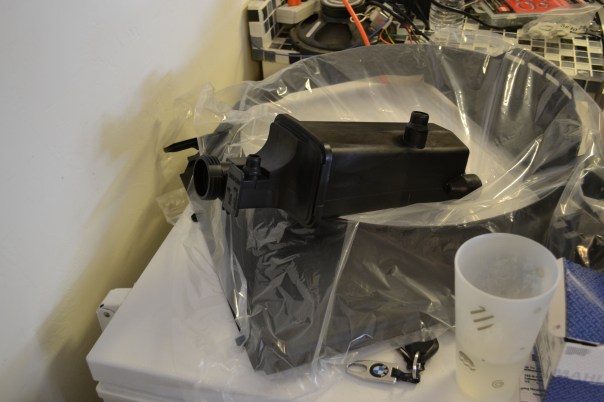
Above (and below), this part is the new expansion tank and in the plastic bag the brand new shroud.

DSC_0016


I am sure it will all go together faster than removal as I have made sure to prep and clean… just waiting for the final delivery of the last few parts… they say it will be delivered by 9PM! Gotta love Prime! Most parts I bought for this project were from Pelican Parts specializing in BMW,  VW and Benz… with a ton of Porsche parts too.

More photos and details once I get the parts!

Ready For Paint


After getting all of the glass out of the 1969 BMW 2002 the next step was to remove the door handles, chrome and grill….DSC_0987

The rear windshield came out nicely and allowed for a good cleaning of the seal mount which had been leaking due to the fact it was the original seal. DSC_0988

Center grill and wings removed.DSC_0989

Blinkers and bumpers were removed as well…

DSC_0990DSC_0992DSC_0993

Cleaned up and ready to head over for repair and paint. No windshield and since the kit had all new gaskets I went ahead and removed the door seals as well…

DSC_0995

Alice in the back ground with her new painted hood.

DSC_0996DSC_0997

Looks good with no bumper, but mom says its got be on the car if you want it original!

DSC_0998

Going to have the door straightened out as well.DSC_0999

I put back on the original 13 inch steel rims in case the rubber gets some over spray!


Start of the Repair

After being rear ended in December of 2018 I knew I wasn’t going to be able to get started on the repair of my old 1969 BMW. The repairs will take a while… I had to move to Arizona, find a body shop that will work with me and find someone who knows what they are doing, the latter is the hard part.

DSC_0837

Most of the replacement parts I already have. the bumper, the rear tail lights and the extra emblem and ‘2002’ marker. the rest will have to be discussed in detail with the auto body shop when I deliver it next week.

I started to take most of the damaged parts off and trunk floor panels to see just how bad it was going to be.

IMG_1495IMG_1507

(I already have it registered in AZ with the classic car plates, or cars older than a certain date you don’t have to have emissions done.)

I also wanted to get the old bumper polished before I take it over.

IMG_1513

Both took a while and now in the AZ heat, in the garage I can work in the morning for about two hours before I have to come inside. (Should have taken a before picture)

IMG_1499IMG_1500

My concern was for the throat of the gas tank, but so far it looks pretty good.

IMG_1501

This cross beam in the trunk center looks pretty bad.

IMG_1502IMG_1508

IMG_1512IMG_1514

Before (Left) and after (Right) of the bumper middle section, it looks really good and with a bit more elbow grease I think it turned out very good. IMG_1515


DSC_0834

I will be sure to take more photos as the repair comes along. Here are a few more from right after the collision happen back in Colorado.

DSC_0836DSC_0862

Old ideas, new projects

It has been tough to truly finish moving into our new home and get every space situated just perfect. I have boxes with books, piles of cables and magazines I still want to peel out the some of the good pages.

I enjoy the simple Saturday mornings going with my wife to the thrift store in our new area. Open 9 to noon, we have to get up and start the day. Yesterday I had an idea… a corner cabinet out of a door… seems simple… and I should be able to clean, cut, glue and paint it all in one Sunday morning.

Since the back will be against the wall and the detail will limit where shelves can be placed I drew out this simple idea/concept.

corner


Here is some photos of the build…

IMG_1474

Adding brackets

IMG_1475

Shelves

IMG_1476IMG_1477

Soaking the wood pieces that will finish the shelves.

IMG_1478IMG_1479IMG_1480

A few pictures after it was painted…

I bit of silver paint and a water wash, i used a towel to remove the heave silver color to just add a bit of detail or color to make the detail pop.

$8 for the doors, paint was free (in the house when we bought it) 17 bucks for wood, paint brushes, caulk and long screws… and few hours of time… something I want in my house (not store bought junk) , corner cabinet!


Tombstone Az

IMG_7763 cody recker

This photo was taken by Cody Recker Friday night May 24th 2019

Tombstone, Az … Wyatt, Virgil and Morgan all had a hand in the history of this iconic town… I decided we better be apart of that history as well. May 25-27 is Wyatt Earp Days with gun fights, all types of characters and just a hint of a tourist trap.

With my wife and I all Cowboyed up, a spirit of old timey adventure and a free weekend  we headed out. Knowing we would want to stay over night we found a bed and breakfast, (with a haunted Picture frame detailing the life of Morgan Earp,the lesser known brother) drove the scenic route on Hwy 83 and then Hwy 82 and discovered a past life in Tombstone.

bed and breakfast room

Met a man playing a harmonica in a Tattoo Parlor, drank a whiskey with a top notch Wyatt look-a-like, watched a gun fight and walked the same streets these famous gun slingers once walked. We also took a late night ghost tour which was nice because we were the only ones on the tour.

IMG_1440

Feeling like we were in a West world episode, the gun slingers get shot, hit the ground, play dead and then after the smoke clears, the on lookers move along and the scene is over they all get back up, dust off and reset the next day to be apart of someones new adventure.

IMG_1433IMG_1447

Of course the saloons and gift shops bring you back to reality, but for the most part you can roam the small town and enjoy a root beer, a good steak sandwich or talk to the characters on the covered wooden board walks. The overall feel of the town allowed us to have fun and keep in a cowboy character.

Below is Bingo card for tombstone I made for my wife… she found almost all of the squares except for the Monocle and a bunny… the bunnies go hiding once the sun comes up.

60943611_10206309211486916_2083599449740804096_n

IMG_1451

Above, a stop into Big Nose Kate’s for an ice cold Coors light… I wish the fake stained glass came out better in my pictures.

big nose kates

With enough history to fill a weekend, and more old buildings to check off the historical site, the last one to check off was going up to Boothill, the cemetery, where everyone of the whos who of Tombstone rest in the full Arizona sun.  I am glad I did not live in those hard times, but with a place in my heart as a cowboy (I was a cowboy as a little boy) it was a fun weekend and I thanked my wife for recommending, reserving and setting up this “I will be your huckleberry” adventure.

one leg zoom

IMG_7770 cody recker

This photo was taken by Cody Recker Friday night May 24th 2019