Tag Archives: Motorcycle

LED Bulbs DIY!

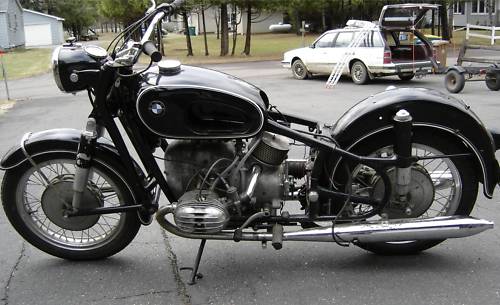
I have been working on my BMW R50 to get it ready for this summers riding season, and this time I was tinkering inside the head light housing. I had a small issue, my key plunger would not seat the contact correctly and thus the motorcycle’s lights and engine were intermittent… which is not good when riding as you never want the engine shutting off thus I was unable to ride the past few weeks until I got this figured out and fixed permanently.

Lucky for me it showed up in my garage right after I replaced the chrome cover for the key hole with a newer one.  I wanted to fire the engine up and check stuff out… but it wouldn’t stay running.

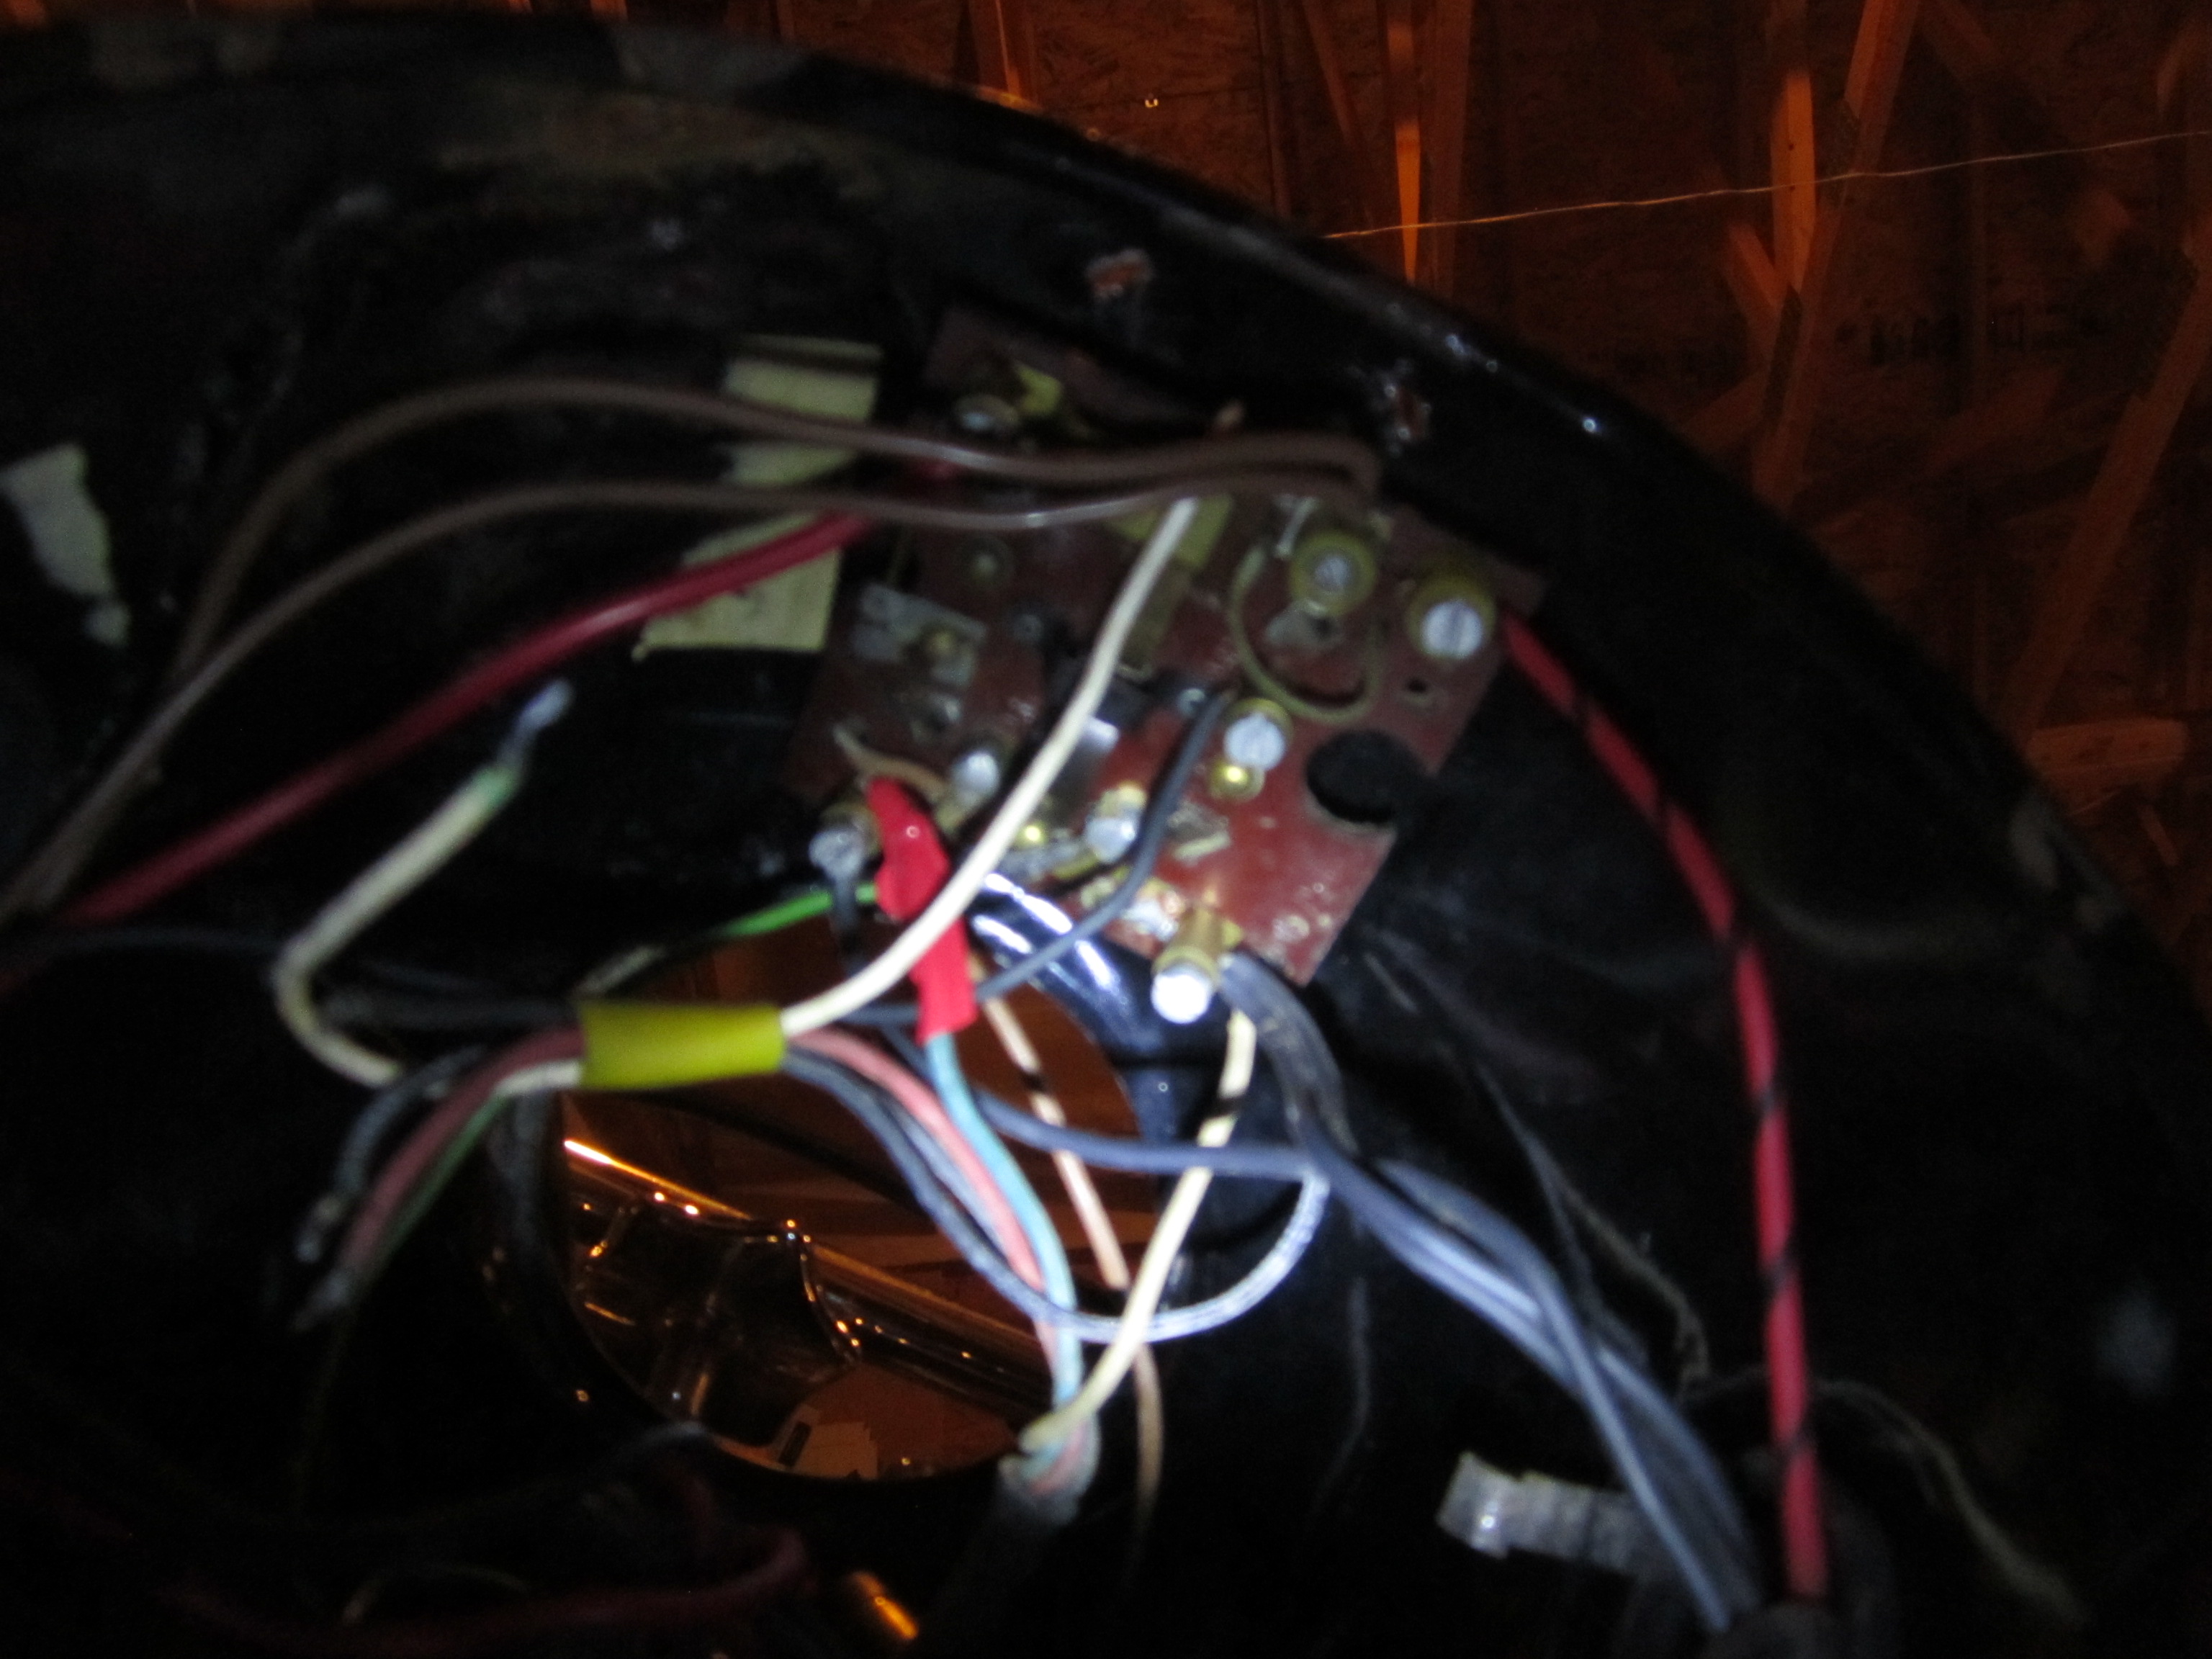
Removing the headlight and looking at the plunger key area on the ‘inside’ of the housing, I noticed a very light contact was being made. This was an easy fix… I looked at the copper “finger” that was making contact with the key plunger and notice is was barely making contact, thus I bent the thicker copper contact up and verified that when my key was inserted a good contact was made… a bit of cleaning and an emery cloth over the contact point to ensure the mate of copper was clean and with no build up of carbon.

IMG_0674
Mess of wires in the head light housing.

I was on to my next project… the little bulb for the speedometer was out, so while I was in there I figured it would be good to fix it!

Try to find this size of bulb anywhere local would be a joke…(it is small and 6 volts) … PN 07119978270… I guess I could order it online and have it in a few days, or I could use a super bright LED and build one out of the blown bulb.

I found this bulb for sale on http://www.bmwhucky.com/

 07 11 9 978 270  bulb 6V 1,5W speedometer  all 6V  $ 5.50

So here is the quick and dirty when putting together your own LED bulb… First go with super bright LEDs, next do some very simple calculations, purchase resistors, LEDs and shrink tubing (Or as I did, dig around in my electronics bins and find the parts)  and prepare to hone your soldering skills!

Note: when purchasing your LEDs be sure to open the data sheet and find out the Maximum forward current and the voltage of the LED…. this will be important! You will want to have a really bright LED “light bulb”so the next step is to calculate the smallest resistor you can use and not damage the LED (The maximum operating current, typically 20 to 40 mAmps).

So to get to the heart of the topic, and to not have a bunch of calculations… I will describe my design.

watt
Using a quick calculator I can verify my design and the size of the resistor (OHMS AND WATTAGE)

My motorcycle is 6 Volts DC, I have an LED that operates nominal at 30 mAmps (That is milliAmps)!  I will use a 220 OHM resistor (1/4 watt)… and that puts the current at 27 mAmps… which is good because when the generator charges the battery, the voltage can go up a bit and thus at 6.5 Volts the current is at 29.5 mAmps, just below the max current.

Super Bright LED
Super Bright LED

Be careful and  break the glass off of the old burnt out bulb. I use a paper towel and wrap it around the glass before I break it to capture the glass fragments. Try not to break the filament in the bulb, you will use this! (Unless the bulb has a solder tab on the bottom of the connector (photo below).

IMG_0682
Bulb ‘tit’ that allows soldering the leads of the resistor and the LED

Next find the positive lead, mark it so when you go to put the LED on it is in the right polarity! If you are using the bulb like the one above, the outer metal is usually ground the the center is positive. The nice thing about making your own LED bulb is that if you want to go back to the Bulb type light, you can take out the LED bulb and the housing (holder) is the original.

Bulb housing for the Speedometer

Now with the resistor, LED, heat shrink tubing and the bulb housing you are ready to solder it all together. Try and make the leads short and cover all leads with heat shrink tubing to protect from shorting out.

Check the polarity of the LED and try it on a power supply or a battery before installing.

LED bulb, Finished assembly!

So, in a few minutes I had an LED bulb that is very bright and works great.

Here is a few photos of a multi LED bulb I did for a brake light.

20140501_101434

20140501_110654

20140501_111633

The Goal of course is to put enough LEDs to get the brightness of the bulb to the same or better LUX .

Back to the basics (for the 1956 BMW R50)

As promised I am back to share and provide detail of the discovery, restoration, repair, accessorizing and riding adventures of my 1956 BMW R50!

IMG_1133

It all started the summer of 2011… searching e-Bay for the “One of a Kind” motorcycle that would be… first off a good learner bike… second be mechanically sound to start a simple and easy restoration. I had never ridden a motorcycle and had never even though of buying one until I moved from Reno, Nevada to Colorado and realized the area I was now living provide almost year round “scooting”. A term now I like to use to let my wife know that there will be no crazy stuff occurring on two wheels and thus safe for her to ride along with me on an always certain adventure, a term is used to describe the easy going, back road, very balanced and smooth, warm sun in your face riding experience only a BMW can provide.

Thus the nickname I have fondly given my BMW… ‘Scooter’ which some people think I am telling them that the motorcycle I am describing to them is an actual moped or scooter…. but make no mistake when they finally see this ’56… they always appreciate that it is a great rider with good steady power, classic lines and a “gentlemanly” look to it.

My wife was a bit concerned that I might be a bit crazy to buy a 56 year old motorcycle, and with no previous riding, why would I want such an adult toy. But I convinced her that this would be a great purchase and for collecting a good bet that this BMW would only go up in price… thus if I never felt able or comfortable riding it, we could get our investment back with ease.

The auction for the R50 would end on July 4th in the evening… I waited next to the computer like a little kid until the very end and was the first and only bidder.. (you can be sure, that on the 4th of July, there would be few people that would be watching a computer screen instead of the fire in the sky celebrating the independence of our great United States of America ).

The gentleman I bought the BMW from was very nice and worked with me on the delivery as though he knew it was going to received as a prized possession and that it would be well looked after… he brought it down in his van while going on a trip to Arizona.

Here is, in his words, the description presented….

“1956 BMW R50 discovered in a basement in Duluth Mn. in 2005.  Bike had a 1960 Mn. plate on it so it sat in this basement for 45 years.  I know the guy who found it…he has a garbage route and was contracted to clean out the house.  He traded it to the fellow I got it from, whom I also know very well.  Second guy (Jim) likes to tinker…he played around with it, discovered that the magneto still had spark but was insufficient to get the bike running.  He patched in a coil and battery & it started right up and ran quietly and smoothly.  This was all in the last three months.  He wanted me to sell it for him, changed his mind and said he’d just sell it to me.  As I said, he likes to tinker, but isn’t really a rider.  He sort of loses interest or finds something else to occupy his free time.  He hangs out in his little garage/shop without a telephone or cell phone.  I bought it knowing the title was lost, and after advertising this bike on numerous occasions and on many venues, I finally took the leap, went to the DMV, picked up a one sided single sheet “lost or misplaced title’ document.  Got together with Jim, filled out the form, and along with 4 pictures, now have a clear title coming in the mail.  Bike is in my name and I have a temporary title and a brand new Mn. license plate.  Unfortunately, Mn. titles take 8-10 weeks to arrive at a person’s mailbox.  This should not persuade a person from buying this bike, as the temporary title is proof that the bike is sellable.  Title will be promptly mailed out to the new owner when I get it.  Odometer shows 16K miles and I know that this is correct.  Bike was sold at a dealership in Minneapolis, Mn. and was on the road from 1956 to 1960, when it was put in storage. “

Dent... what dent? I see some character.
Dent… what dent? I see some character.

He went on to describe the dent in the gas tank that could be fixed (which I would never have fixed, as I like the character) the few items that were “extra” and the two things he did to get the bike started with a coil and a battery (the original magneto was bad, and since been replaced at a very steep cost) and how the ”  Left muffler chrome is lifting, otherwise the bike is solid, straight, and not oxidized. “ thus began my love affair with this great motorcycle.

One of the first images I saw online of the R50.

I was very excited the day the Scooter arrived… my wife and I planned to be at our home the entire day, as not to miss Rick as he delivered the motorcycle to our home. As he pulled in I can remember the nice Colorado July day, a bit hot, sunny day, but nice enough to sit on the front porch of our home. The van slowed near our home after a 20 minute wait. The time that had to pass since he called me to let me know he was near and on his way. Rick the seller was very nice and talked with my neighbor who was there to see my new purchase and I. As we all looked over the classic lines, the patina on the engine parts  and how the motor would be turned over by a side mounted kick starter.  I remember feeling like the past was now present and that the next chapter was going to be a dream come true with the adventures my wife and I would have on this R50.

I proudly showed my wife the extra parts and tools that came with the purchase.  “Look here !” I said to my wife… “a complete set of original tools in the canvas roll!”  like a young boy finding the next large box of LEGO Bricks under the Christmas tree .  What a find… what a treasure to behold… but now what?

The extra parts that followed the bike from Duluth.

What was I going to do with a motorcycle that needed some expertise and caring hands to make this R50 a road warrior again, with safe and correct operation?

I just started taking it apart, right there in the drive… in a way it was like just going “back to the basics”.


1956 BMW R50 Adventure

William on a photo shoot on his 1956 BMW R50.

After getting my R50 and fixing it up, riding it and enjoying the attention that it brings to me every time I ride, I have decided to share my adventure with photos, repair photos and general information I have learned over the past two years.

I bought her off of ebay on July 4th 2011… the auction ended that night and you already know that half of America is out watching fireworks and the other half wants nothing to do with an old Bimmer …. I was the only bidder!

51630020

Of course my wife asked what was I going to do with this 56 year old bike, since I had never ridden a motorcycle, never owned a motorcycle and surely had no experience restoring/fixing an old BMW motorcycle…. I told her that this bike will bring many days of joy to the both of us and that this bike was exactly the first bike that I would treasure forever…

Of course it wasn’t all great at the beginning. I had many repairs, rebuilds, parts to buy, knuckles to bust, tears to cry and electrons to measure. So I thought it would be fun to share this adventure and provide a look into the world of fixing, learning to ride, what I still have to fix, drawings I found, “other” parts that work and maintaining a 1956 R50.

1956 BMW R50
1956 BMW R50 with out any fixing. (Purchased condition)

Future post will be about the history of my R50, the clutch rebuild, the 6 volt battery, how to check the bike before riding, the carburetors (why floats!) that I wished were easier to work on and how I found great parts.

March 28, 2023 It’s been a while but I have found some information on the rims of this bike and wanted to stick the information somewhere….it turns out that the rims on my motorcycle are Weinmann Aluminum Wheels R50S and are very hard to find