Replacing a Clutch plate, BMW R50 1956

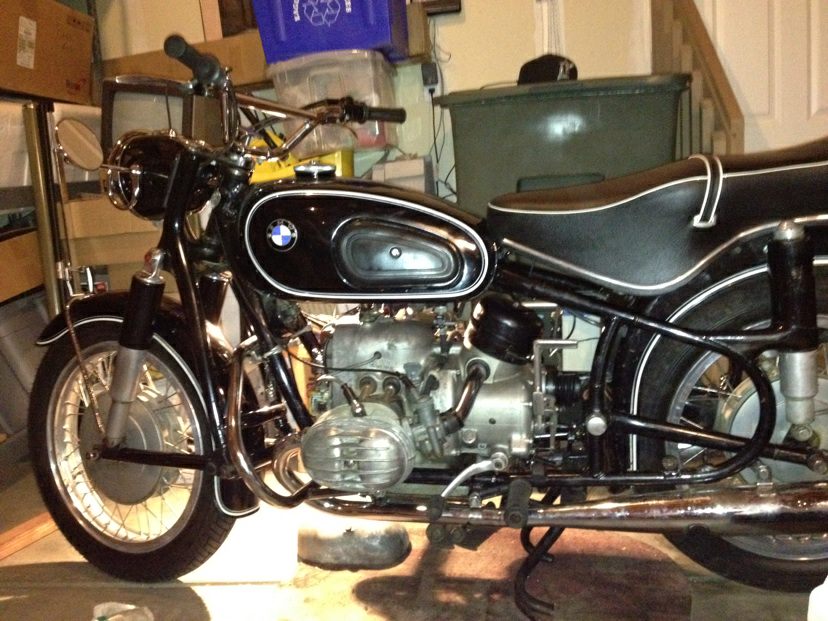
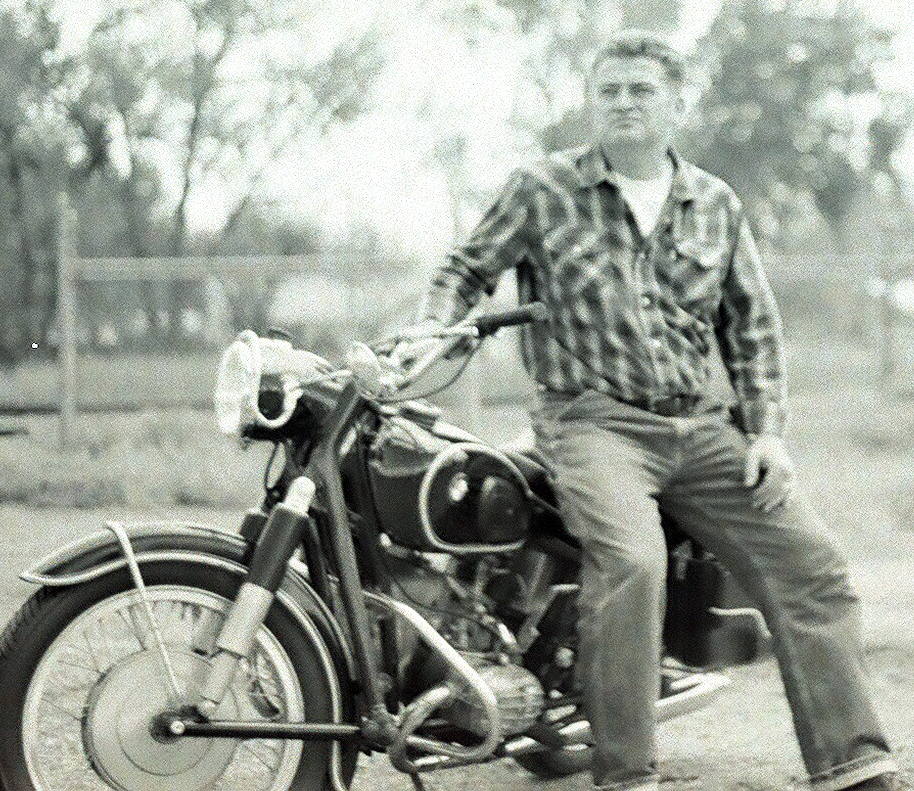
My very first few days of riding were not the way I had envisioned myself riding off into the sunset on my ‘new to me’ BMW. The R50 has a very easy clutch to engage but sometimes my hand would let the lever go a bit too fast and the front wheel would rise up and my hands would grip tight as the motorcycle would rapidly accelerate with a POP. Since I had just learned to ride on a very small Kawasaki about two weeks before I had the R50 running, the hand and gas combination had been a bit of a challenge for me.

One day while riding I notice the “slip” of the transmission, I knew I was in gear but it felt as if the clutch was not engaging. I had been riding now for about 5 weeks and had felt comfortable but I knew I would have to figure something out very soon. Coming back from lunch and first gear would not even allow me to roll. I ended up pushing my scooter about 2 blocks off the main road and back to my work. In the hot sun with my helmet and jacket on I was drenched in sweat.


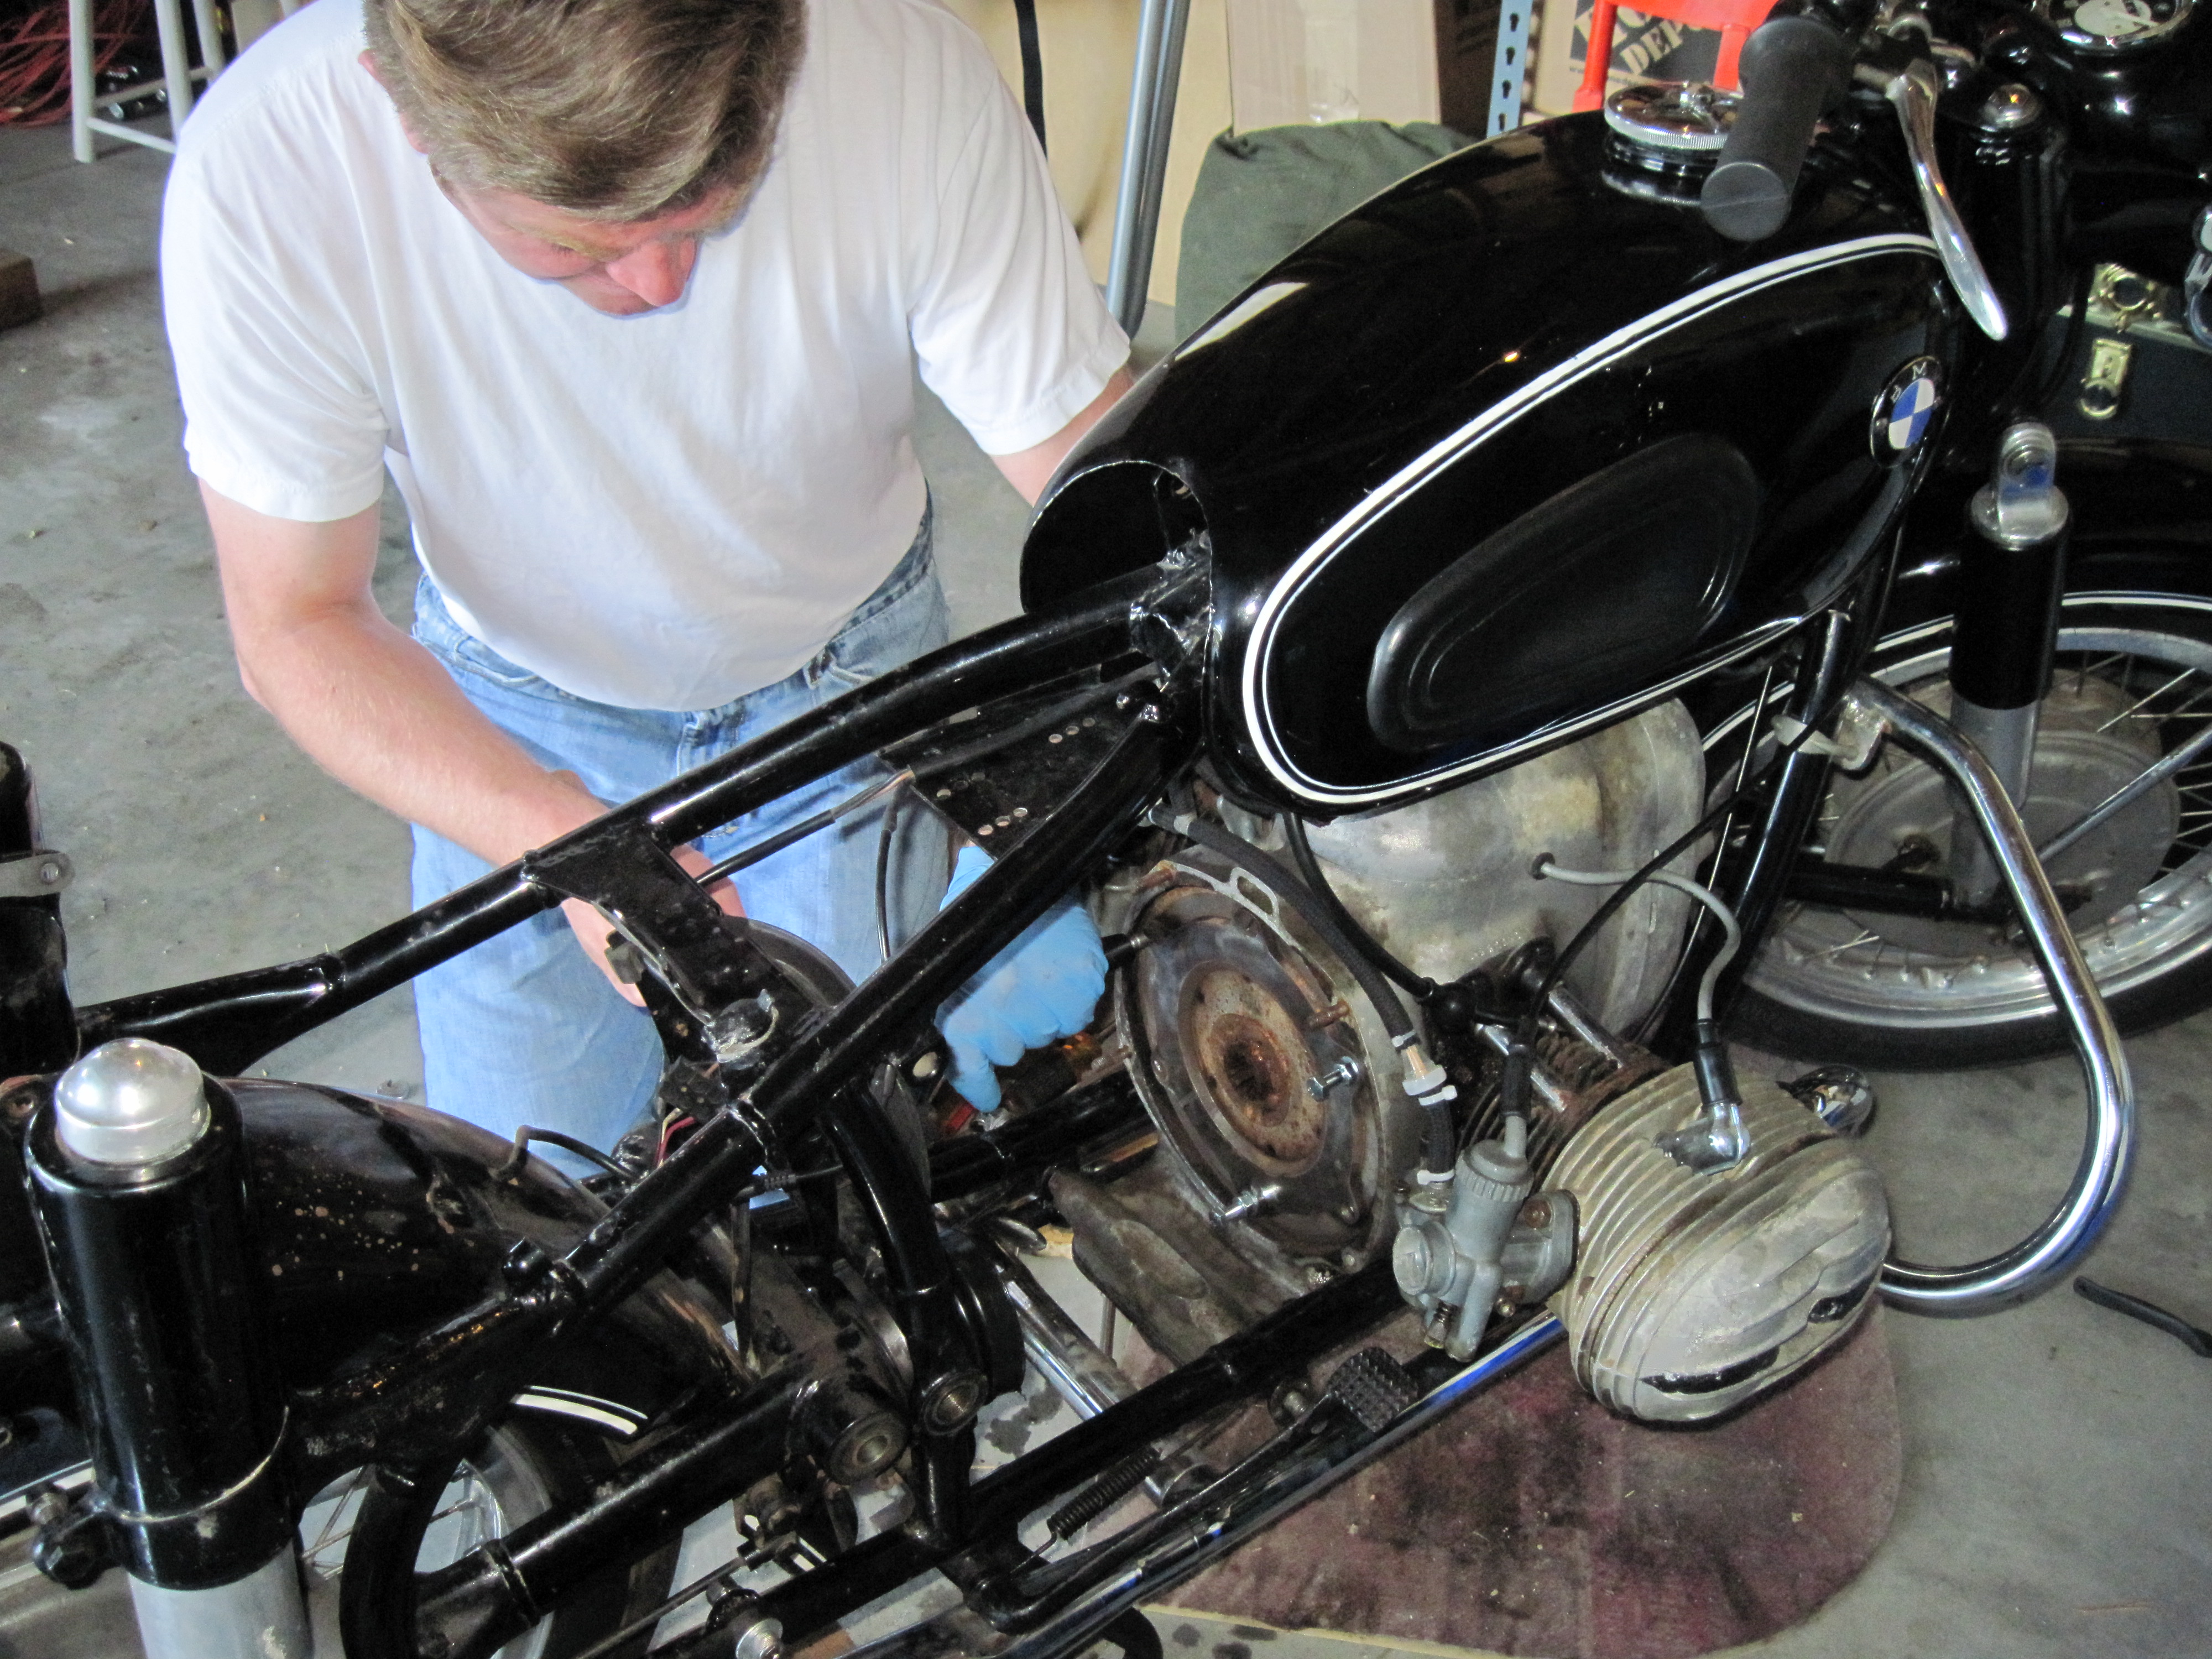
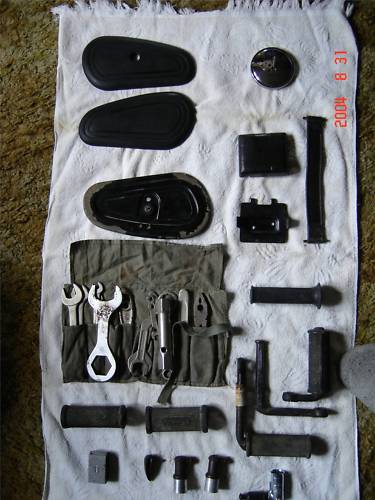
My new Allstate insurance paid for itself as the tow truck back to my house was covered. That night I started immediately and had the transmission off and looking at the clutch plate.

IMG_0216

Everything looked fine, but I went ahead (since I was there) and ordered all new clutch plate, clutch plate spring, friction plate and 6 hex bolts to upgrade to the old slot screws. The next weekend, once my parts arrived, I put it all back together, but to my surprise, the scooter still would not go… I removed the transmission and tested in first gear to verify operation of the final drive and check the slinger area.
IMG_0224
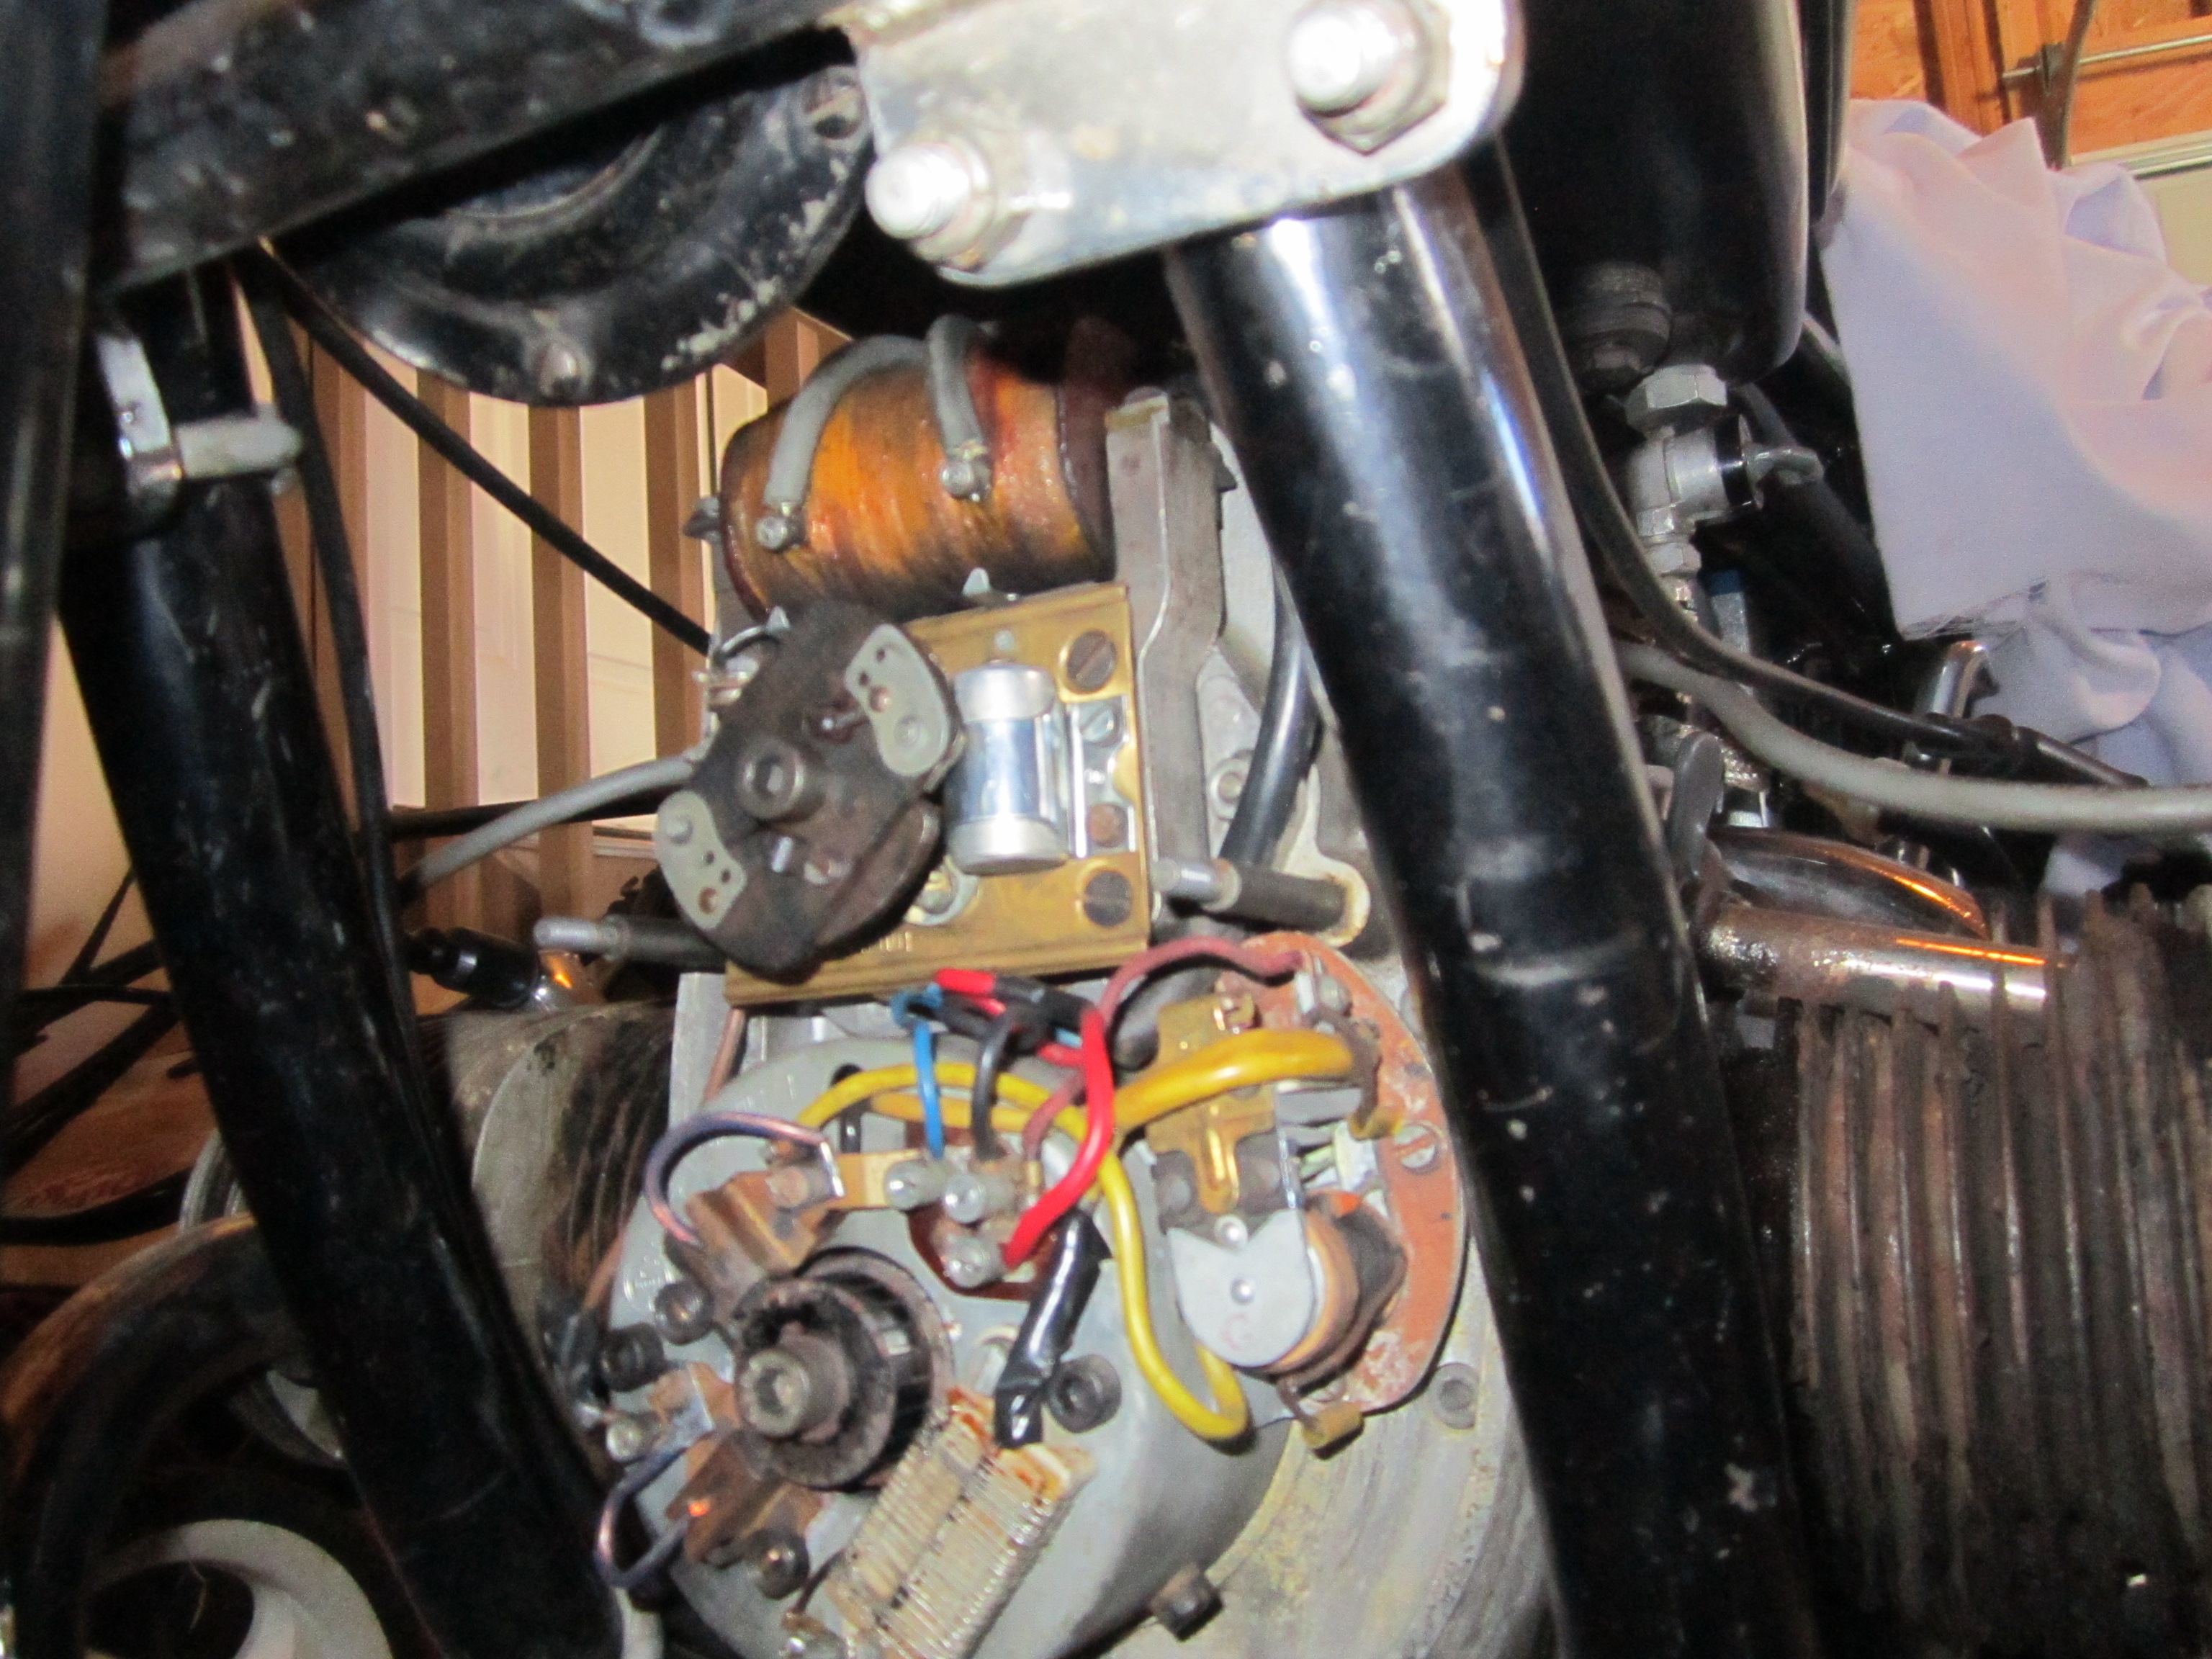
Bingo! The woodruff key had been sheared off and the castle nut had not been torqued to the correct foot pounds.

IMG_0226

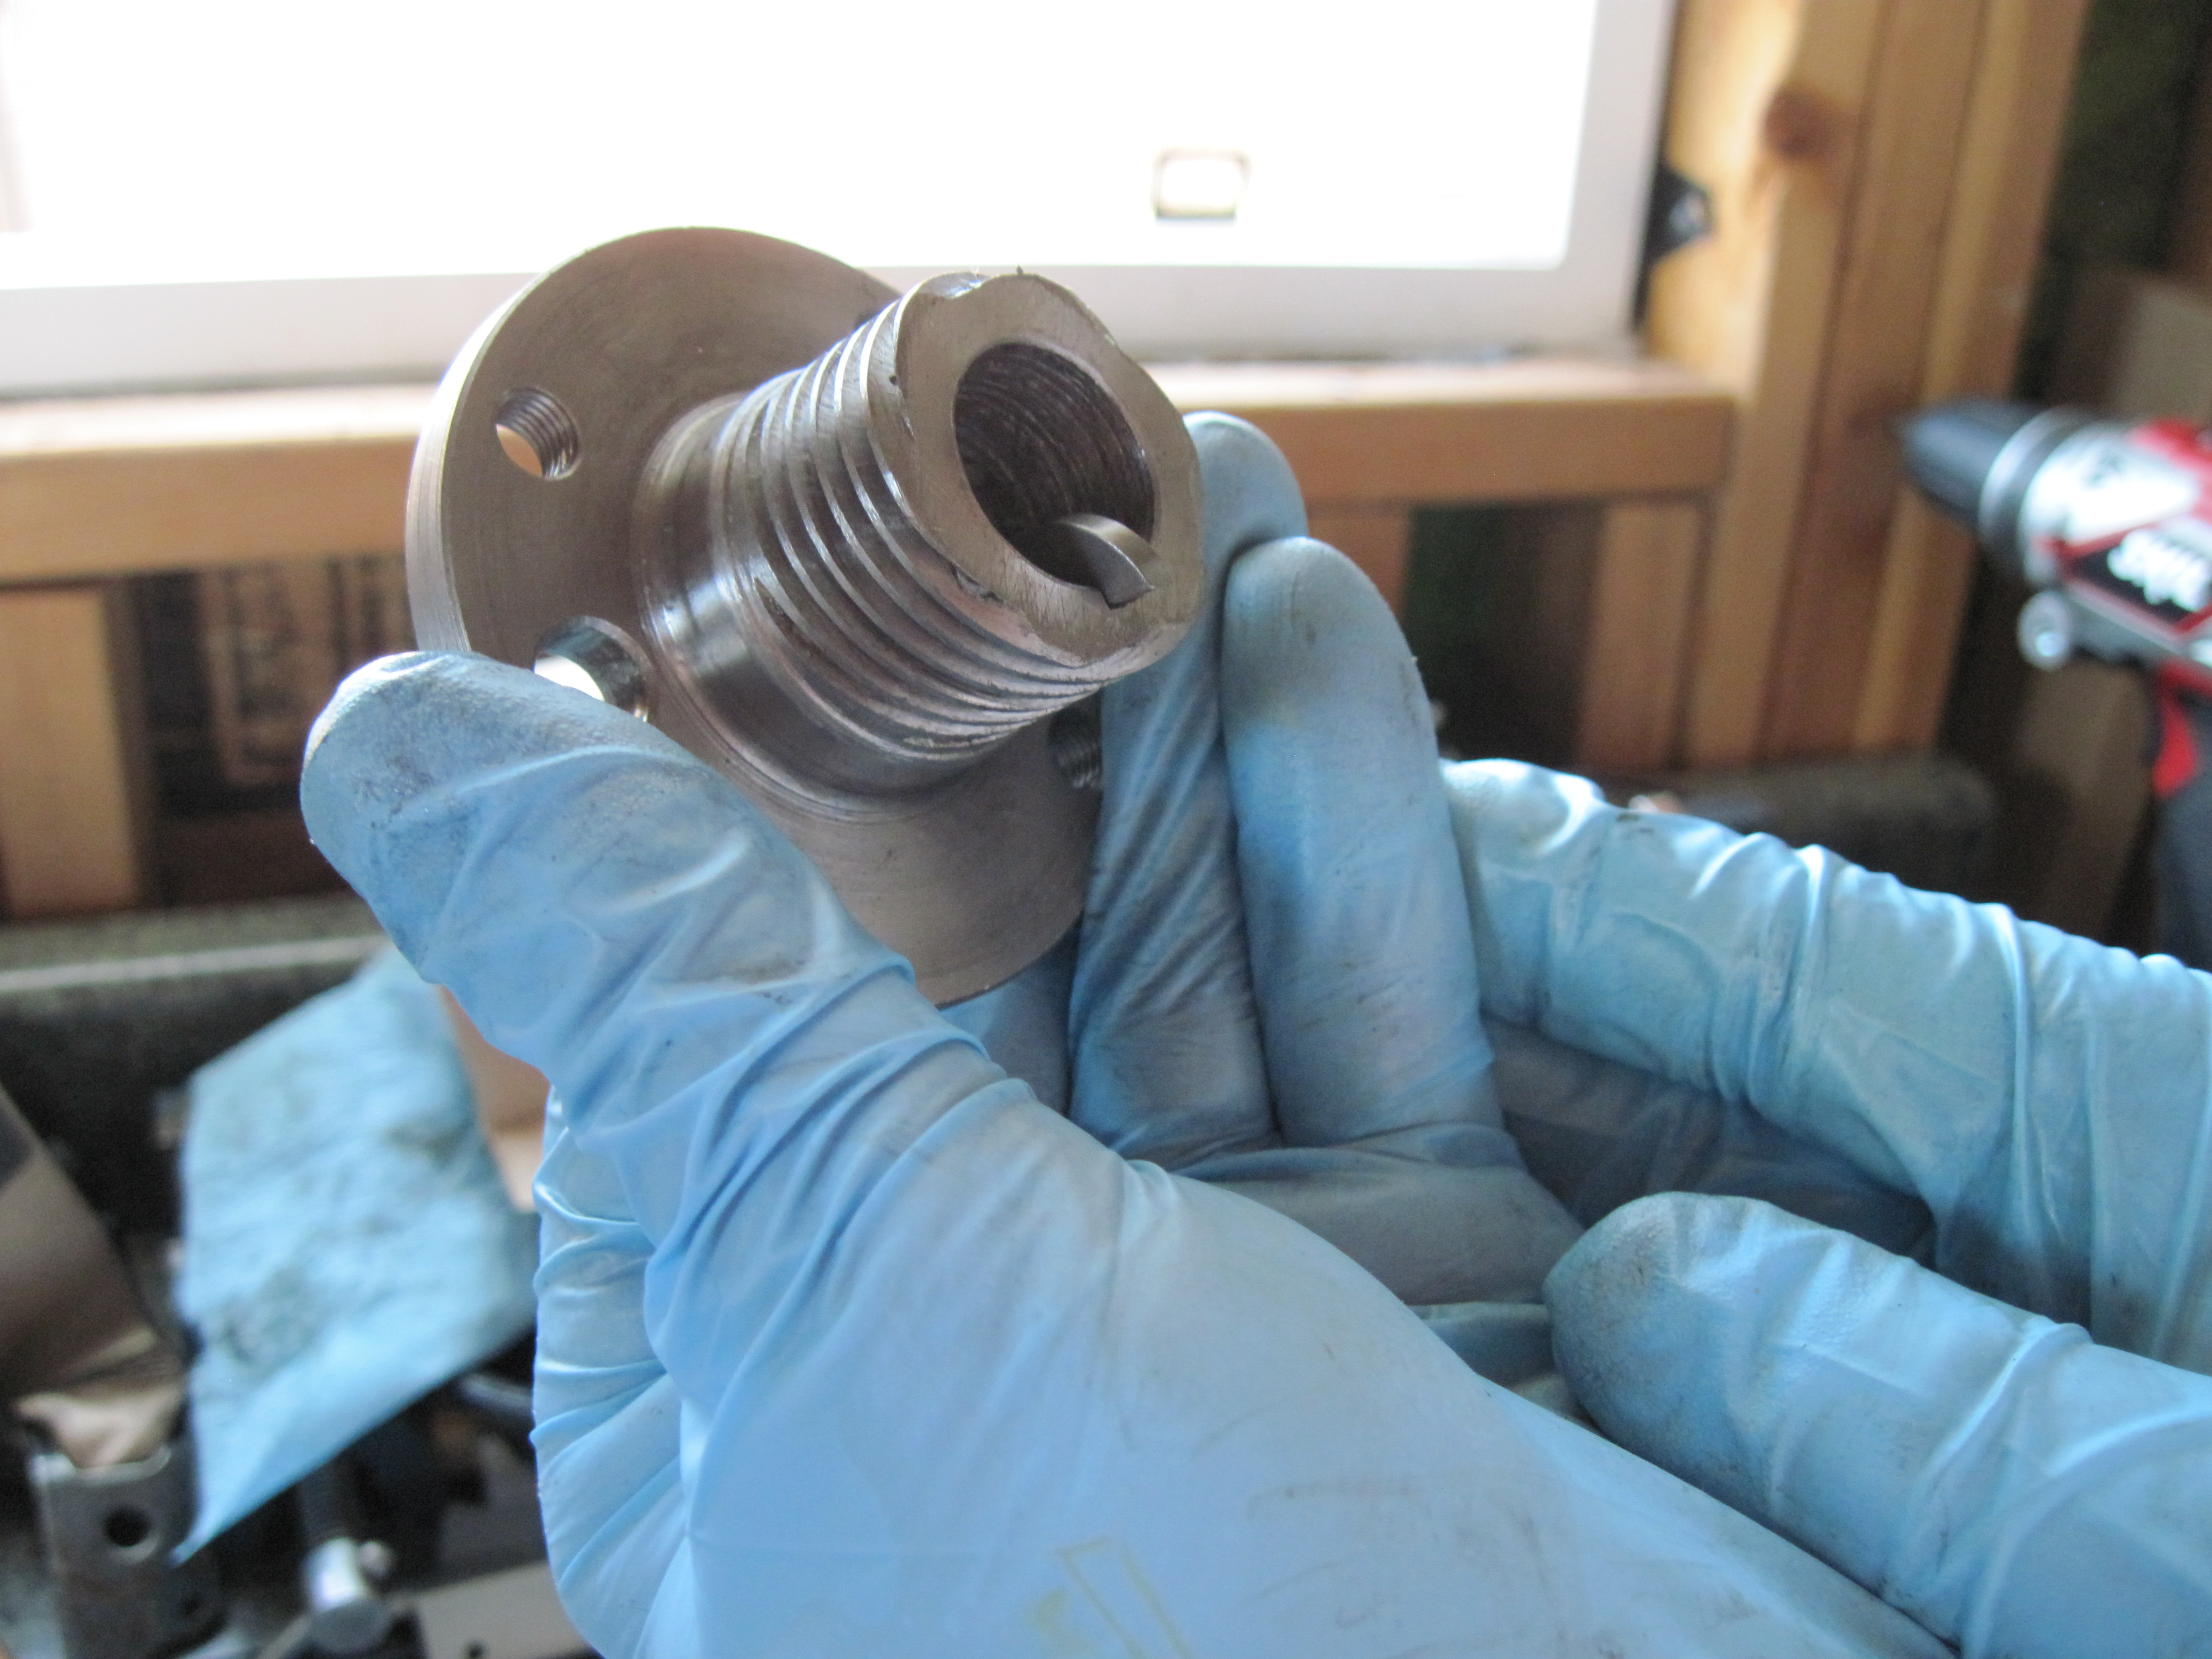
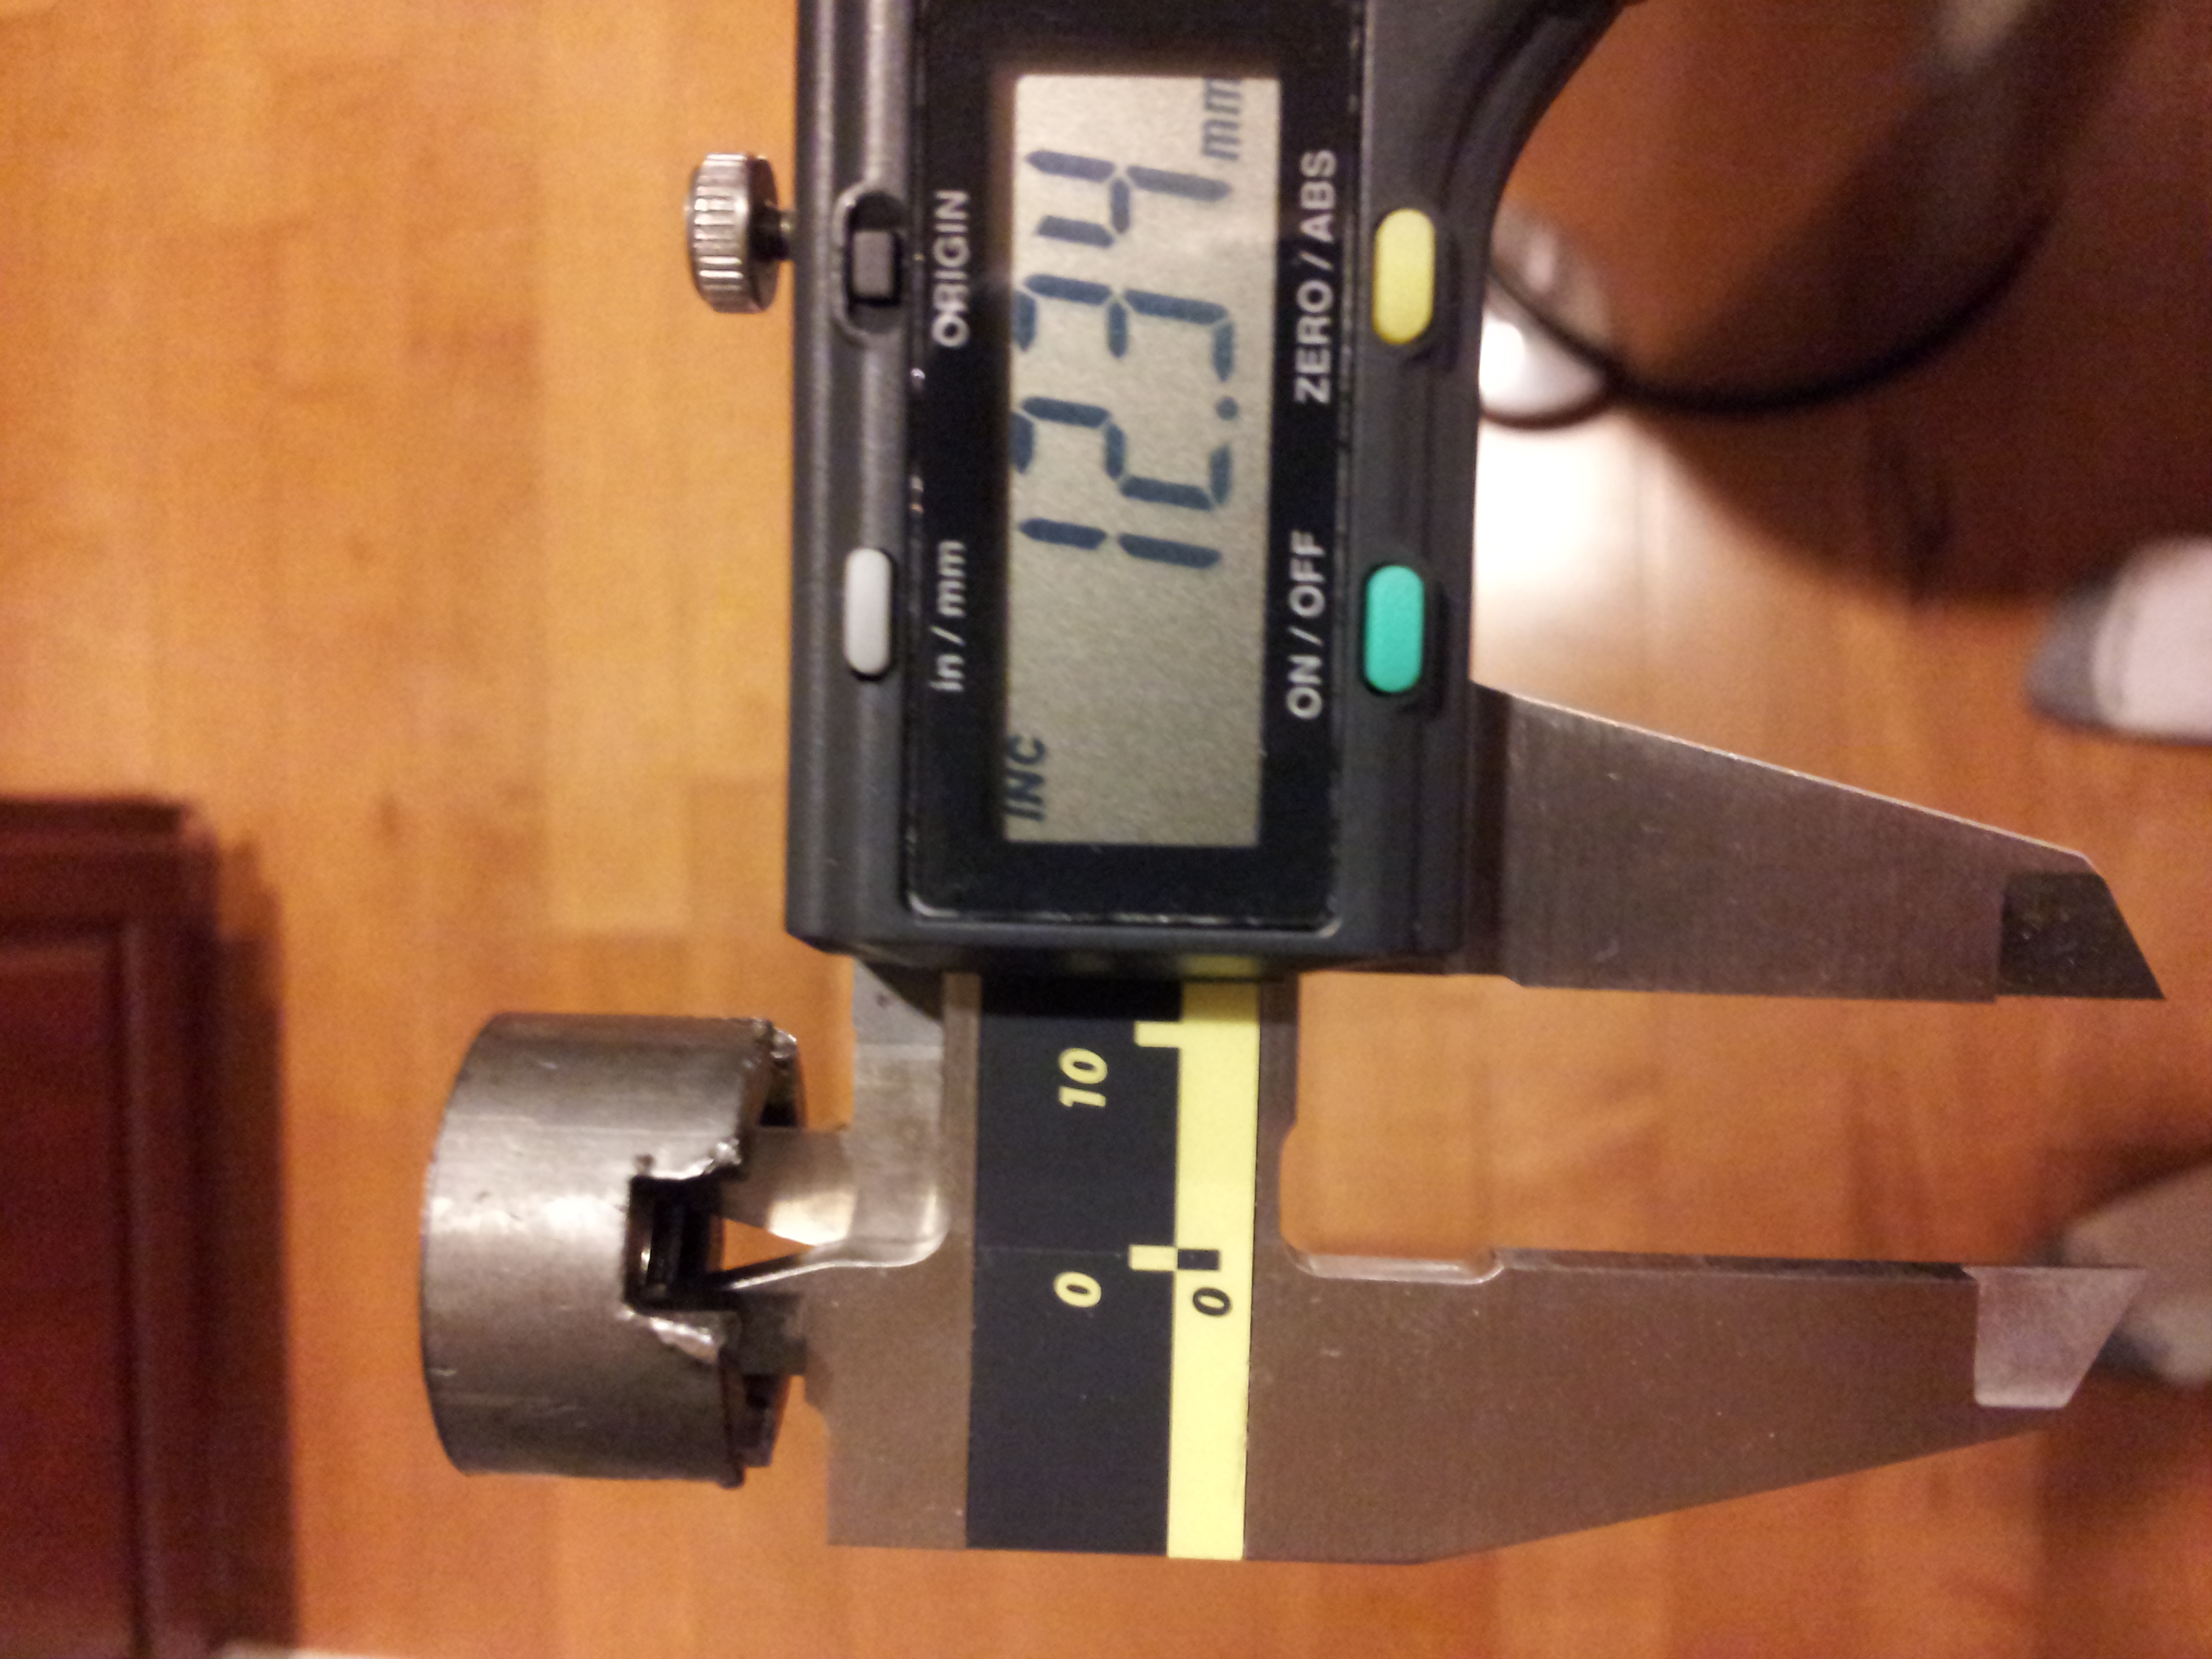
This is a tapered fitting and required I also purchase a special castle nut socket. Purchasing a new castle nut and woodruff key I waited.

Castle Nut!
Castle Nut!

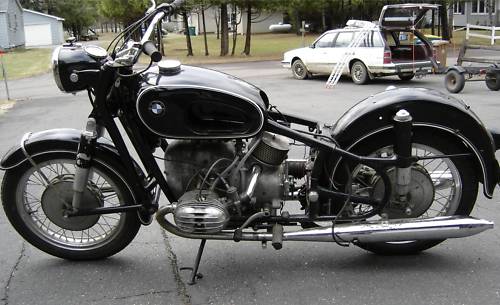
Reassembly was fast, I could feel the excitement in the air that summer night as I put the R50 all back together. Leaving no bolt, washer, screw and connection checked and rechecked for correct assembly.

IMG_0206

That night I did a test ride and perfection, a new clutch and correctly assembled final drive shaft. My experience was sometimes frustrating, but at the end of the day, with the ‘scooter’ back on the road, I felt a good sense of accomplishment.

IMG_8765

Turn the correct wrench and set yourself free!

Many people think that they must have some level of skill before embarking on an adventure (restoration) with an old car or motorcycle.  Having my own adventure with a 1968 BMW 2002 and a 1956 BMW R50 in my life time I don’t think that a high level of mechanical skill is required for the simple tasks. But, I do think there is one thing that is required to go forward into the garage and find peace working on your dream ride…

It is having the correct tools! I have seen the best mechanics turn into crazed tool tossers when the tool they are using just doesn’t “do the trick” like the correct tool would have. (Also using the correct tool can keep the user from hurting oneself. Since the incorrect tool can have disastrous out comes… knuckle mashing, elbow splitting and finger pinching painful reminders that the “I shouldn’t use this tool” thought right before you did, was certainly  a recall from past experiences AND the correct answer).

20120619_214338

Knowing what tools you use, how to use them correctly, the correct size, quality, cleanliness of the tool, and the extra adapters that make the job easier are all things to consider when you finally decide to start a restoration project. That being said, when you do use the correct tool you find a peaceful connection to the project. It makes me feel like I am part of the history of a well designed, well maintained, and appreciated motorcycle that I hope to have a chance at riding and pass on in another 45 years. (OK… if you really know me, you know I would never pass the “Scooter” on to anyone).

Sure! I can fix it!
Sure! I can fix it!

A well organized, clean, and trash free environment to work in is key and is rarely found in my garage… so I try to clean up before and clean up after. I try to wipe down all my tools and clean with WD40 every now and then… I try to place old parts in the parts bin with a mark in sharpie of the date it was removed (10/23/13), what model (R50), and a basic reason of why it came off (broken) and/or why it was replaced (better functioning used one) on a ribbon of masking tape.  I take plastic baggies with nuts, bolts and washers and do the same thing. All this make me think one day I will go back and have a treasure trove of parts that will bring excitement to my eyes…. but I really know when I am looking for a quick fix I will have a junk bin, which of course will have nothing close to what I need.

But I did say “try” in that last paragraph… it happens about 50% of the time, which I feel is better than nothing.

Opening up the front cover to the R50 allows a tight and uncomfortable access to the regulator/relay for charging the battery, timing components, generator and a small wiring harness. All of these items in this cover are part of the electrical and timing of the motorcycle. Plain and simple I keep my fingers off this stuff… I use a digital multi-meter to measure the voltages and check relay operation with my eyes and ears, I use a few Q-Tips to clean off dirt and grime with isopropyl alcohol and try to keep any and all tools away from the timing cap and rotating advance.

IMG_0128
Front cover removed… regulator on the right side next to the generator.

My regulator is the Item of my concern this winter and will revisit this component repair/replace in a later post.  This post is the joy using the correct tool for the job… it really makes sense then, that BMW has provided a tool tray/roll with the required tools to conduct the right level of repair/maintenance for every vehicle produced (that I have owned).

The one thing I always do when looking to buy a used BMW is to ask to see the tool kit… if it is gone, I ask for it, if the owner does not have the tools, I don’t buy the used BMW. Just that simple… it is not because I am a cheapy… and don’t want to buy another replacement set… what I am really doing is asking to see if the tools were ever used in the weekly/monthly/yearly maintenance of the engine.

No tools, then someone didn’t care enough to do the basic care. (Sure someone can say …. “Well I took it in to my favorite shop, and they did the work!” Great! Let’s see the receipts… or “sure… they must be Master BMW technicians?” Jiffy Lube?  I think not…and really… the older the BMW car or motorcycle the less likely someone was REALLY taking care of it by spending money at a repair shop… therefore at least looking at the condition of the tools can provide a small sense if the owner cared. (Perfect and clean = watch out! OR oily with grease and worn surfaces = great, someone looked at the level of the oil in the rear drive!)

Tools! Tools! Everywhere!

So, be bold… open your tool box, look at the owners manual, find a repair book or general maintenance book on your favorite web site, change your oil, replace a bulb, see what it is to work on an old classic and turn a wrench on it. The wrench you turn will just maybe make you feel a connection to history, a history you are continuing to preserve for the future.

Back to the basics (for the 1956 BMW R50)

As promised I am back to share and provide detail of the discovery, restoration, repair, accessorizing and riding adventures of my 1956 BMW R50!

IMG_1133

It all started the summer of 2011… searching e-Bay for the “One of a Kind” motorcycle that would be… first off a good learner bike… second be mechanically sound to start a simple and easy restoration. I had never ridden a motorcycle and had never even though of buying one until I moved from Reno, Nevada to Colorado and realized the area I was now living provide almost year round “scooting”. A term now I like to use to let my wife know that there will be no crazy stuff occurring on two wheels and thus safe for her to ride along with me on an always certain adventure, a term is used to describe the easy going, back road, very balanced and smooth, warm sun in your face riding experience only a BMW can provide.

Thus the nickname I have fondly given my BMW… ‘Scooter’ which some people think I am telling them that the motorcycle I am describing to them is an actual moped or scooter…. but make no mistake when they finally see this ’56… they always appreciate that it is a great rider with good steady power, classic lines and a “gentlemanly” look to it.

My wife was a bit concerned that I might be a bit crazy to buy a 56 year old motorcycle, and with no previous riding, why would I want such an adult toy. But I convinced her that this would be a great purchase and for collecting a good bet that this BMW would only go up in price… thus if I never felt able or comfortable riding it, we could get our investment back with ease.

The auction for the R50 would end on July 4th in the evening… I waited next to the computer like a little kid until the very end and was the first and only bidder.. (you can be sure, that on the 4th of July, there would be few people that would be watching a computer screen instead of the fire in the sky celebrating the independence of our great United States of America ).

The gentleman I bought the BMW from was very nice and worked with me on the delivery as though he knew it was going to received as a prized possession and that it would be well looked after… he brought it down in his van while going on a trip to Arizona.

Here is, in his words, the description presented….

“1956 BMW R50 discovered in a basement in Duluth Mn. in 2005.  Bike had a 1960 Mn. plate on it so it sat in this basement for 45 years.  I know the guy who found it…he has a garbage route and was contracted to clean out the house.  He traded it to the fellow I got it from, whom I also know very well.  Second guy (Jim) likes to tinker…he played around with it, discovered that the magneto still had spark but was insufficient to get the bike running.  He patched in a coil and battery & it started right up and ran quietly and smoothly.  This was all in the last three months.  He wanted me to sell it for him, changed his mind and said he’d just sell it to me.  As I said, he likes to tinker, but isn’t really a rider.  He sort of loses interest or finds something else to occupy his free time.  He hangs out in his little garage/shop without a telephone or cell phone.  I bought it knowing the title was lost, and after advertising this bike on numerous occasions and on many venues, I finally took the leap, went to the DMV, picked up a one sided single sheet “lost or misplaced title’ document.  Got together with Jim, filled out the form, and along with 4 pictures, now have a clear title coming in the mail.  Bike is in my name and I have a temporary title and a brand new Mn. license plate.  Unfortunately, Mn. titles take 8-10 weeks to arrive at a person’s mailbox.  This should not persuade a person from buying this bike, as the temporary title is proof that the bike is sellable.  Title will be promptly mailed out to the new owner when I get it.  Odometer shows 16K miles and I know that this is correct.  Bike was sold at a dealership in Minneapolis, Mn. and was on the road from 1956 to 1960, when it was put in storage. “

Dent... what dent? I see some character.
Dent… what dent? I see some character.

He went on to describe the dent in the gas tank that could be fixed (which I would never have fixed, as I like the character) the few items that were “extra” and the two things he did to get the bike started with a coil and a battery (the original magneto was bad, and since been replaced at a very steep cost) and how the ”  Left muffler chrome is lifting, otherwise the bike is solid, straight, and not oxidized. “ thus began my love affair with this great motorcycle.

One of the first images I saw online of the R50.

I was very excited the day the Scooter arrived… my wife and I planned to be at our home the entire day, as not to miss Rick as he delivered the motorcycle to our home. As he pulled in I can remember the nice Colorado July day, a bit hot, sunny day, but nice enough to sit on the front porch of our home. The van slowed near our home after a 20 minute wait. The time that had to pass since he called me to let me know he was near and on his way. Rick the seller was very nice and talked with my neighbor who was there to see my new purchase and I. As we all looked over the classic lines, the patina on the engine parts  and how the motor would be turned over by a side mounted kick starter.  I remember feeling like the past was now present and that the next chapter was going to be a dream come true with the adventures my wife and I would have on this R50.

I proudly showed my wife the extra parts and tools that came with the purchase.  “Look here !” I said to my wife… “a complete set of original tools in the canvas roll!”  like a young boy finding the next large box of LEGO Bricks under the Christmas tree .  What a find… what a treasure to behold… but now what?

The extra parts that followed the bike from Duluth.

What was I going to do with a motorcycle that needed some expertise and caring hands to make this R50 a road warrior again, with safe and correct operation?

I just started taking it apart, right there in the drive… in a way it was like just going “back to the basics”.


1956 BMW R50 Adventure

William on a photo shoot on his 1956 BMW R50.

After getting my R50 and fixing it up, riding it and enjoying the attention that it brings to me every time I ride, I have decided to share my adventure with photos, repair photos and general information I have learned over the past two years.

I bought her off of ebay on July 4th 2011… the auction ended that night and you already know that half of America is out watching fireworks and the other half wants nothing to do with an old Bimmer …. I was the only bidder!

51630020

Of course my wife asked what was I going to do with this 56 year old bike, since I had never ridden a motorcycle, never owned a motorcycle and surely had no experience restoring/fixing an old BMW motorcycle…. I told her that this bike will bring many days of joy to the both of us and that this bike was exactly the first bike that I would treasure forever…

Of course it wasn’t all great at the beginning. I had many repairs, rebuilds, parts to buy, knuckles to bust, tears to cry and electrons to measure. So I thought it would be fun to share this adventure and provide a look into the world of fixing, learning to ride, what I still have to fix, drawings I found, “other” parts that work and maintaining a 1956 R50.

1956 BMW R50
1956 BMW R50 with out any fixing. (Purchased condition)

Future post will be about the history of my R50, the clutch rebuild, the 6 volt battery, how to check the bike before riding, the carburetors (why floats!) that I wished were easier to work on and how I found great parts.

March 28, 2023 It’s been a while but I have found some information on the rims of this bike and wanted to stick the information somewhere….it turns out that the rims on my motorcycle are Weinmann Aluminum Wheels R50S and are very hard to find

Halloween Party Time!

So, as you may know if you have followed me this month (thank you by the way) I had my Halloween party on the 25th!   My time spent cleaning, decorating and preparing food was well received and made for a nice evening with my wife and my friends. We always have a certain theme for our Halloween Party and this year was “be your favorite dead person”.

So, the costume ranged from “the skeleton” version of the Marlboro Man, James Dean, Audrey Hepburn to a pimp and his Ho, a taxi driver and a witch … just goes to show you the range of a costume party can not be contained.

I took a few pre-party photos to share with my mom (who follows my blog with great input and her support keeps me adding to my crazy blog!).

unfortunately, the photos don’t do the decorations justice at all… the whole room was full and everywhere you looked it was a Halloween delight!

20131025_175031
Display in the dinning room!

Blow mold display of the old Empire collection!

Decorations at the front door...
Decorations at the front door…

The games are always the most important to keep your guests entertained and the suggestion of a prize keeps them from gabbing about the latest gossip and truly focused on getting the right answer… even if it is listening to the other couples talk about what their answers are, just so they have some well educated guess…

The questions this year were mostly about famous people, I also made sure that each persons death date was said for added trivia…. below are a few…

     1. In 1931, who played the title role in the original film version of Dracula?

    2. Who played Dr. Sam Loomis, the child psychologist who hunted Michael Myers in four of the first five Halloween movies?

    3. Often overshadowed by Halloween and All Saints’ Day, the two days preceding it, what is the solemn feast day of Roman Catholics commemorating those who have died and are now in Purgatory?

     4. What is the holiday in Mexico celebrated on November 1st and 2nd in which people pray for and remember friends and family who have died and decorate the graves of the deceased with sugar skulls and marigolds?

     5. Vincent Price died 20 years ago today (Death Date: Oct 25, 1993). What was the last movie in which he was filmed? Bonus: What was his last released film?

     6. Who holds the title of the first posthumous acting nomination in Academy Awards’ history? Hint: It was the 1956 Academy Awards and the film was released in 1955.

      Bonus: Name the film?

     7. Vince Guaraldi, who composed the music for 17 Peanuts television specials, died on February 6, 1976, earlier that afternoon he had finished recording the soundtrack for what Peanuts television special?

      A.) A Charlie Brown Thanksgiving

      B.) It’s Arbor Day, Charlie Brown

      C.) A Charlie Brown Valentine

       8. Audrey Hepburn (Death Date: January 20, 1993) had been nominated for five Academy Awards for acting but won only once, what was the name of the film for which she won her only acting Oscar?

     A.) Breakfast at Tiffany’s

     B.) Sabrina

    C.) Roman Holiday

9. Tom Everhart is the only artist with rights to create artwork featuring the characters of which famous cartoonist who died on February 12, 2000?

Bonus: What was the cartoonist’s nickname?

10. With earnings of about $160 million, who is this year’s top-earning dead celebrity?

     A.) Elvis Presley   (death date: August 16, 1977)

     B.) Marilyn Monroe (death date: August 5, 1962)

     C.) Michael Jackson (death date: June 25, 2009)

     D.) Elizabeth Taylor (death date: March 23, 2011)

11. Ole Kirk Christiansen (death date: March 11, 1958) was the inventor of the Lego bricks. What do the Danish words “leg godt“ mean in English?

How did you do? Get them all? The average was 6 right… and the couple that got 7 right  won two movie tickets! runner up a $15 gift card to a coffee store…

I was going to hold off giving away the answers until my next post, but thought that would just be a bit mean … so here you go! Answers below:

1. Ans.: Bela Lugosi (Death date August 16, 1956)

2.     Ans.: Donald Pleasence (Death date: February 2, 1995)

3. Ans.: All Souls’ Day

4. Ans.: Dia de los Muertos (Day of the Dead)

5.  Ans.: Edward Scissorhands

     Bonus: The Princess and the Cobbler (AKA: The Thief and the Cobbler, AKA: Arabian Knight)   

6.  Ans.: James Dean (Death Date: September 30, 1955)

      Bonus: East of Eden

7.  Ans.: B.) It’s Arbor Day, Charlie Brown

8.   Ans.: C.) Roman Holiday

9. Ans.: Charles Schulz

Bonus Question Ans.: Sparky

10. Ans.: C.) Michael Jackson

11. Ans.: Play well

Please feel free to comment with your right answers!

I will be posting my last Halloween themed post right after Halloween, and I will be sure to post photos of the Out side decorations for the trick-o-treaters!

Halloween Baby Doll – “Day Of the Dead”

Every year I have created at least one new Halloween baby doll for my collection. So, last  year I did a Day of the Dead baby doll with eyes that roll back open when the doll is sat upright, movable head, and its very own festive custom paint.

I have done some pretty cool baby dolls for Halloween, but to me this one doll really is the coolest and, at the same time, the creepiest and most fun to create.  I find my dolls at the local thrift stores taking care to find the ones with all plastic bodies, eyes that roll (and for my zombie doll a few years back, the tube that would allow me to make blood and green stuff come out of the mouth, depending on what I filled the squeezable holding bladder) and any other feature I might want to turn into a special effect.

Here is some other dolls:

Zombie baby!
Zombie baby!

Skeleton and Baby Dracula!

Finiish Doll
Pumpkin head baby Doll!

Some commonly used items for this type of project:

Sharp knife, hot glue gun, spray paint, acrylic paint, paint brush, scissors, CelluClay (a

Papier-mâché-type product sold at craft stores), aluminum foil, fabric and a plastic baby doll.

A few items used to make a Halloween Baby Doll, not all items pictured, so please see text!

After taking the clothes off (and tossing them in the washing machine for re-use on other projects) and cleaning the plastic body of the doll with water and a few drop of bleach, I can guarantee that my doll is clean and ready for me to work on.  Also it removes crayon marks, dirt, juice or anything else the doll was pulled through in its previous life.  A clean canvas is key to the creative flow. A light sanding will also allow paint to stick better, so you might want to rough up the plastic body a bit.

I typically pull the head off, cut out the eyes with a sharp razor, and start my transfer of the eyes back into the plastic skull.  Cut a hole big enough for the rolley eyes and hot glue them into the skull.  On this doll, I also cut the hands and feet off to allow plastic skeleton hands to be hot glued on in their place.

20121003_172301

Next is the paint! I use acrylic paint with a base coat of flat black spray paint.

20121007_152409
Custom Paint!
He is ready for the kiddies . . . Halloween . . . and to be on display for whomever comes during the month of October!
I think the creepier the better. Have to keep those Trick-or-Treaters on their toes!  As they get close, you can see their faces turn from ones of sugar-filled happiness to ones of horror and disgust!

Halloween Window Shadow

I know this idea has been done a million times, but now I am seeing people all over “SPEND MONEY” on this easy to do, fun to MAKE and super cheep project!

Be creative and do your own CUSTOM Halloween Decoration!

Come on MAN! get it together and have some fun while decorating your home.   You say you are too busy… then get up, turn off the TV and go get some very simple items and tools.

And MAKE your own custom Halloween Window Shadow

IMG_1742
My crazy pumpkin in the window from outside.

A cardboard box, a box cutter/ razor, colored tissue paper, clear packing tape, and an area that you can cut a cardboard box without hurting anything like a wood floor or carpet or a table top (not that I did that, just a warning). If you a young person, get an adult, if you are a young person at heart, grab your inner adult to supervise yourself.

Decide what shadow you want to do. I did a pumpkin face, a jolly roger pirate flag and a snow flake for the “other” holiday season.

Next is a quick  series of simple pictures showing the progress of Making your own.

shadow 2
Put together several pieces of cardboard that can be taped together and fill the window you want the Shadow in.shadow 3

Put together several pieces of cardboard that can be taped together and fill the window you want the Shadow in.

shadow 4
Draw the pattern you want the light to shine through.

shadow 5
Cut out the negative. Be carefull… razors are sharp!

shadow 6
On the back side of the cardboard (the side that is away from the outside of the window view) tape or glue the tissue paper to cover all the holes in your pattern.

Mine looked like this…

IMG_1745

Turn on the light to the room and go outside when its dark… don’t get frightened when you see your Halloween surprise!

SPOOKY!
SPOOKY!

Have fun and Make IT!

Halloween Blow molds!

Every Halloween I love putting out my collection of the old Empire blow mold that reminds me of my childhood trick-or-treating days of old. Great fun and make the porch glow, plus adds safe lighting for the steps!

I just wanted to post my collection! So thanks for looking!

IMG_1737
Ghost with pumpkin and black cat on the front porch.

IMG_1738

IMG_1739
Modified with a metal base and florescent light buld.

IMG_1741
This one is really rare and I am trying to find more information on this one… not empire.

UPDATE!  the one above “Witch on a broom” is a Sun Hill product, made in the USA! and the ones I am seeing on auction sites are approximately 40 to 60 USD!

empire
My new ones!

Scarecrows!

If you have a murder of crows invading your front yard or you want to add a bit of fright for the kiddies on Halloween night, then the perfect Scarecrow display will do the trick, for scaring those treaters.

A simple poles with cross beam design provides the support, clothes from a thrift store or your old jeans that don’t fit can be the start of a very fun and cheep display. I stuff my old clothes with newspaper and take safety pins (around the belt line) to secure the pants and the shirt to keep the pants on and the shirt from letting out the newspaper stuffing.

Wood poles and twine or zip ties and a screw to secure.

Shirt on pole
Put the shirt on the pole, with the arms of the shirt around the cross dowel.

pants attatched
The grey lines are to represent safety pins to secure the pants to the shirt. Remember…the pole will need a place in back of the pants to come out behind the pants or cut a hole or run it all the way down the pant leg on one side.

The stuffing is up to you… how much or how little is a way to make your scarecrow who you want it to be.

I use a support that anchors the base to a fence and a spike that is sunk into the ground for added stability.

20130929_155848
Finished Scarecrow with fence.

Halloween Night!
Halloween Night!

Add a pumpkin head, and some lighting, a hat or even a few strategically placed black birds or an owl and you are all set!

Spooky Candle Holder in an Hour!

Thrift stores have it all… if you are looking for something and it doesn’t have to be new, and you can take your time to find it… then for pennies on the dollar you can find treasures! One such treasure… a brass candle holder for three candles.

Now I wanted to make this candle holder for my Halloween party covered in spider webs, dripping blood and super creepy… I got started and realized it didn’t need to have an “over the top” covered in craziness… a simple design made it classy yet, when lit, it was an eerie sight… you judge.

Puts out good light, just warn guests to remember their surroundings and Hair and Costumes are flammable!

I started by painting the brass flat black, added with a glue gun small skeleton hands I found at the hobby and craft store, added a painted plastic skull to the top and finished with 3 (Halved) blood dripping candles.  The beads were an after thought and not permanent to the decoration but added for the color to tie in some other decorations.

20120930_132637

A simple design and a fast build (less than 1 hour total) made for a nice addition to the decorations for the Halloween party.  I ended up finding the same candle holder a few months later, and will make a twin for the other side of my sliding glass window.