William Davison, Jr. lives in Sahuarita, Arizona. He keeps busy with his many hobbies (old BMW car restorations, LEGO Robotics and Halloween effects/costumes). He loves to restore, make and create. If he isn't doing something in the shop, then you can find him riding his 1956 BMW R50 motorcycle.
See more of William's photography at https://ello.co/wdavisonjr.
View all posts by William Davison →
If you have a murder of crows invading your front yard or you want to add a bit of fright for the kiddies on Halloween night, then the perfect Scarecrow display will do the trick, for scaring those treaters.
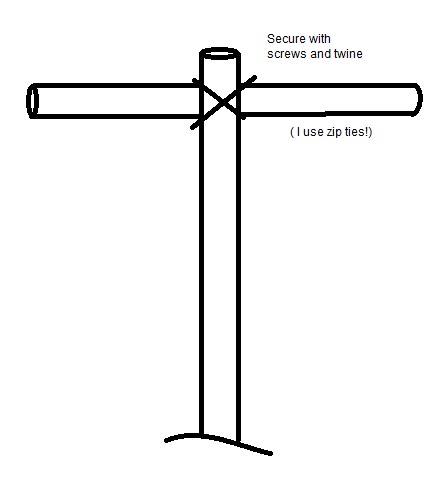
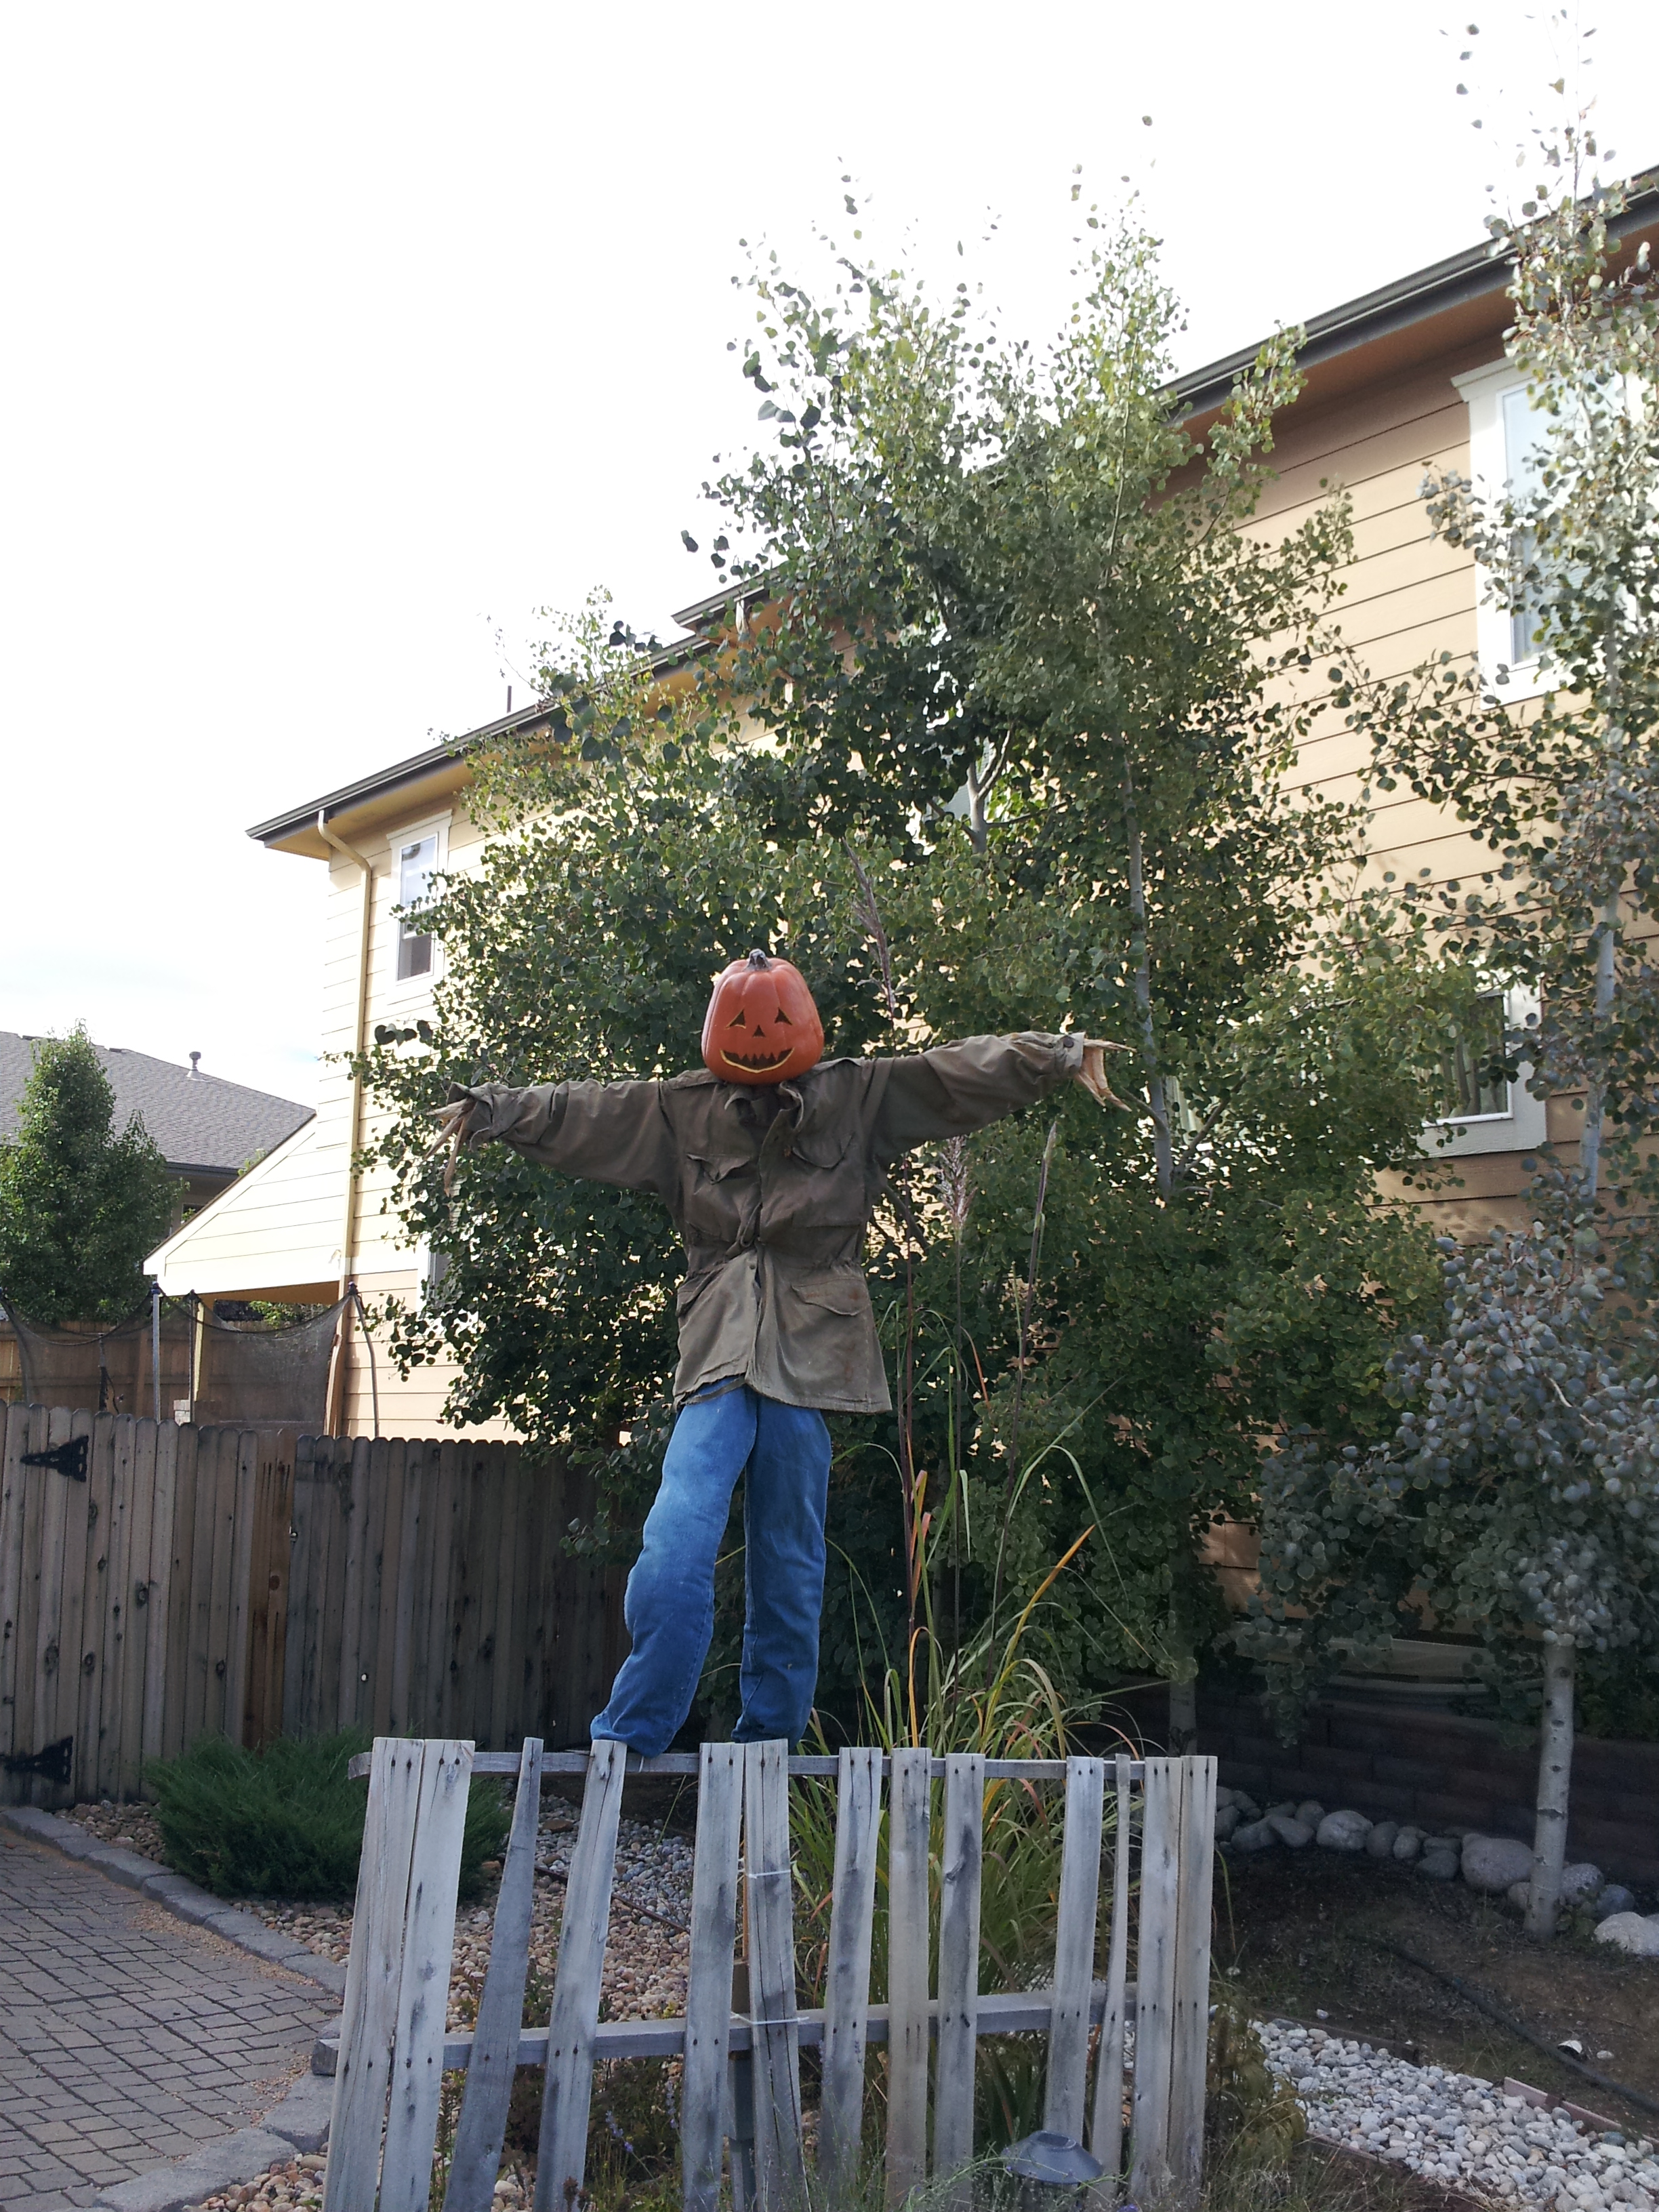
A simple poles with cross beam design provides the support, clothes from a thrift store or your old jeans that don’t fit can be the start of a very fun and cheep display. I stuff my old clothes with newspaper and take safety pins (around the belt line) to secure the pants and the shirt to keep the pants on and the shirt from letting out the newspaper stuffing.
Wood poles and twine or zip ties and a screw to secure.Put the shirt on the pole, with the arms of the shirt around the cross dowel.The grey lines are to represent safety pins to secure the pants to the shirt. Remember…the pole will need a place in back of the pants to come out behind the pants or cut a hole or run it all the way down the pant leg on one side.
The stuffing is up to you… how much or how little is a way to make your scarecrow who you want it to be.
I use a support that anchors the base to a fence and a spike that is sunk into the ground for added stability.
Finished Scarecrow with fence.Halloween Night!
Add a pumpkin head, and some lighting, a hat or even a few strategically placed black birds or an owl and you are all set!
Thrift stores have it all… if you are looking for something and it doesn’t have to be new, and you can take your time to find it… then for pennies on the dollar you can find treasures! One such treasure… a brass candle holder for three candles.
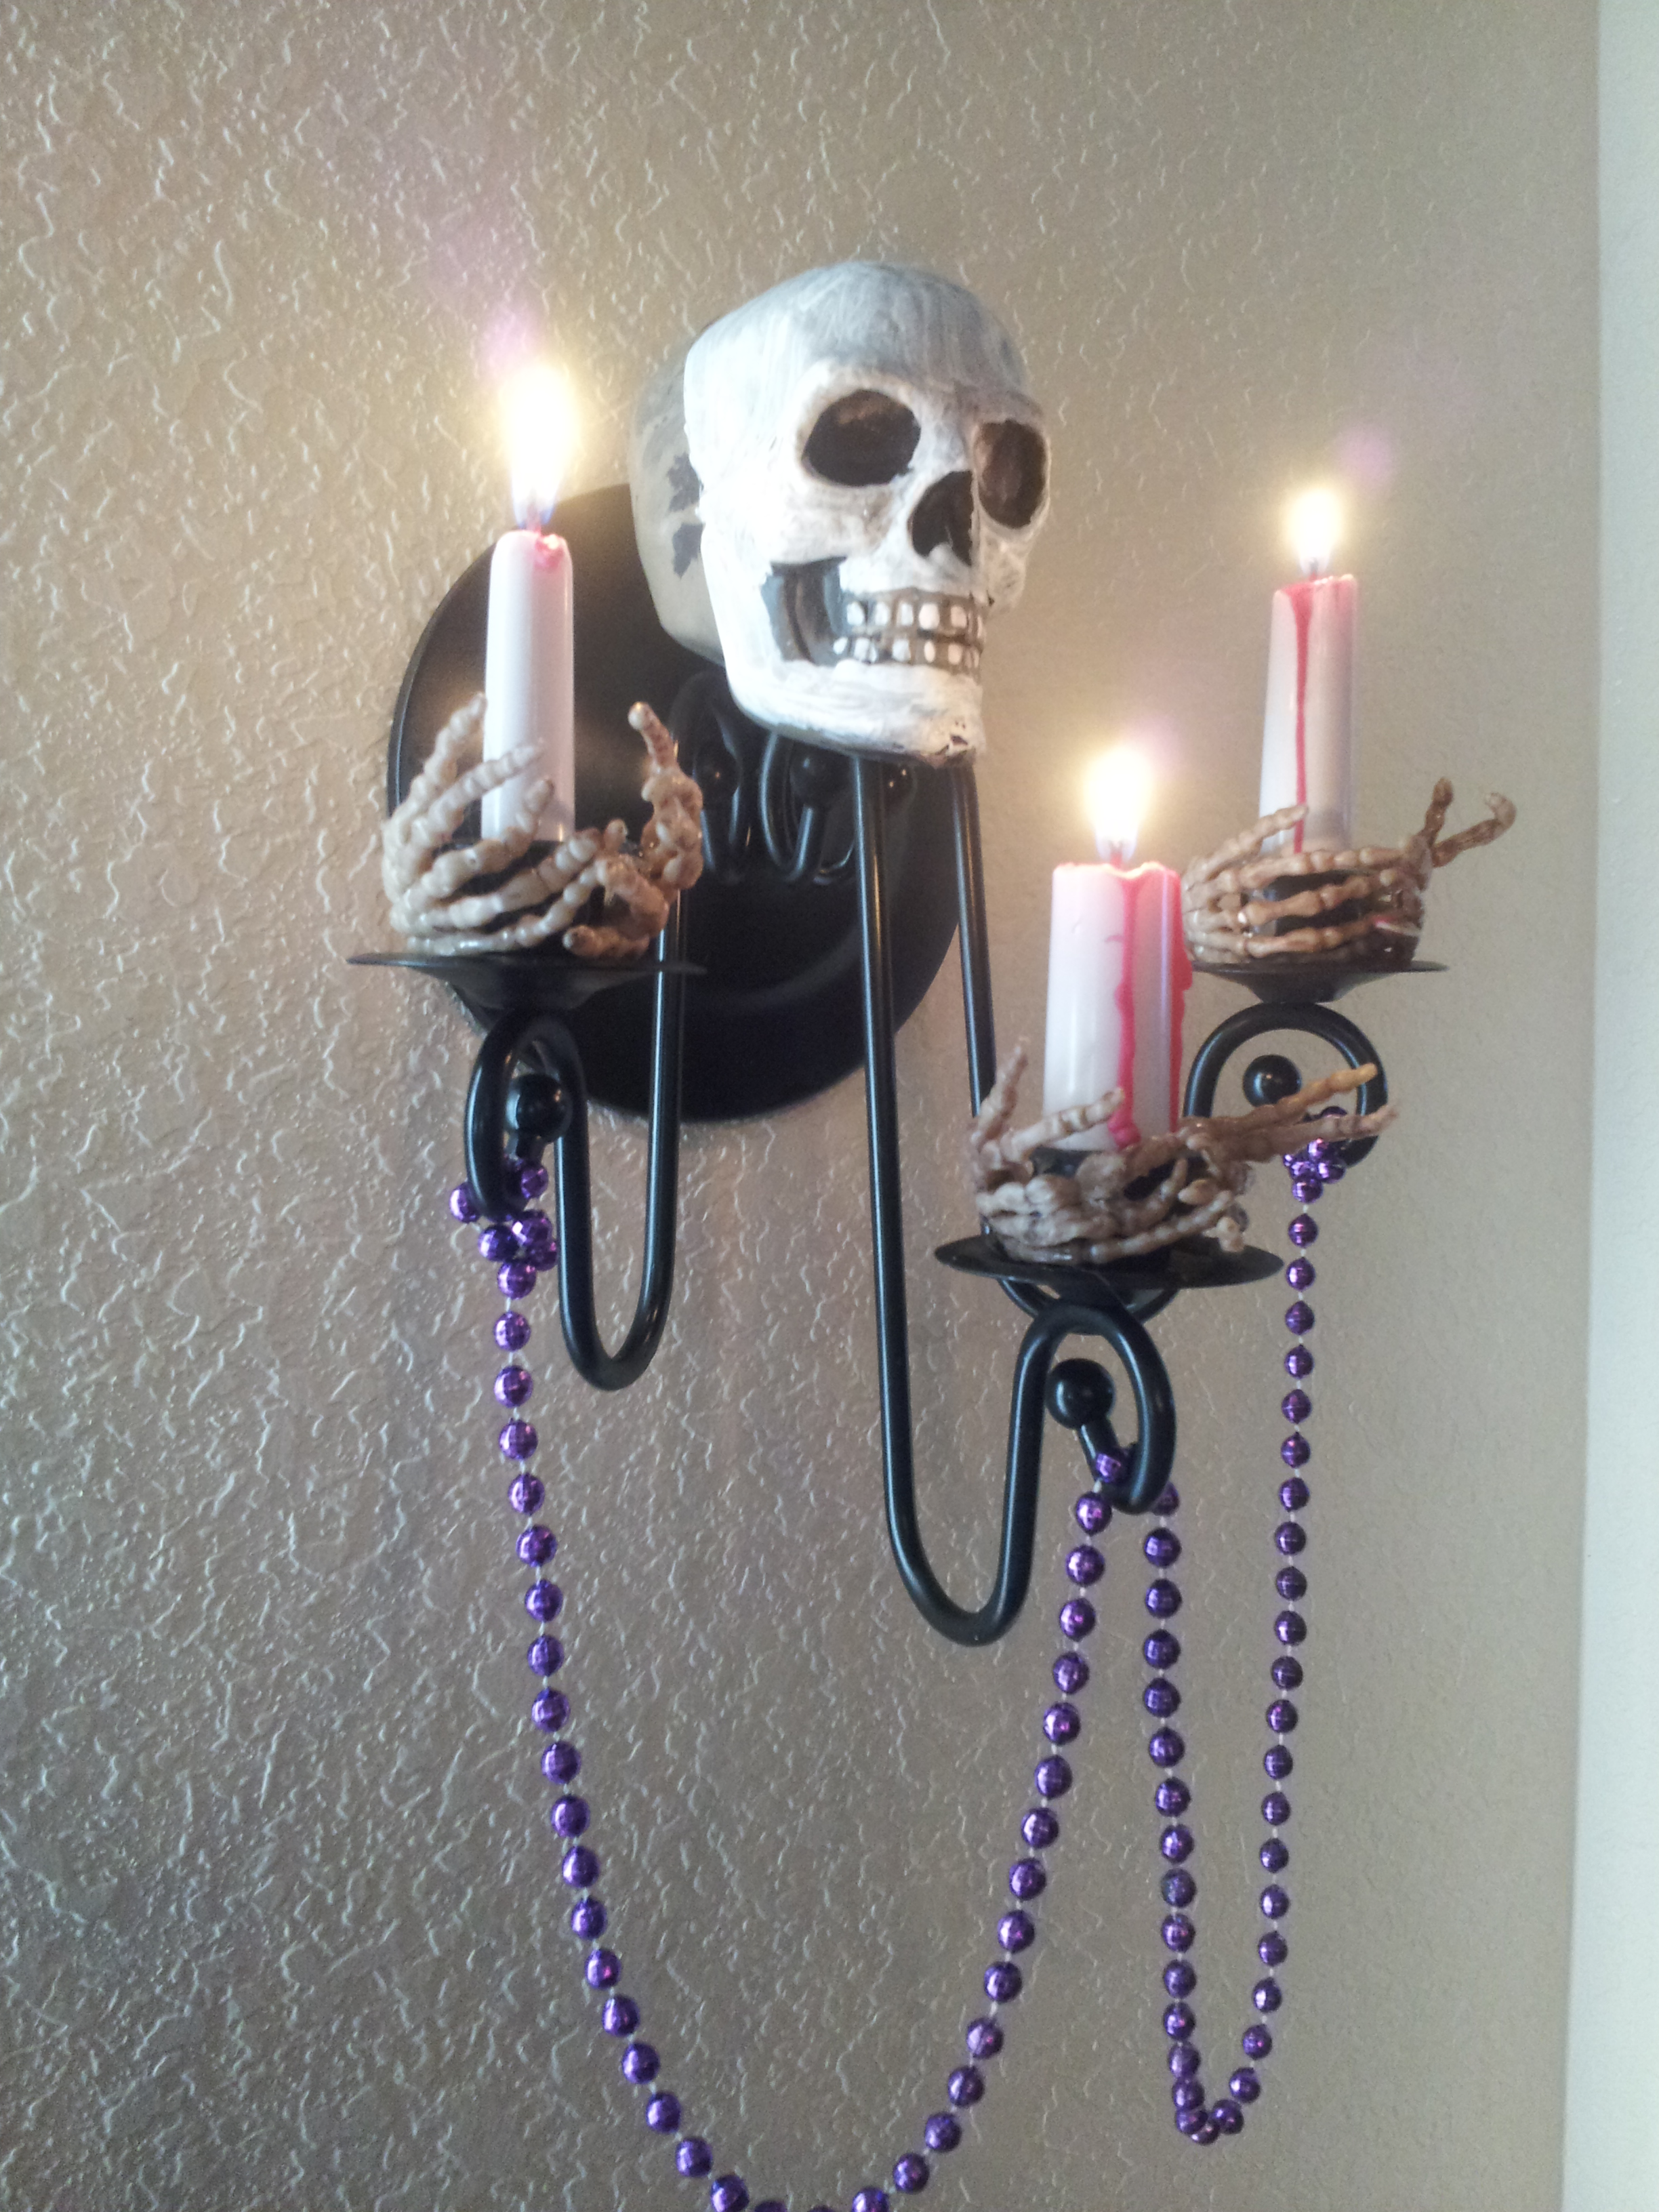
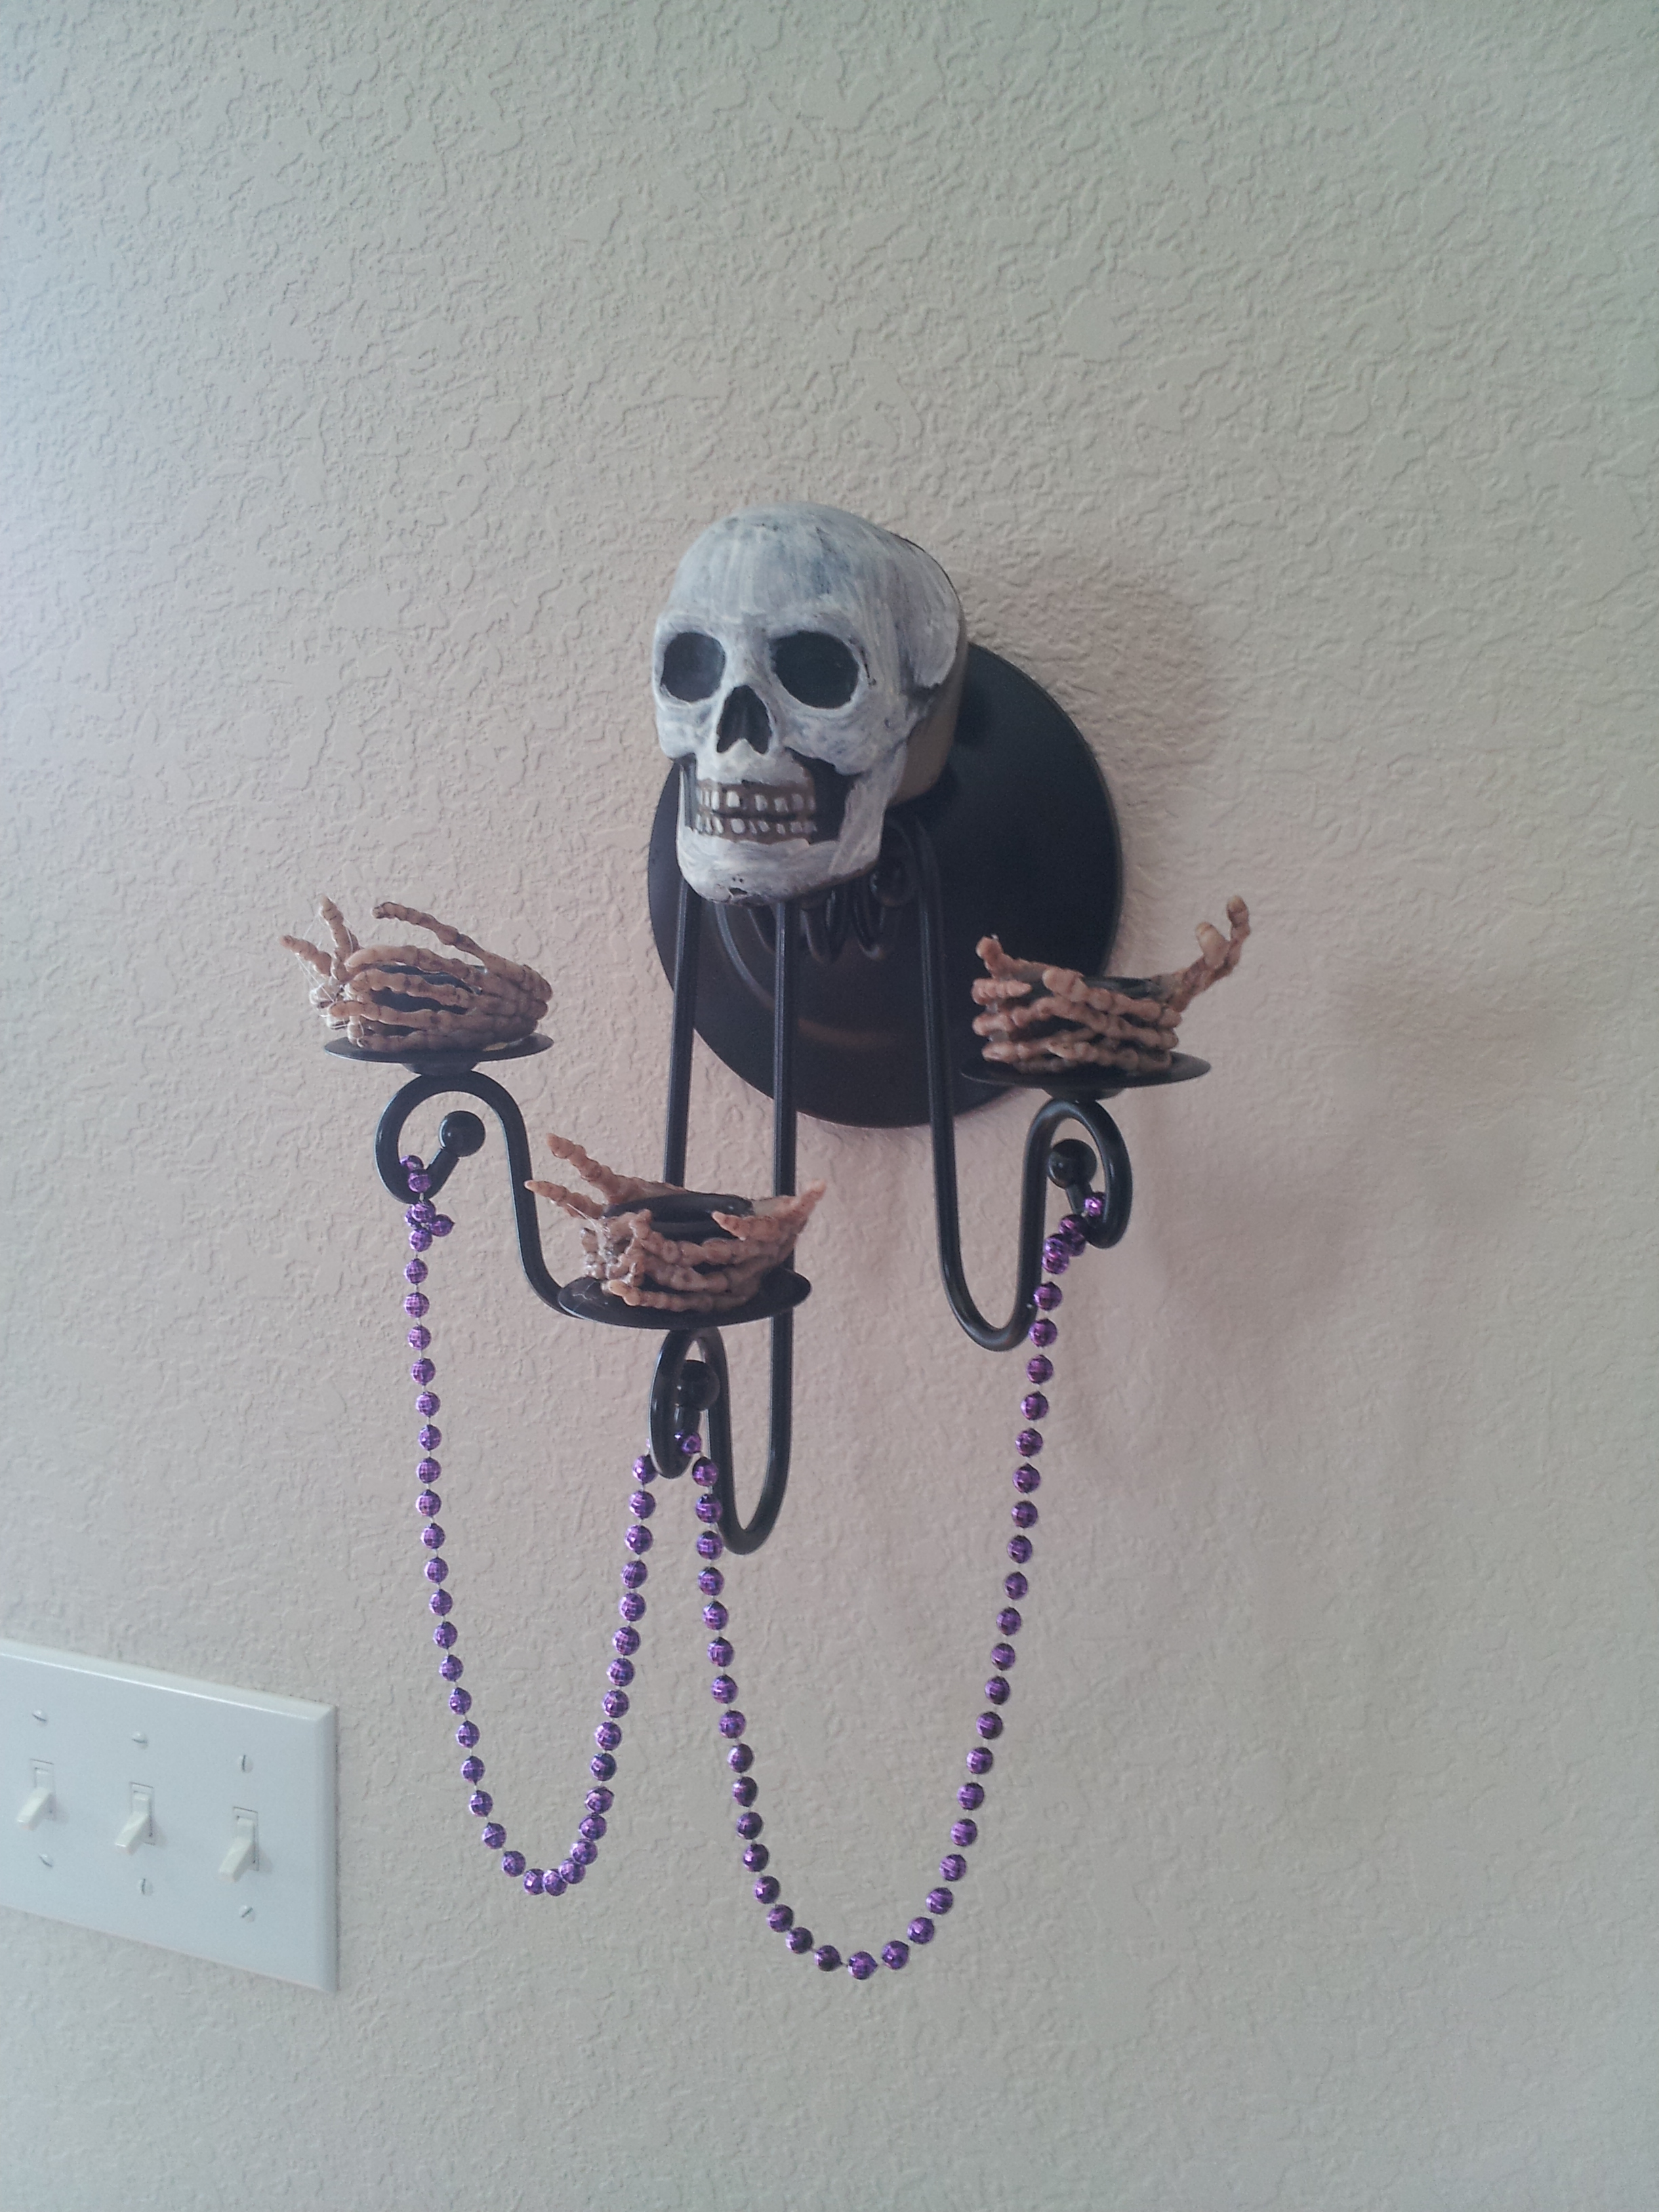
Now I wanted to make this candle holder for my Halloween party covered in spider webs, dripping blood and super creepy… I got started and realized it didn’t need to have an “over the top” covered in craziness… a simple design made it classy yet, when lit, it was an eerie sight… you judge.
Puts out good light, just warn guests to remember their surroundings and Hair and Costumes are flammable!
I started by painting the brass flat black, added with a glue gun small skeleton hands I found at the hobby and craft store, added a painted plastic skull to the top and finished with 3 (Halved) blood dripping candles. The beads were an after thought and not permanent to the decoration but added for the color to tie in some other decorations.
A simple design and a fast build (less than 1 hour total) made for a nice addition to the decorations for the Halloween party. I ended up finding the same candle holder a few months later, and will make a twin for the other side of my sliding glass window.
Every year I have create at least one new Halloween Baby doll for my collection… but now it is time to share my creations… This year I did a Pumpkin Head baby doll with the eyes that roll back open when the doll is sat upright, movable head, and its very own custom fall robe.
I have done some pretty cute ones for Halloween, but to me this one doll really is the cutest, littlest and (at the same time the creepiest) most fun to work on. I find my dolls at the local thrift stores taking care to find the ones with all plastic bodies, eyes that roll (and for my zombie doll a few years back, the tube that would allow me to make blood and green stuff come out the mouth, depending on what I filled the squeezable holding bladder) and any other feature I might want to turn into a special effect.
Some commonly used items for this type of project:
Sharp knife, hot glue gun, paint, paint brush, scissors, Papier-mâché, spray paint, tin foil, fabric and a plastic baby doll.
A few items used to make a Halloween Baby Doll, not all items pictured… so please see text!
Taking the clothes off (tossing them in the wash machine for recycle on other projects) and cleaning the plastic body of the doll with water with a few drop of bleach… I can guarantee my doll is clean and will not get me sick with some kiddie germ I have not seen in 30 years. Also it removes crayon marks, dirt, juice or anything else the doll was pulled through in it’s younger life. A clean canvas is key to the creative flow.
Drying head and clean doll body.
I typically pull the head off, cut out the eyes with a sharp razor, and start my Papier-mâché using the head as a base and work slowly to build it up. Setting the eyes back into the appropriate place (or not, DEPENDING on if you want A HUNCHBACK baby doll) and letting the molded wet paper dry. Once the paper is semi dry it is time to add the scars, wrinkles or cut in the nose and mouth. Add teeth (plastic fork tines), sew a robe for the baby doll body and paint!
I think the creepier the better… keep those Trick-o-Treaters on their toes! As they get close and see their faces turn from sugar filled happiness into one of horror and disgust!
He is ready for the kiddies… Halloween … and to be on display for who ever comes during the month of October!
Tomorrow… a candle holder that will be the talk of your Halloween Party!
The Fall air and chilly nights has put me in the mood to do some cool Halloween decorations, plan a Halloween party and show others how much fun and how easy it really is to make your own decorations and invites for your next Ghoulish Party!
With party invites I needed it to be fast, as I wanted to send them out to family and friends to give them enough time to put it on the calendar, schedule a baby sitter, and prepare for a costume (no one gets into my Halloween Party without a costume!), so the invites were done in one day… and sent out the very next day.
I gathered some of my last year decorations, placed them on a table with good lighting and started taking photos! After several changes I got what I thought would be good for an invitation card photo. I cropped the back ground clutter, dropped it on a night sky (with moon) background and… looky looky… a spooky invite!
Cropped and dropped onto a back ground of the night sky with moon.
Next, printing them out on my photo printer I could add the required text on the back! Making them a postcard and since my photo paper is blank on the back… all that was required was my excel address list and printing out my invites on the reverse side of the photo paper made for a quick and easy invite.
Added info and made the size a postcard.
Tomorrow I will discuss the Pumpkin Head Baby doll decoration, the center of attention in my invite photo….
Hope you will come back to check it out… 30 days of making, crafting, cooking, planning for a Halloween party to remember!