With some scrap speaker box carpet, a hot glue gun and the sub woofer delivered.. I finished the bass tube for my commuter car. The Boss amplifier was a deal at $55.00 on sale on-line… free delivery, and at more that 75% off I thought I would take a chance. I was skeptical about the rated 1500 watts Peak into a two Ohm load, but after hooking it up in the basement and running it for a while I was very pleased with the clean sound and more than enough power. The amp also met many requirements: must have active variable crossover, RCA OR Speaker level inputs, soft start turn on and stable at 2 Ohm… (Nothing like the amps I used to have back in highschool!) so for the 55 dollars I felt like i got a very good deal for a good subwoofer amplifier.
My next post on this project will be a detailed test using a frequency sweep from the 20Hz range up to the 75Hz range. Taking a sample at 5 Hz increments and plotting the speaker output for a comparison and a detailed analysis of the ported tube enclosure of “My Design”.
After some research I found some very inexpensive servo motor control electronic boards. Easy Driver stepper motor drivers… these PCBs will allow me to control the motors for each axis, allowing microstepping resolution to full, half, quarter and eighth steps.
I also found a simple schematic which I will use to start basic programming, testing and explore the Sketch code required to allow G Code to be processed. The feed motor for the extruder (A group of parts which handles feeding and extruding of the build material. Consists of two assemblies: a cold end to pull and feed the thermoplastic from the spool, and a hot end that melts and extrudes the thermoplastic.) will be run on another stepper motor and is not detailed in this schematic. I started the layout of all the components on a prototype bread board, and I might just keep it that way for the final build to simplify troubleshooting and modifications.
Next I will prep the computer power supply and run the needed power lines to a breakout board with fuses and a selector switch to allow for a voltage display for each power bus line.
For a long time I have been very interested in building speakers… for home, for stage, for car and for outdoors… I have tried many different styles and types of enclosures… but I came home from work and looking around in my garage I decided to build a very quick bass tube out of free junk I have collected. i have always wanted to try this type of tube style with the extra added horn/port… and i figured I would capture some photos along the way to show the build.
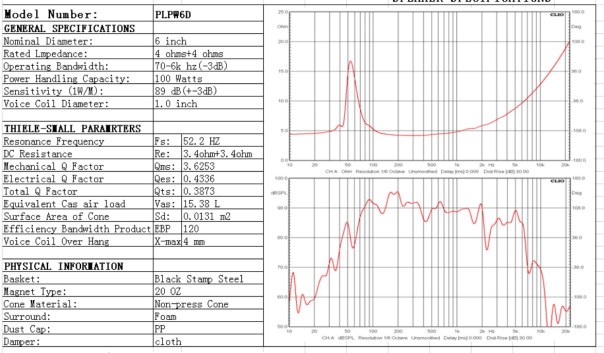
I did some very basic calculations to find the perfect length and using the data sheet for the speaker (a Pyle Power Series Dual Voice-Coil 4-Ohm 6.5-inch 600-Watt Subwoofer) I optimized the volume for the 40 to 50 Hz frequency. Now the spec for the speakers says the range is 38 to 70 Hz, but the port will be tuned for 53 Hz.
Some plastic tube and a cardboard tube (all free) will become the body, some scrap particle board will hold the speaker at one end and the other end the speaker connection. Some blanket matting will become the interior tube baffle or damping material, and some wire will be run the length to ensure I have good connections to the speaker (once it arrives in the mail).
Plastic tube is cut to the correct length which is based on the volume needed for a ported enclosure.. in my case it was 27 inches.
Here is the peices cut… the ends have a flat edge to keep the speaker from rolling around.
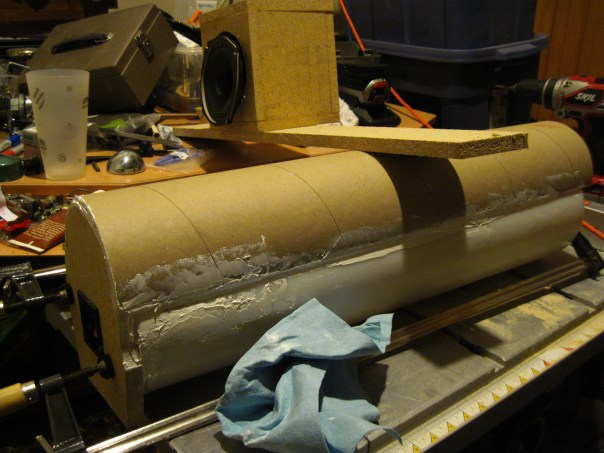
Some glued in matting… a dry assembly and now to put it all together. (Right photo: Looking down the tube cut in half to make the port.)
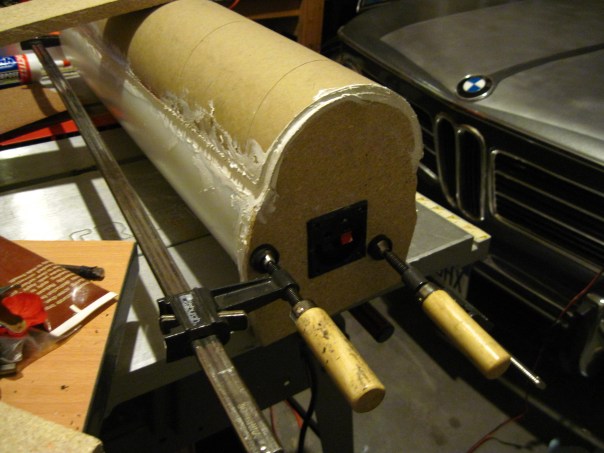
I just used some construction adhesive to join everything… since it is ported I am thinking the pressure will be minimal and not fatigue all of the parts connection points. I might run a few drywall screws in key locations just to be safe before I cover the tube. HEY! There is the Stuka! My 1968 BMW 2002 in the garage for the winter taking a nap and on the trickle charger!
For now… I will let it dry and wait for the speaker to arrive… once I get the woofer I will finish the build, conduct a measurement recording of a sweep frequency of 20 Hz to 70Hz and plot the data for a review and blog post. I hope to have it done soon!
I wanted to try and start this project about a year ago and I finally made myself this week start to compile all of my hardware that I have been salvaging, hoarding, finding, purchasing and saving. I have been looking through my Make Magazine 3 D printer edition and seeing how others are making professional printers and realizing i can make one myself. ( http://makezine.com/comparison/3dprinters/ ) This guide shows the quality, accuracy, cost, print size, etc… which provides the basic 3 D printer purchaser a way to find the right choice.
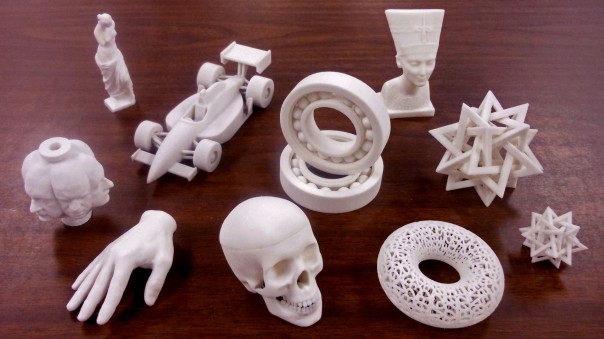
A 3D printer is something I have been thinking would be good for all my other electronic projects, to build housing, mounting hardware, special mechanical assemblies… I think it will also be good to learn the electronics and hardware behind the new products that are flooding the market… my print area will be approximately 8 inches by 8 inches by 10 inches… not to bad for a first 3D printer and for the size a commercial printer would be in the $1K to the $1.5K range. My cost so far… about 40 bucks! I bought the stepper motors used and they are capable of a half step (around 0.9 degree) SO… 400 HALF STEPS would be one 360 revolution on the shaft.
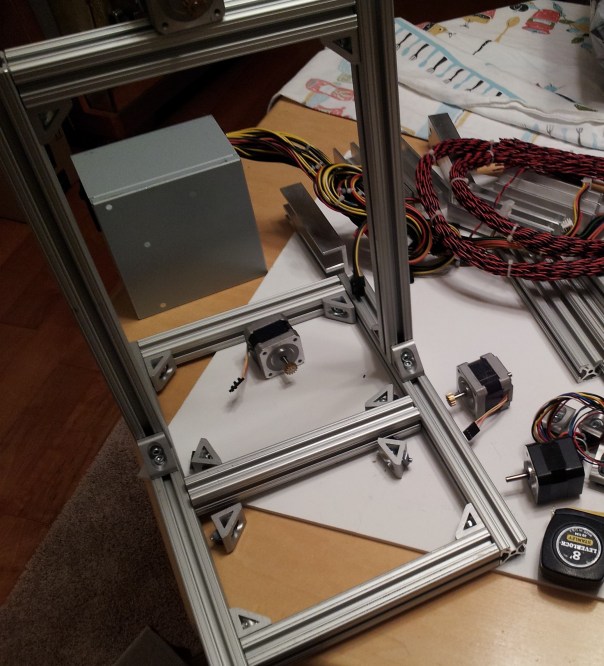
Below is the frame made our of 1.5 inch 80/20 stock aluminium, saved from a dumpster during a cleaning at MSI, a small micro satellite company that was purchased by SNC during my time in Littleton, Co. I saved roughly $80.00 but was limited to the size of the pre-cut stock for my frame size… I can always increase the print size if i want to buy larger 80/20 stock… but for now the print size I have will work great .
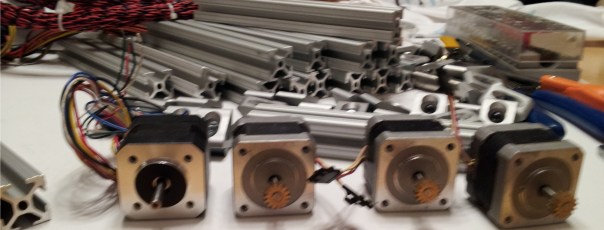
Below are the used, but good stepper motors I bought a while back in Colorado Springs at a little electronics shop that sells dismantled electronics.
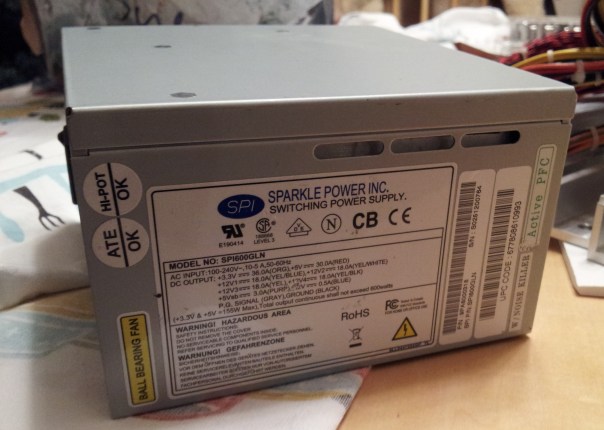
I even was able to get the power supply for free… just a general power supply out of a desk top PC… it is nice because the voltages and current supplied will be more than enough for the heat plate, spool motor, stepper motors for each axis and to power the electronics.
+3.3 Volts DC at 36 AMPS!
+5 Volts DC at 30 AMPS!
+12 Volts DC at 18 AMPS times 3!
Next up, wiring diagrams and electronics… I want to pre-route the power wires, micro switches and stepper controllers to see what size my support housing and clearance for the motors, switches, and threaded rod needs to be.
After that… mechanical linkage, thread rod, mounting the steppers.
As I work on my printer I will be sure to capture more photos, provide electronics and wiring diagrams and hopefully by summer be printing for some cool Halloween stuff or a small something to send to my friends and family for holiday!
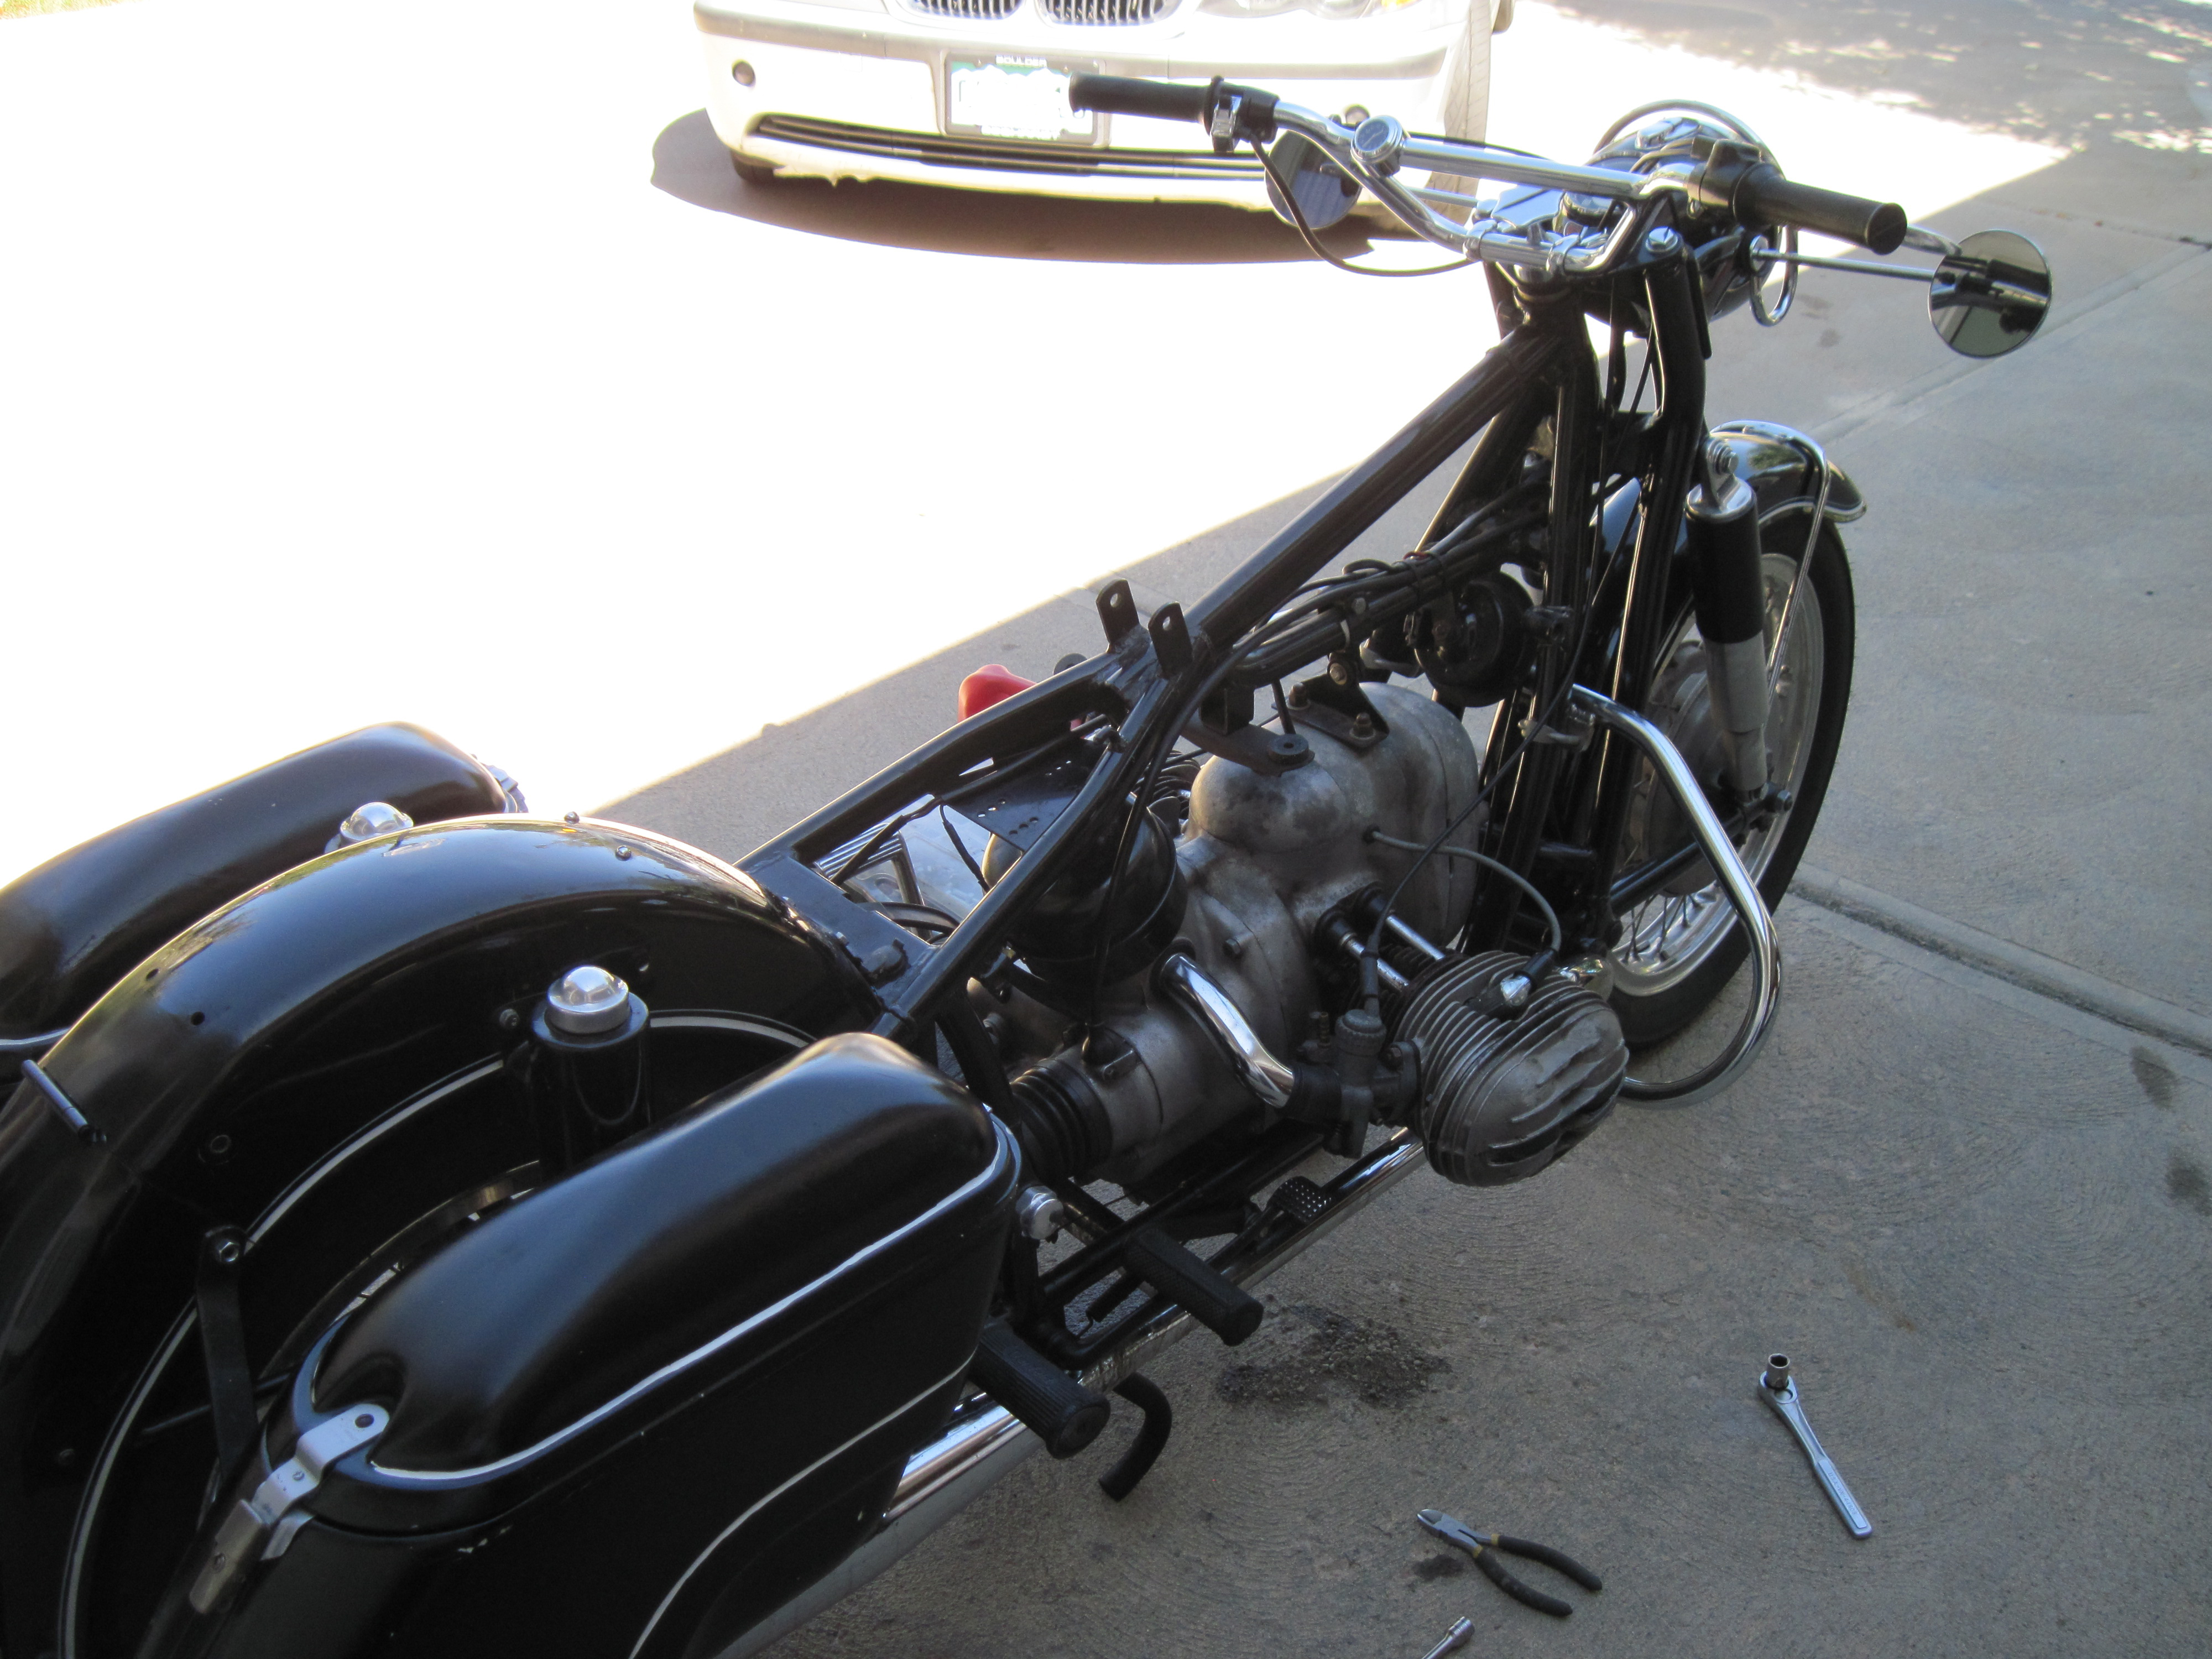
So what I thought was going to be an easy seat change ended up last me over 3 hours, but after it was done it really makes a big change in the look of my R50.
Above and below is the look of my BMW with the banana seat…
After removing the seat, i wanted to see how the chromed luggage rack o the back fender is going to look. No holes drilled yet… and will save that project for a different day.
After almost 2 hours of draining the gas out of the tank… (I made the mistake of filling up a few weeks back, not knowing I wanted to put the solo seat on) the four gallons of gas through a filtered 1/4 inch tube is not the best way to drain a tank.
Above, the tank and seat off… i went ahead and washed the back fender.
Assembly was very quick and came together quickly. All the bolt holes lined up and the review of all the items double checking that it was all assembled correctly and tight.
Out for a ride, Saturday in denver was a perfect clear and sunny day, I think the high was 80 degrees and the last Saturday of the summer for 2015 was perfect.
Once again it is time for some halloween projects to get ready for October… and it is my favorite time of the year. Fall, leaves in full color, the crisp night air, and Of course Halloween!
Just as I have done in the past few years, I am going to make some new creations for my yard and for the tricker-treaters… A new idea for a more automated talking skull are in the works and this year, (As I am starting earlier), a new scarecrow mask for myself and maybe a small more relaxed Halloween party… I was thinking a sit down dinner with a mystery twist…. but who knows, as I always go big and never have enough time.
I also saw some really cool figures to put into the lawn and I could light the with a solar spot light to creep the kiddies out of my yard.
I will try and photo my progress and provide some instruction, code, electronics, etc. on all of my projects… My goal is to use the items I already have and make them better, or use stuff I have on hand to keep it cheap and simple.
I look forward each year to posting these crazy ideas and I hope you enjoy… as for now, you can check out my previous posts on Halloween…
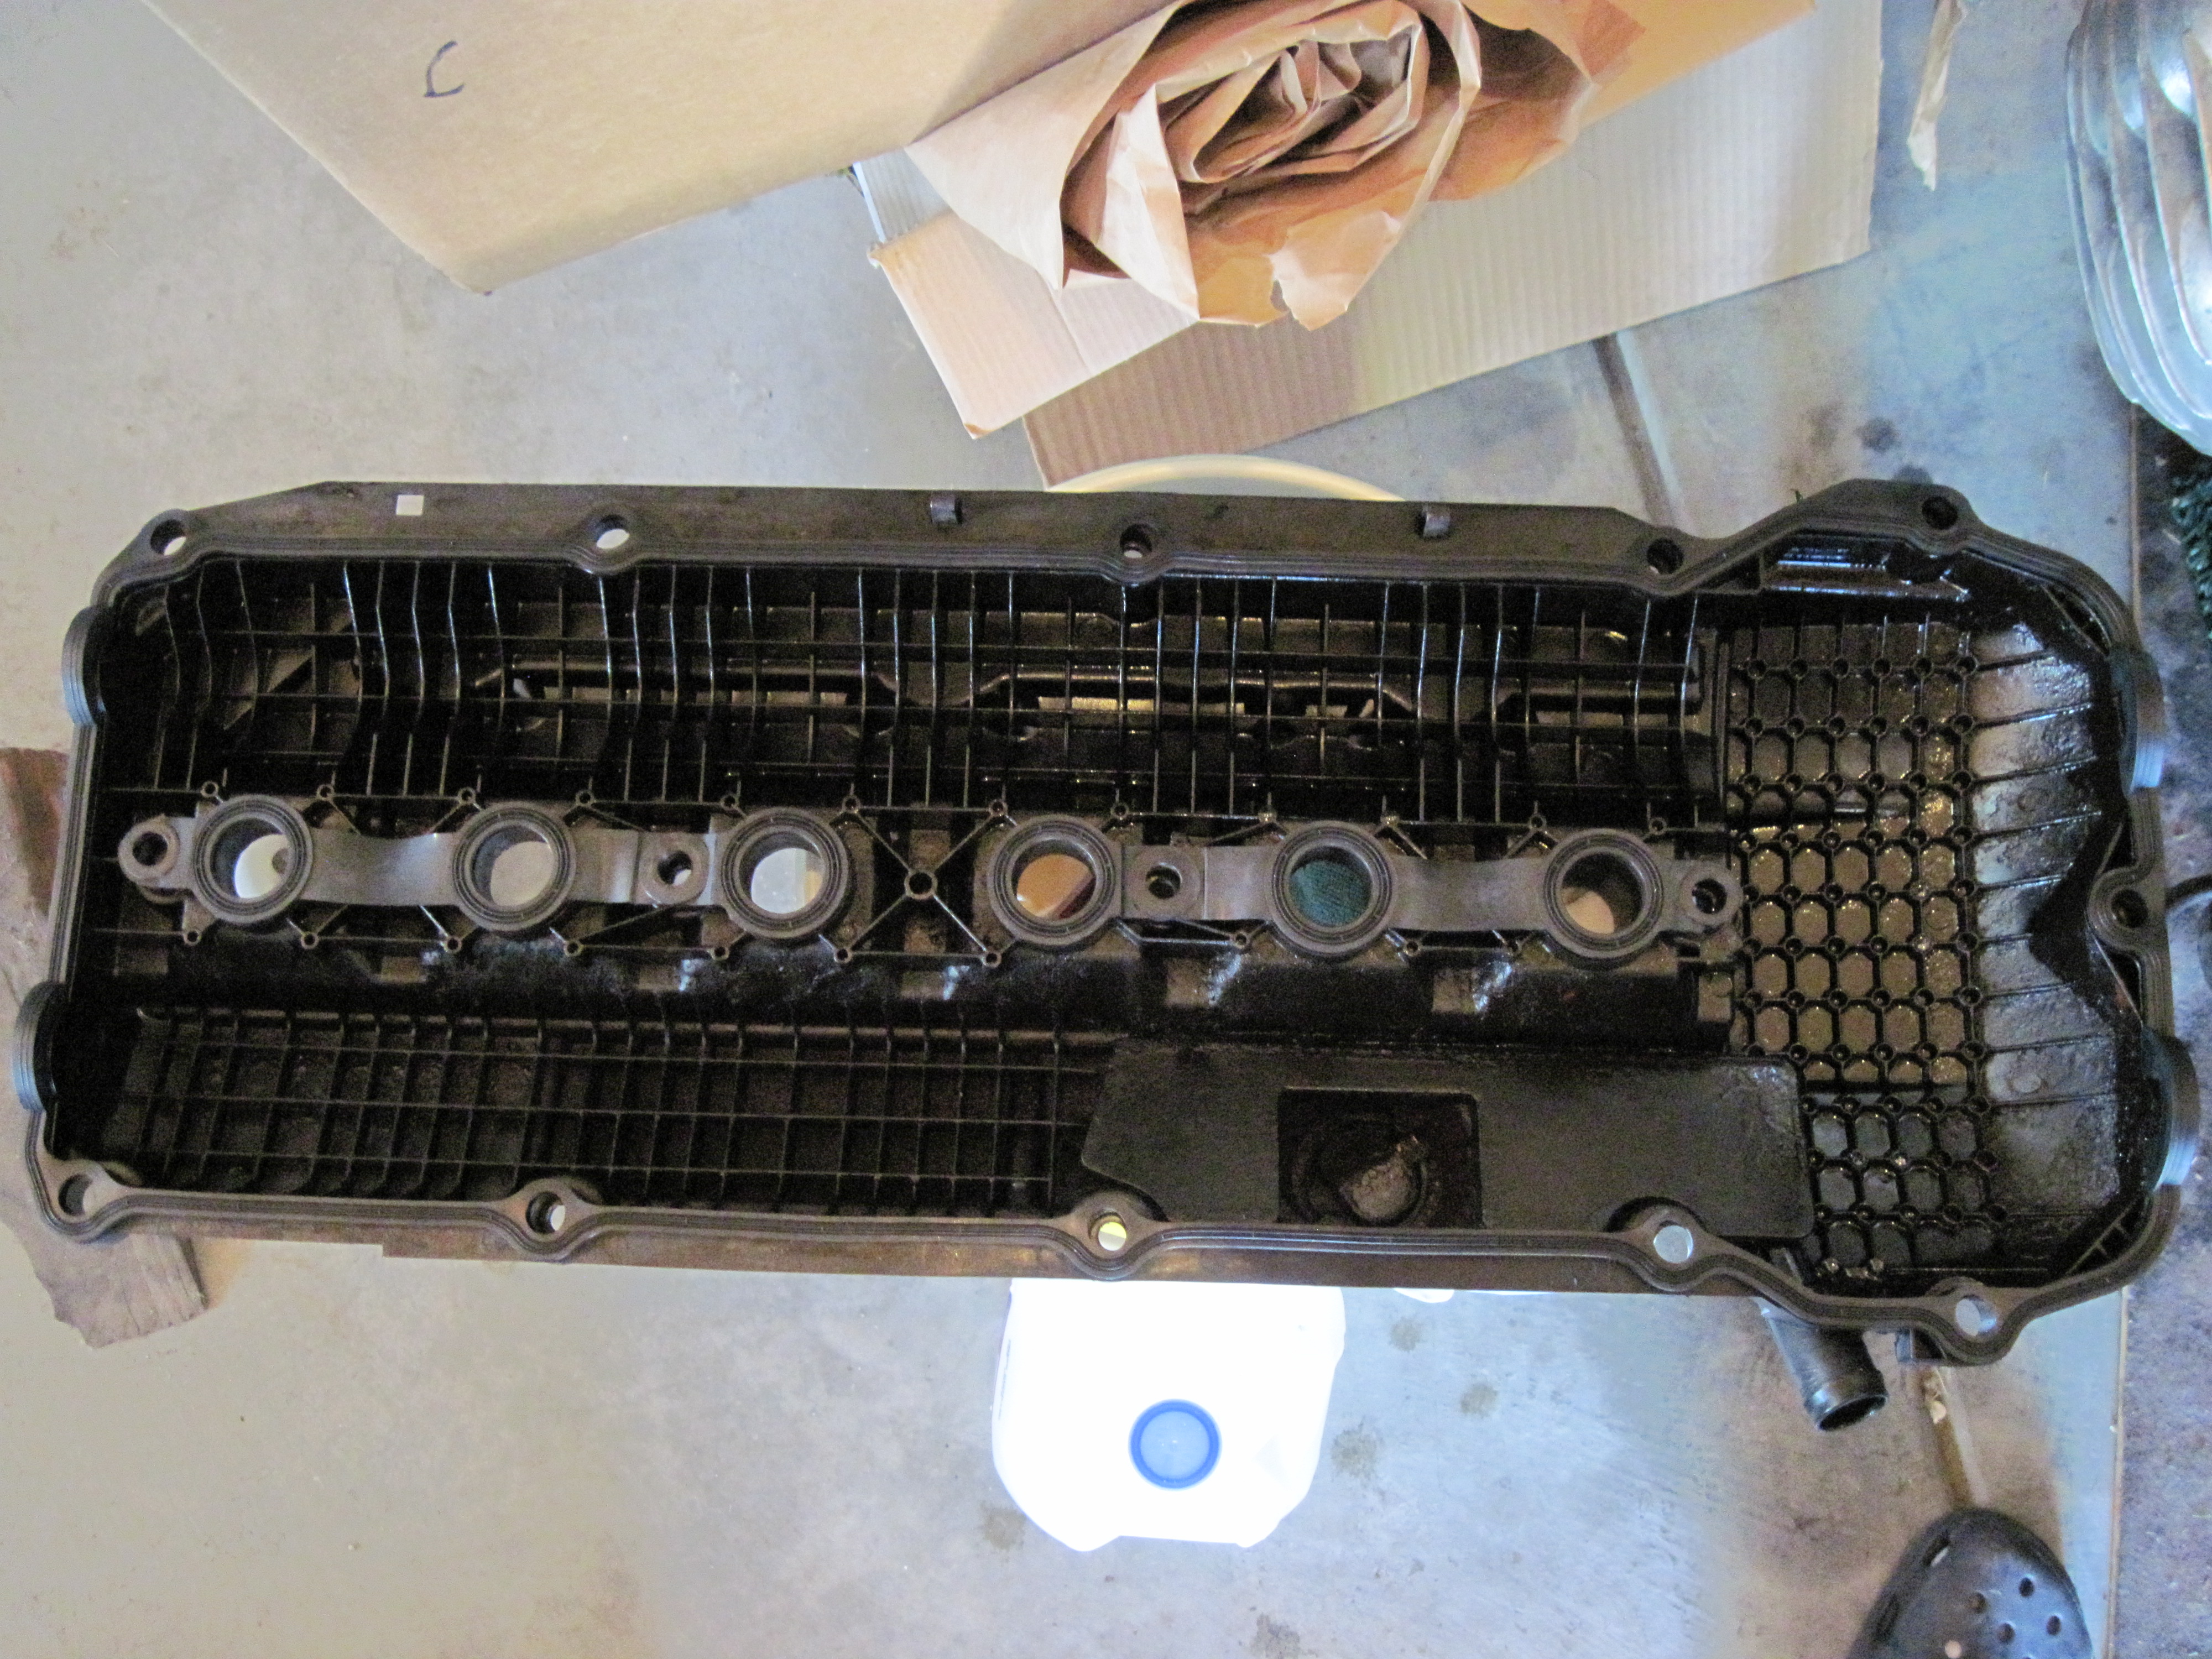
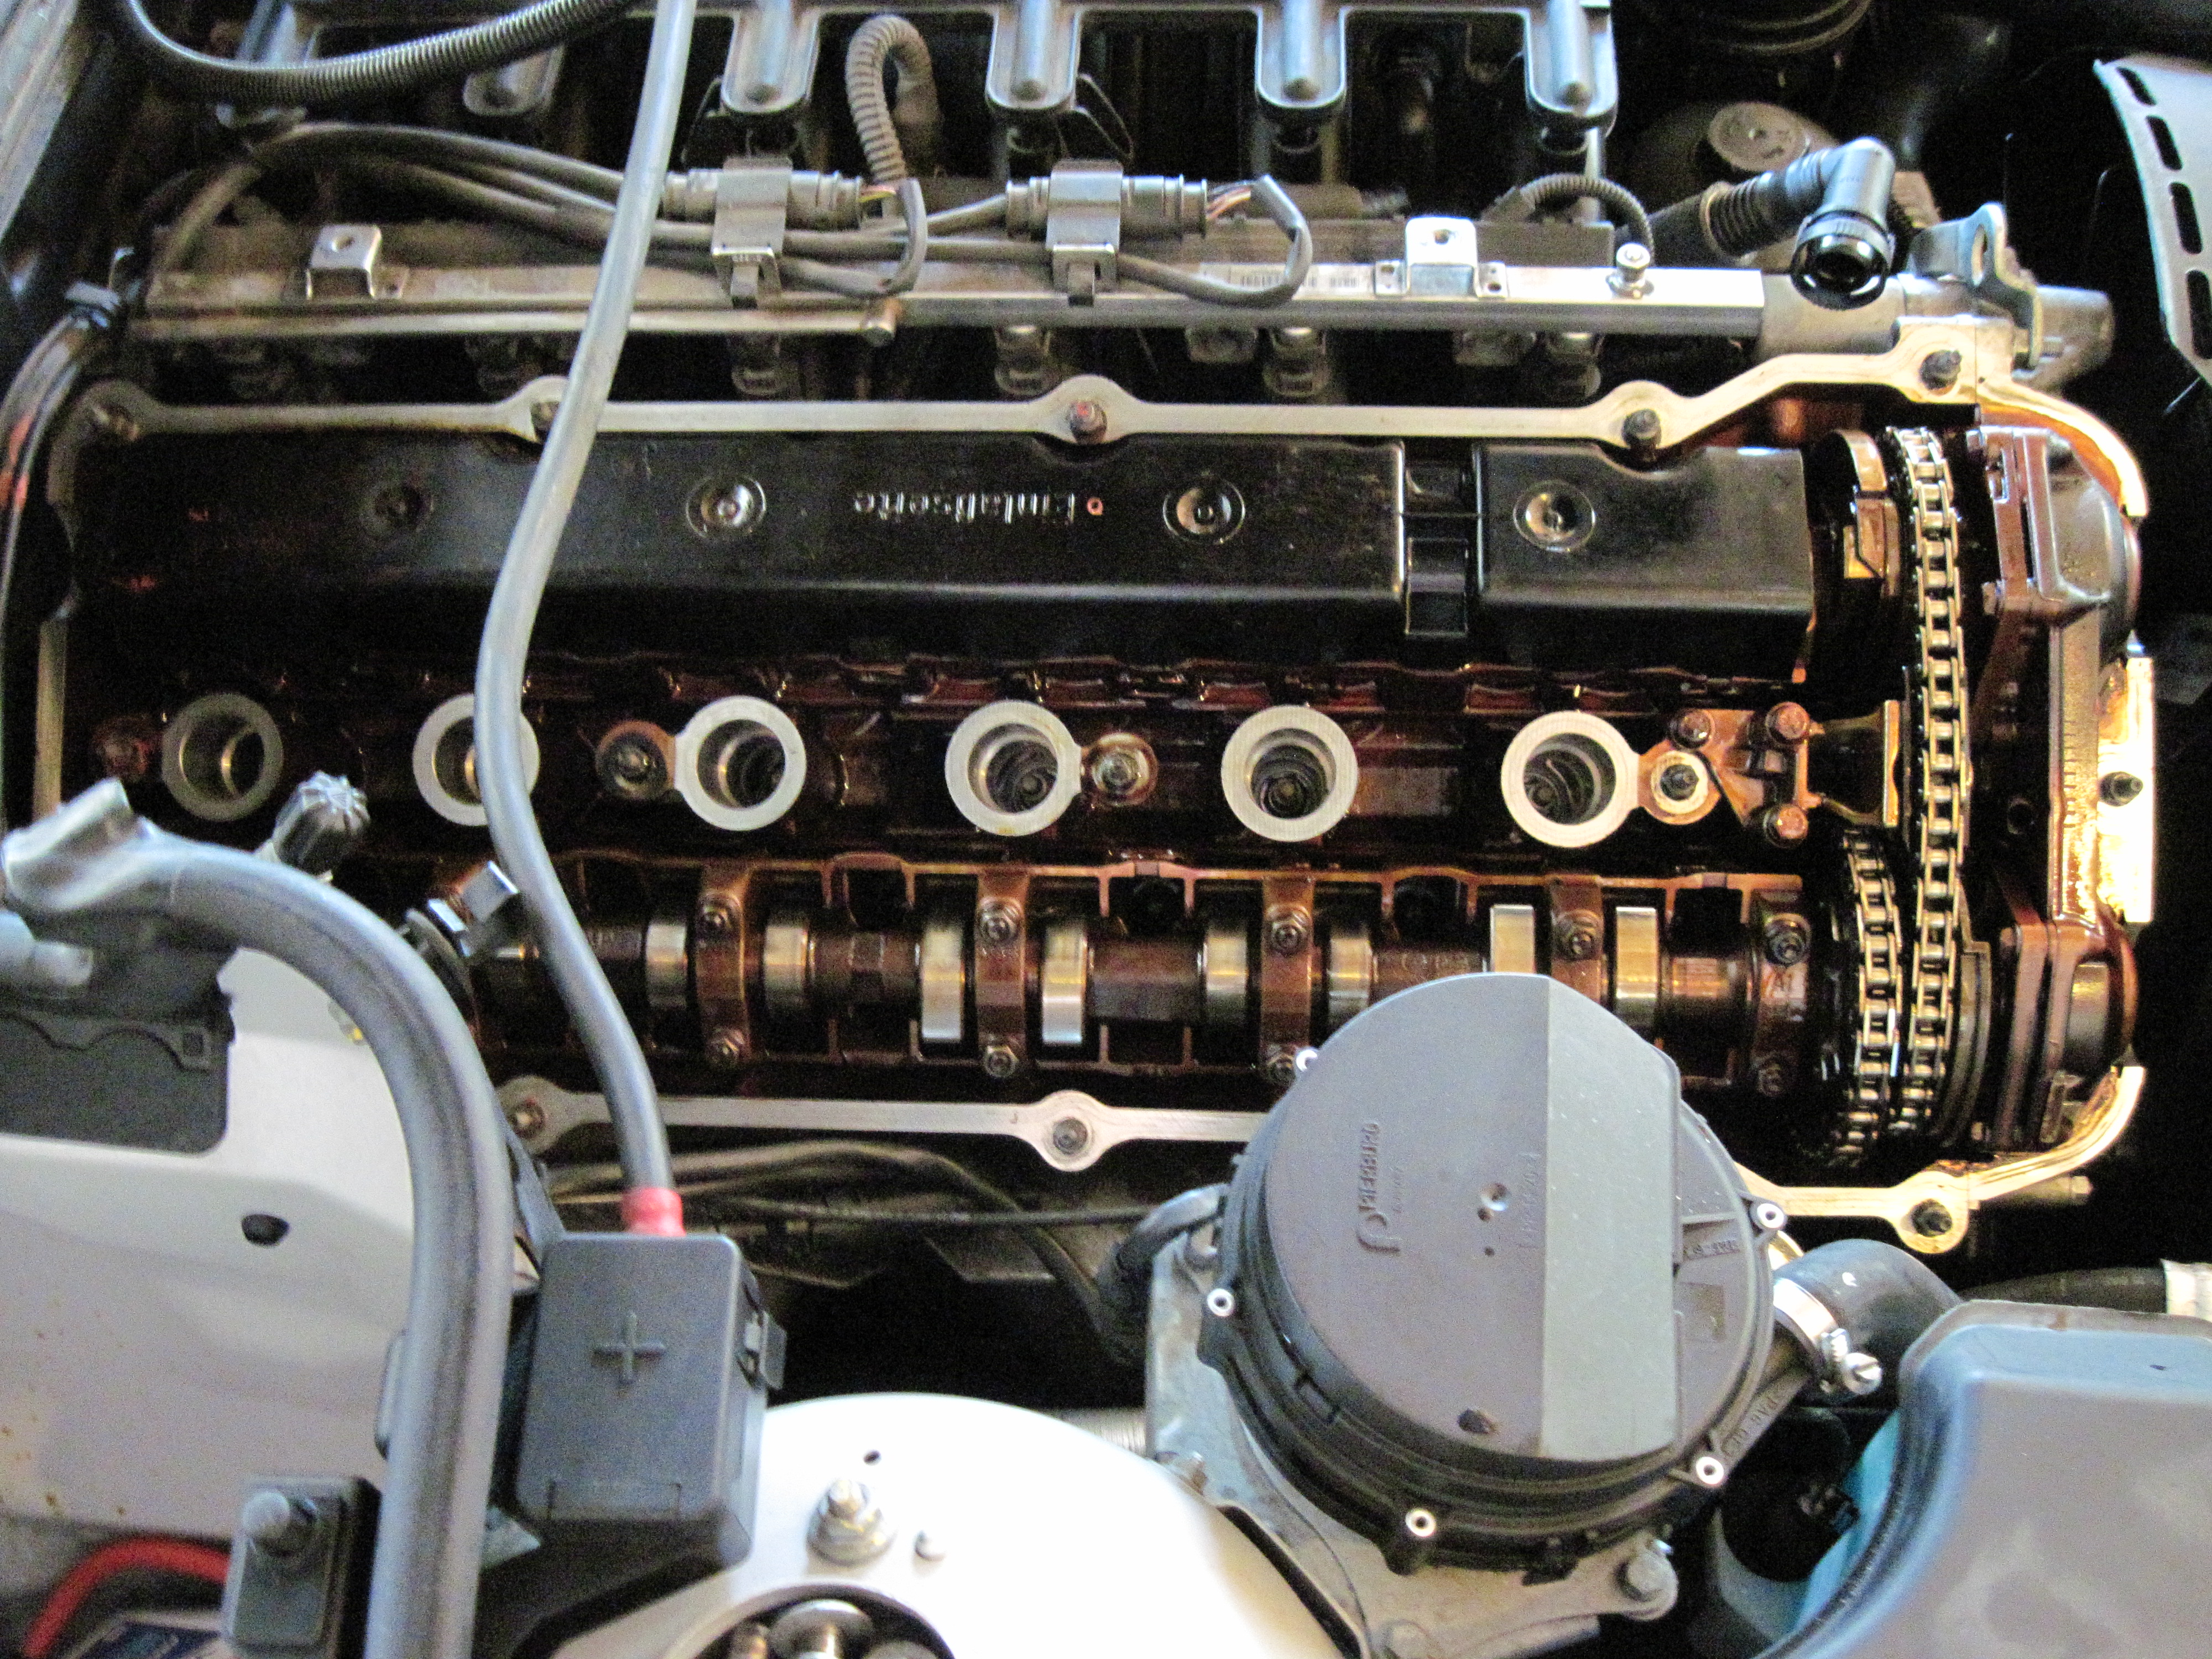
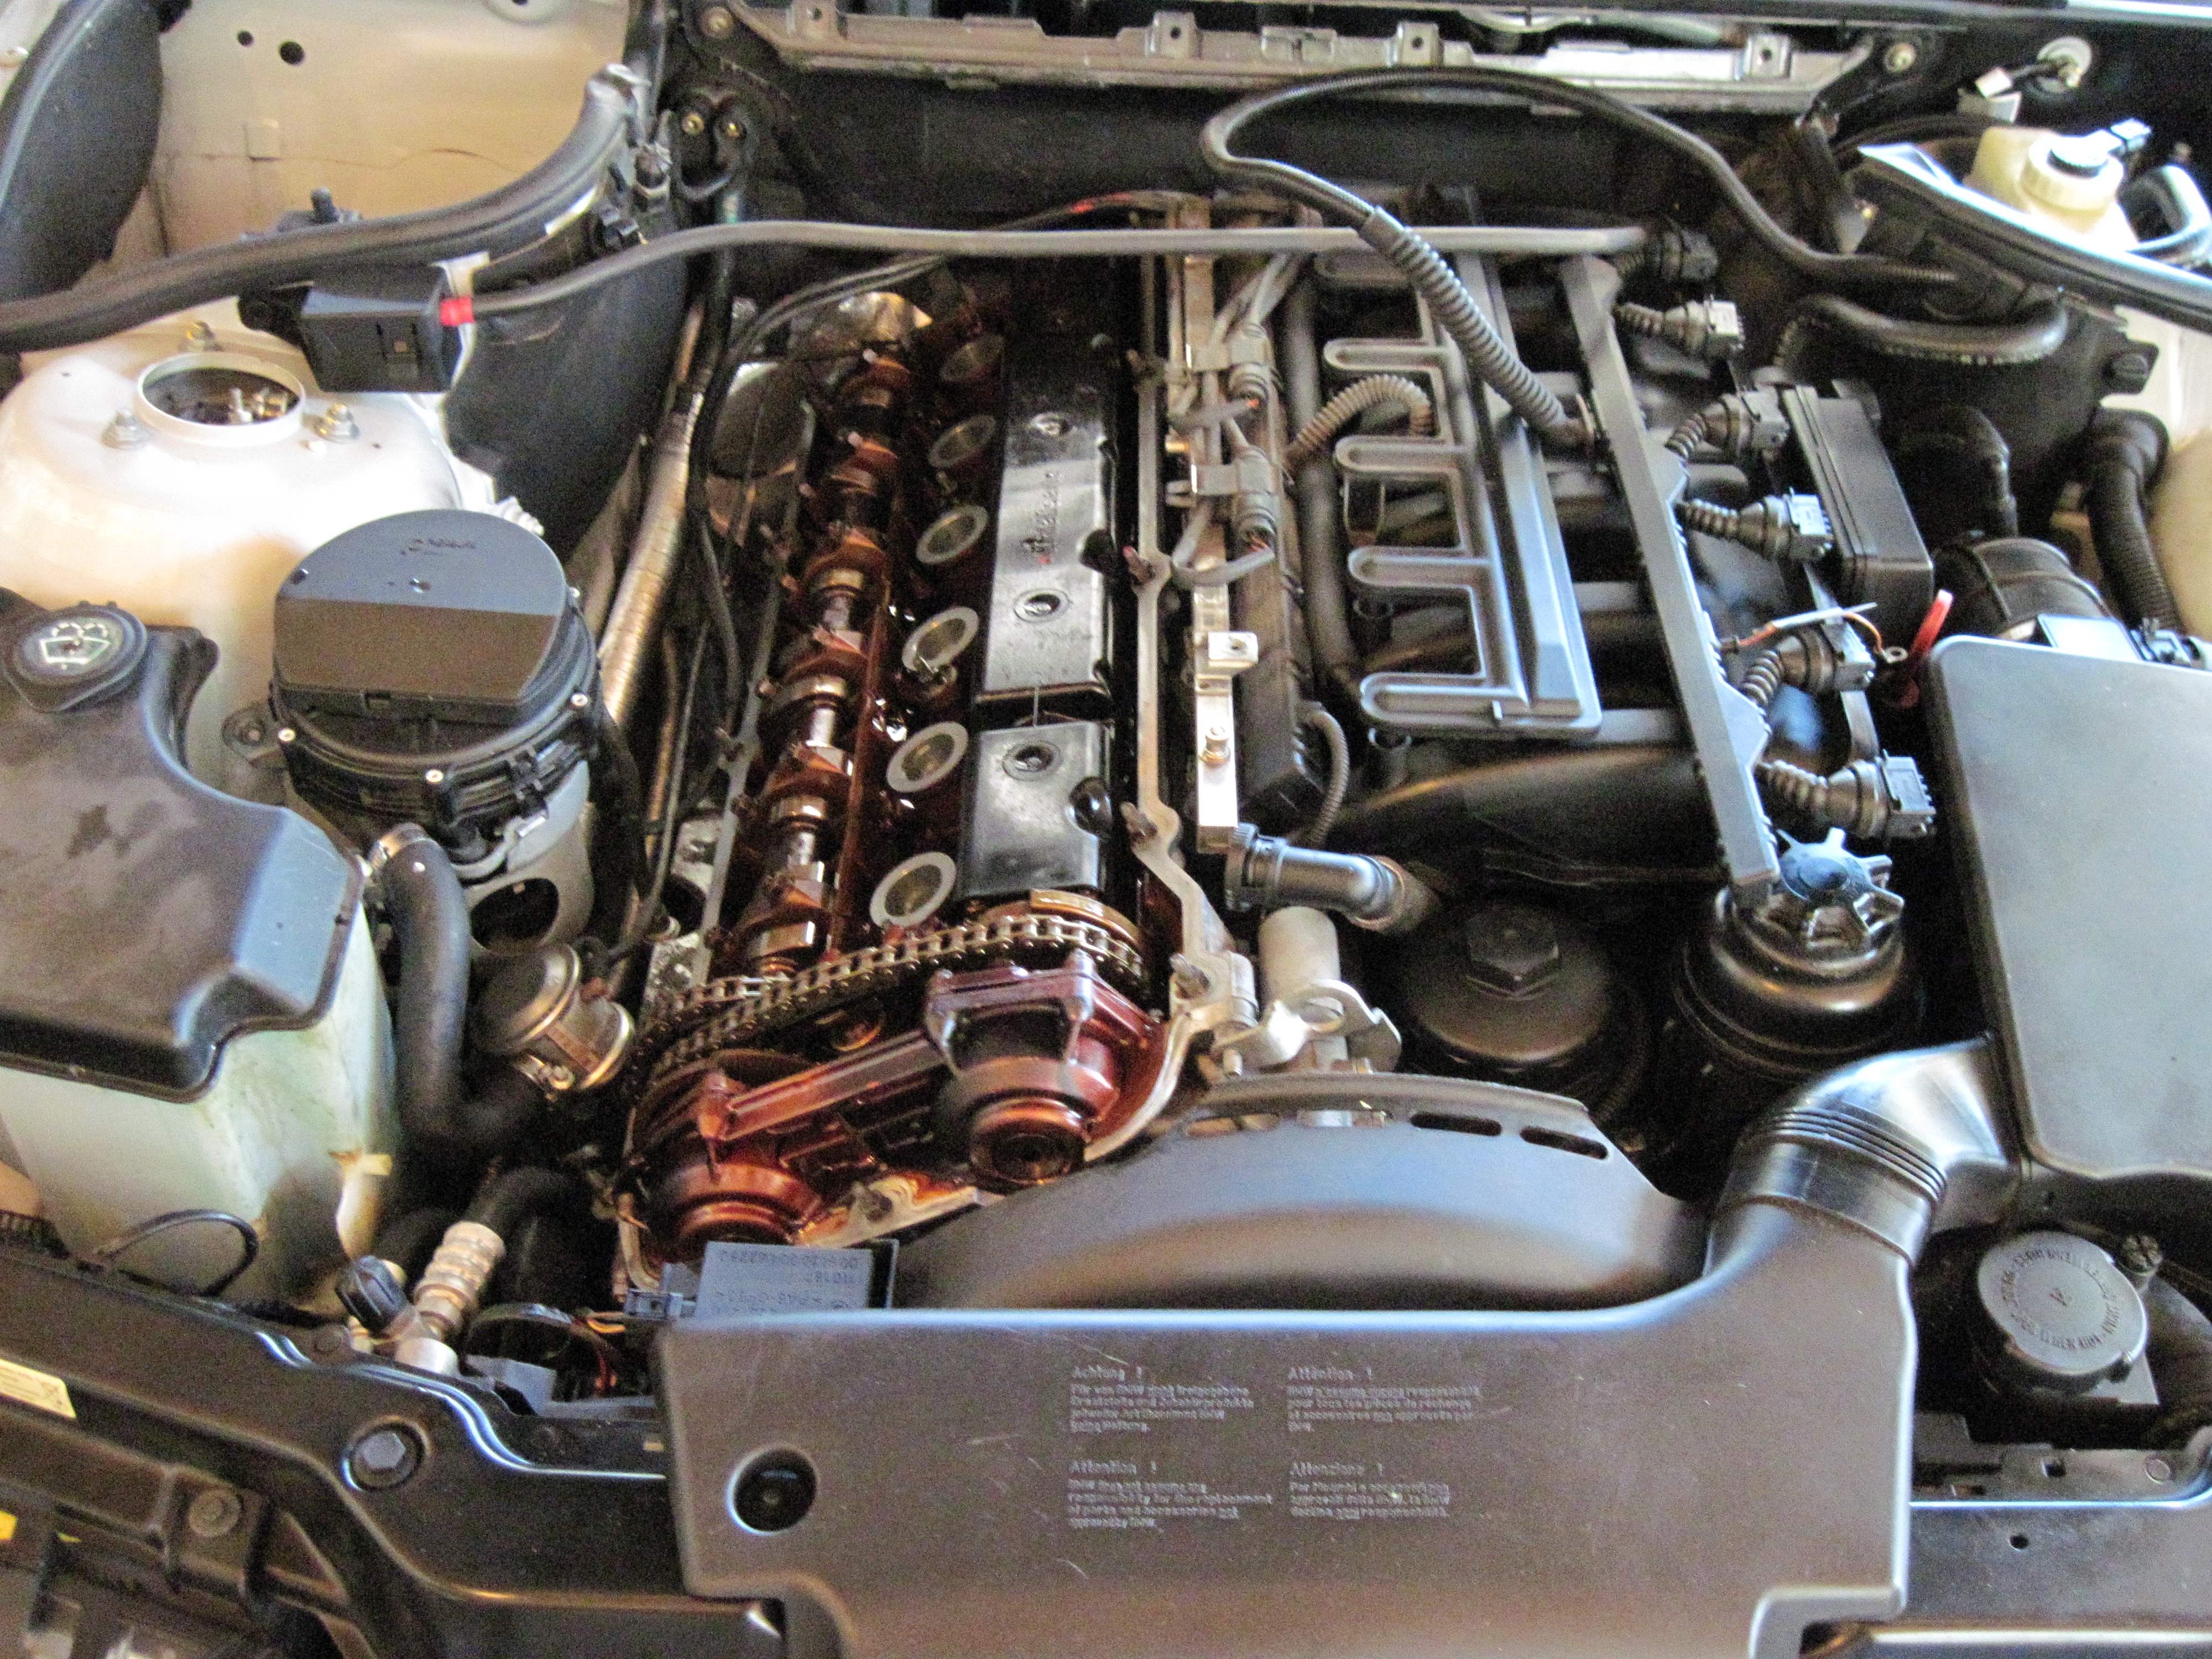
So, after purchasing a used BMW 325i 2002 I decided to check out some common issues that are prevalent in a car with 130,000 miles on it. An oil leak with really worn belts, I still think I got a good deal. During a valve cover gasket replace is a good time to check the ignition coils, spark plugs, a valve cover air circulation and other items. Digging in one saturday morning I felt the task at hand would take about 2 to 3 hours… and it did. Once into the top of the valve head I was very pleasantly surprised to find the the ignition coils were all new and replaced in October of 2013, along with the ignition coil harness with the OEM markings and labels. the valve cover gasket was replaced, along with all belts and pulley wheels with the tensioner too. everything went very smoothly and went together quickly after the part replacement.
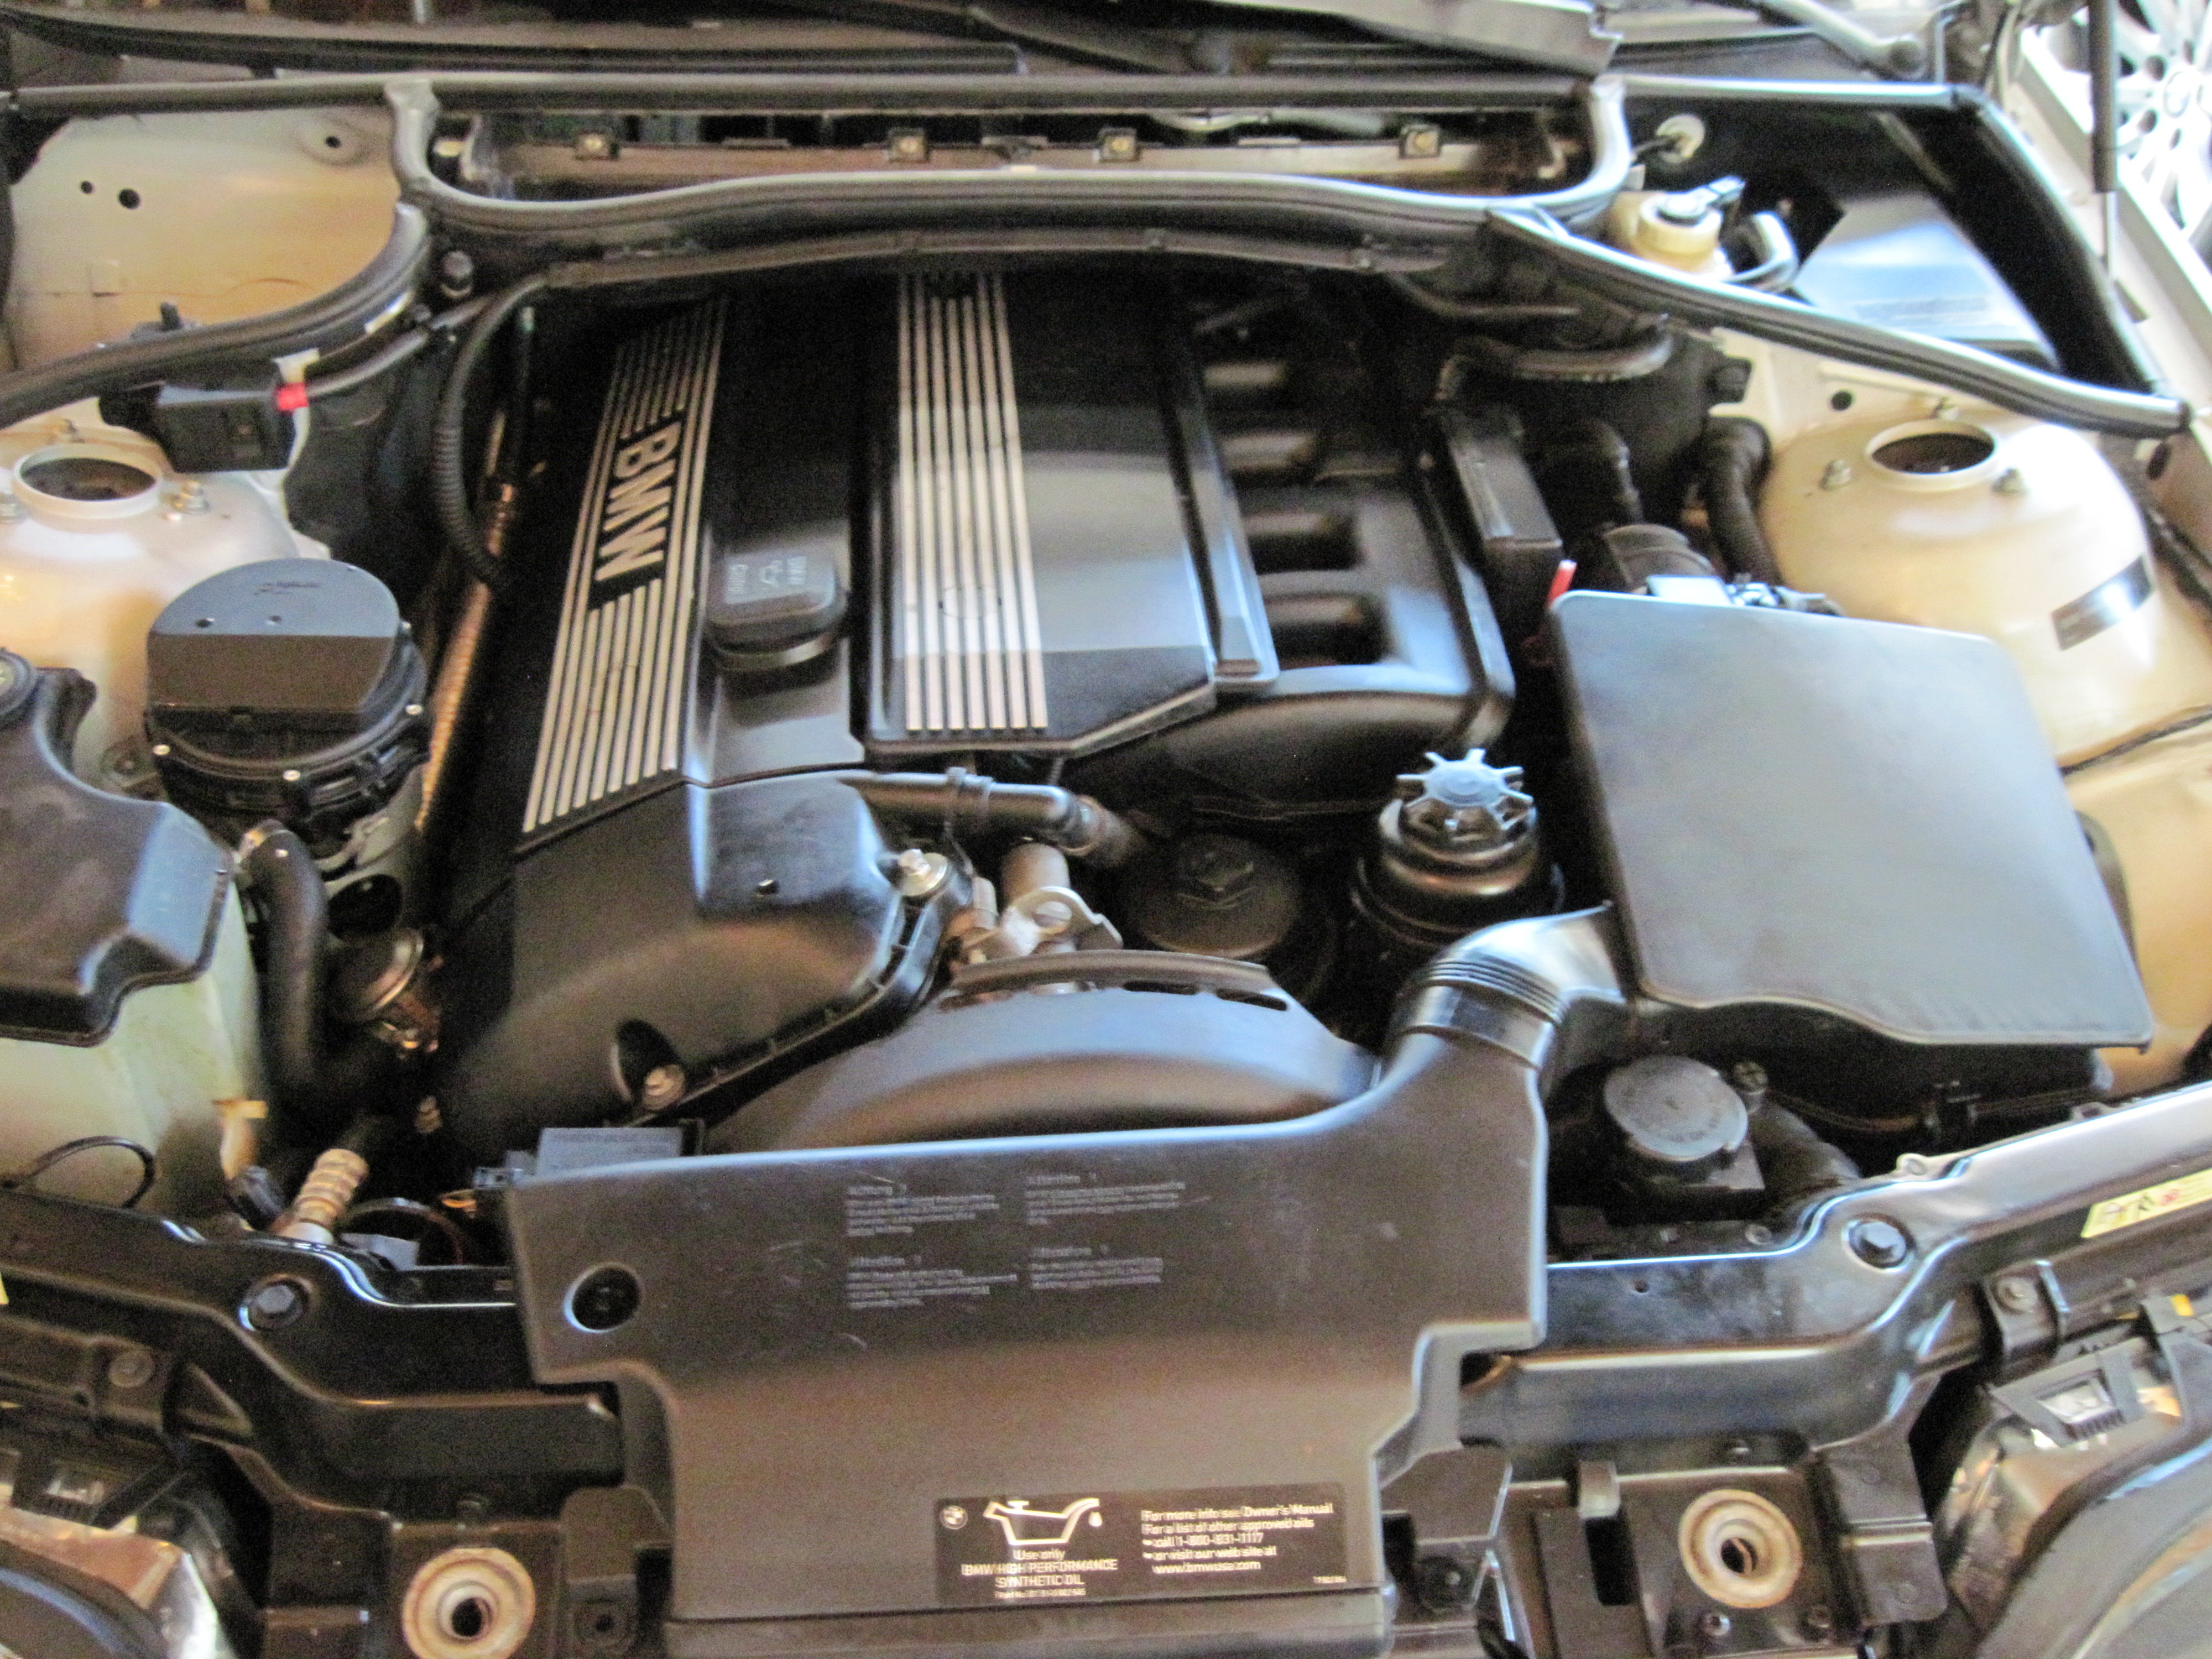
This was a fun photoshop of the engine and the hood closed… I made the engine 40% transparent and the layered the engine on top of the photo of the Bimmer with the hood closed… click on the photo to really see the detail as it will pop open in full size.
Cover for the valve head looked great, no heavy slug from water in the oil and the air circulatory tubes were also replace.
Removing the spark plugs to check the condition… they all looked great and must have been replaced when the ignition coils were done… no wonder i am getting 25 miles to the gallon!
The Vanos pump will need a rebuild soon as if seems to be leaking from the seals.
All back together minus the air cabin filter housing… since I had a new one, I replaced that too… it was full of dirt and road grim… so it was time.
open hood closed hood… mating the two images is how I got the first image of the car with the “like” see through hood!
Sports package = Sports rims, sports suspension, bucket seats, three spoke steering wheel, lowered about 2 inches compared to a normal 325i and a Harmon Kardon sound system. Not to bad for a commuter car! Next up will be to inspect the wheel bushings and brakes….
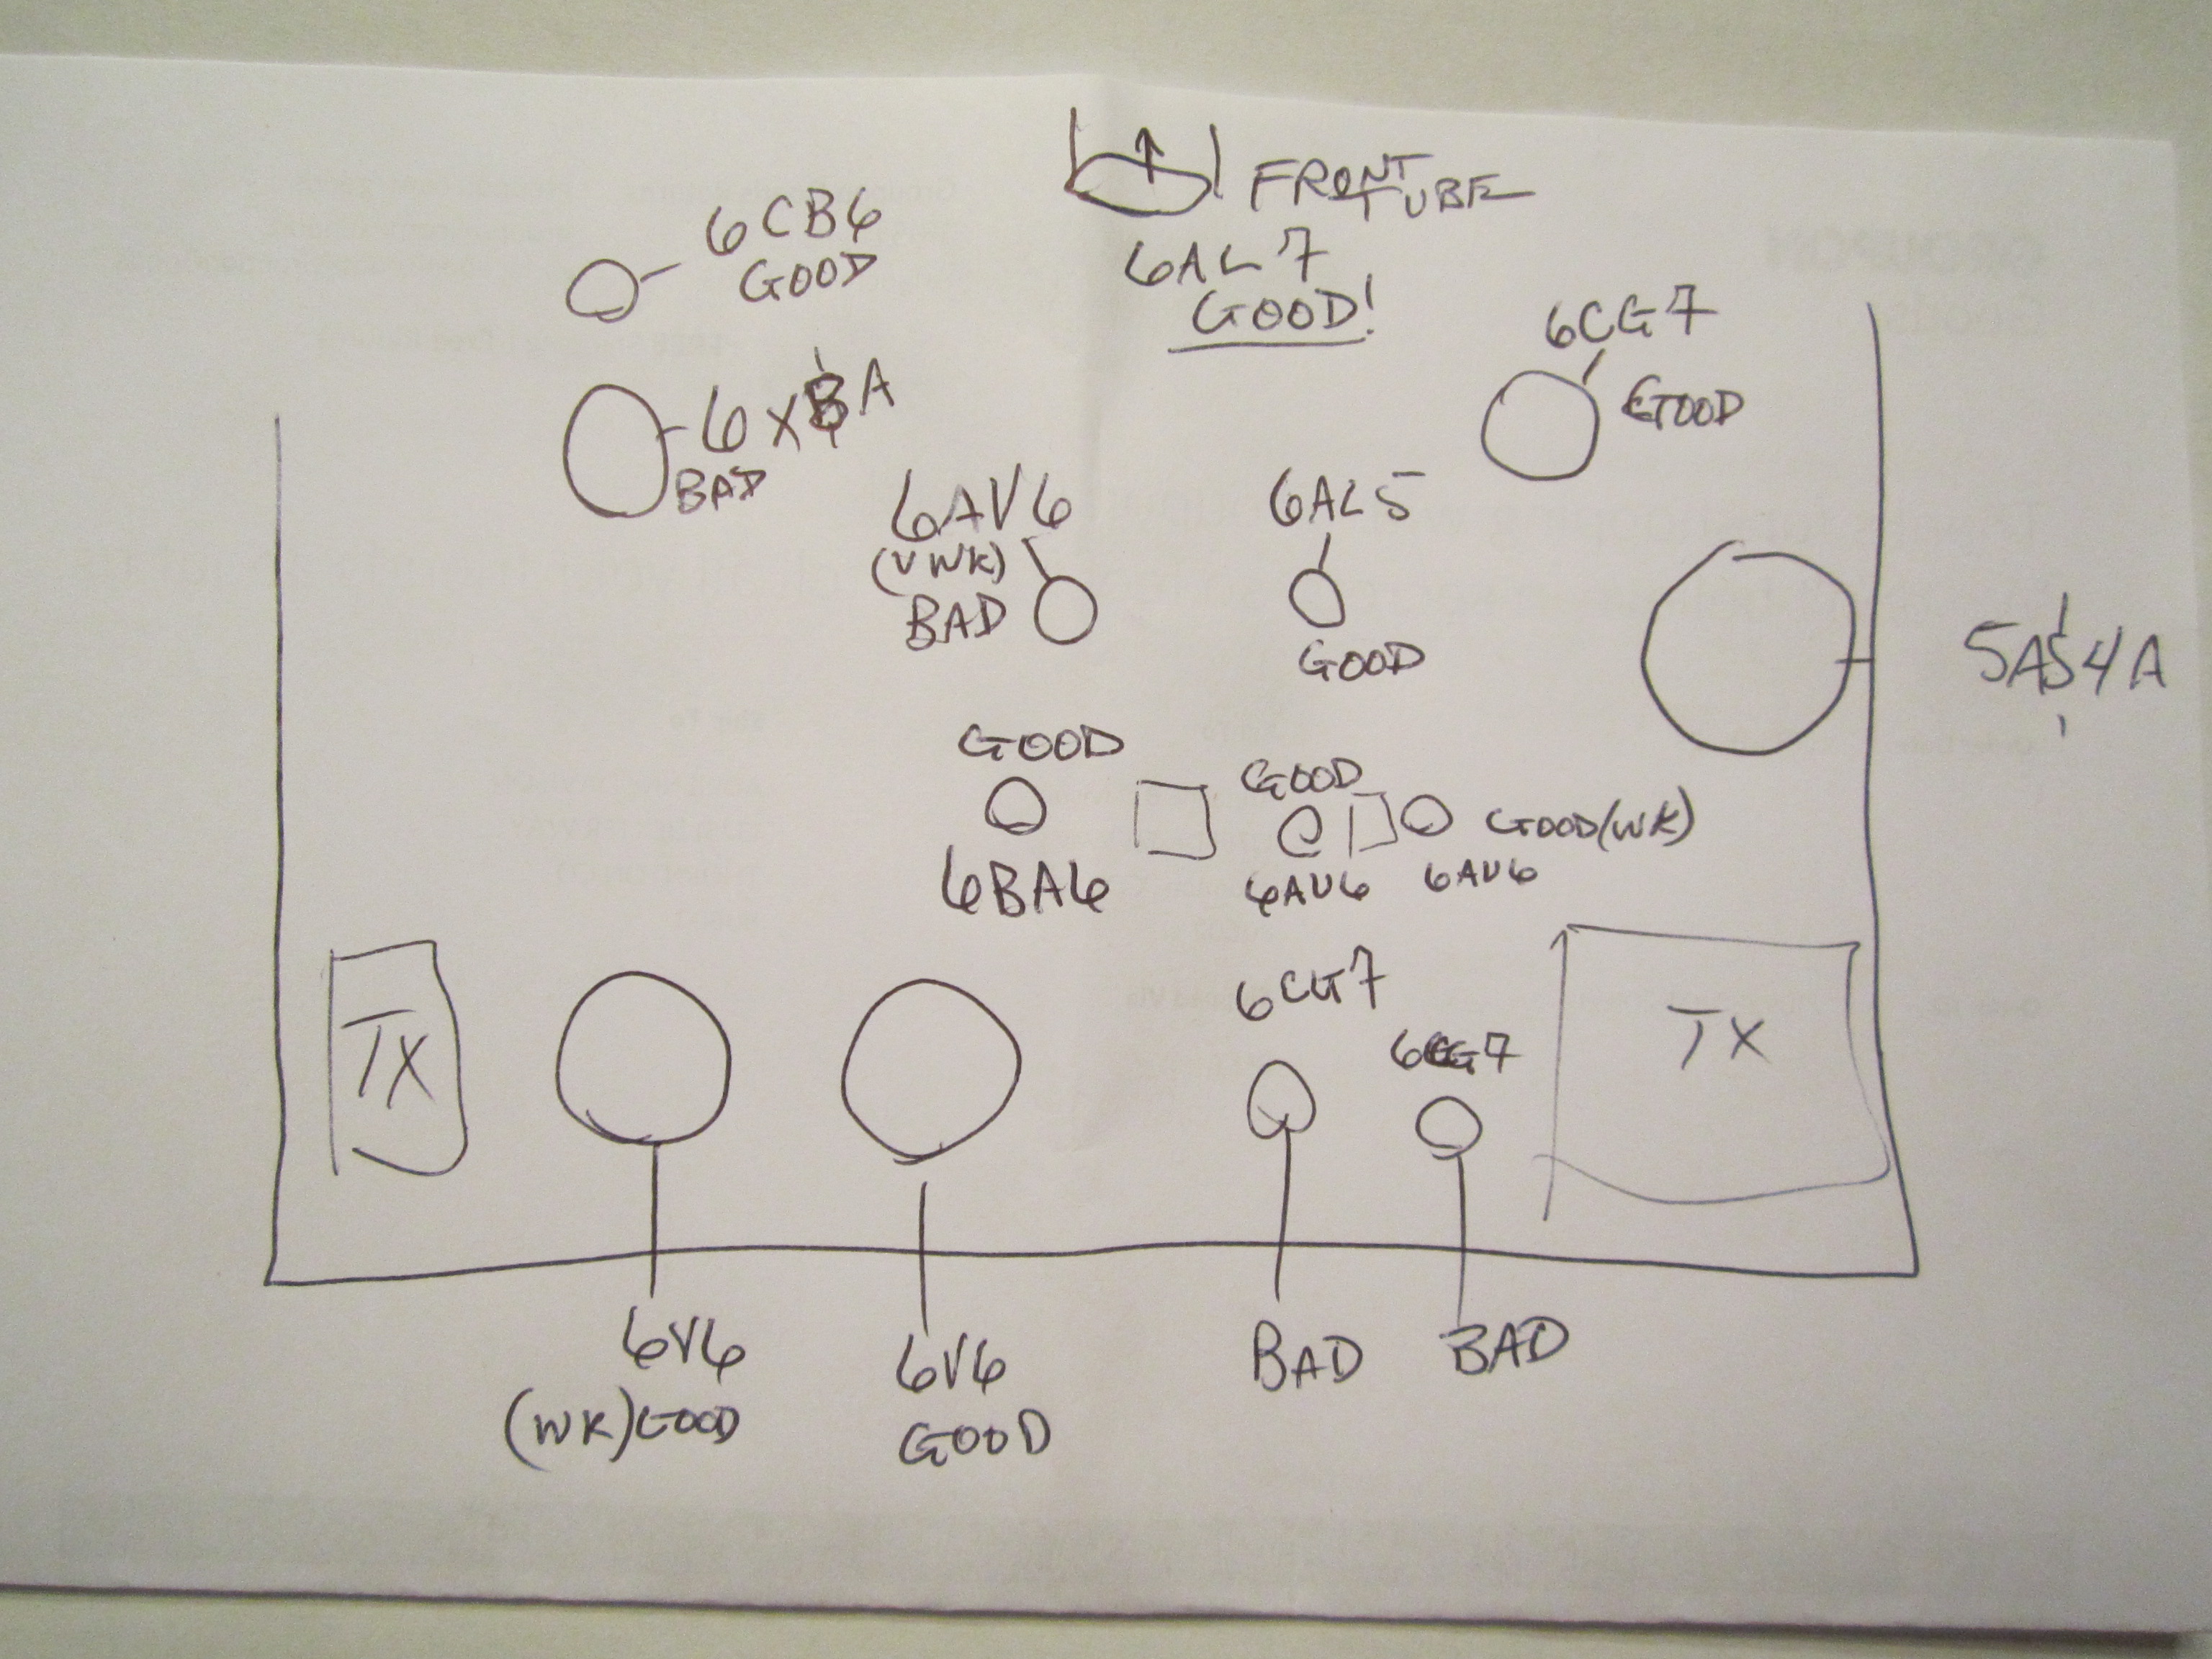
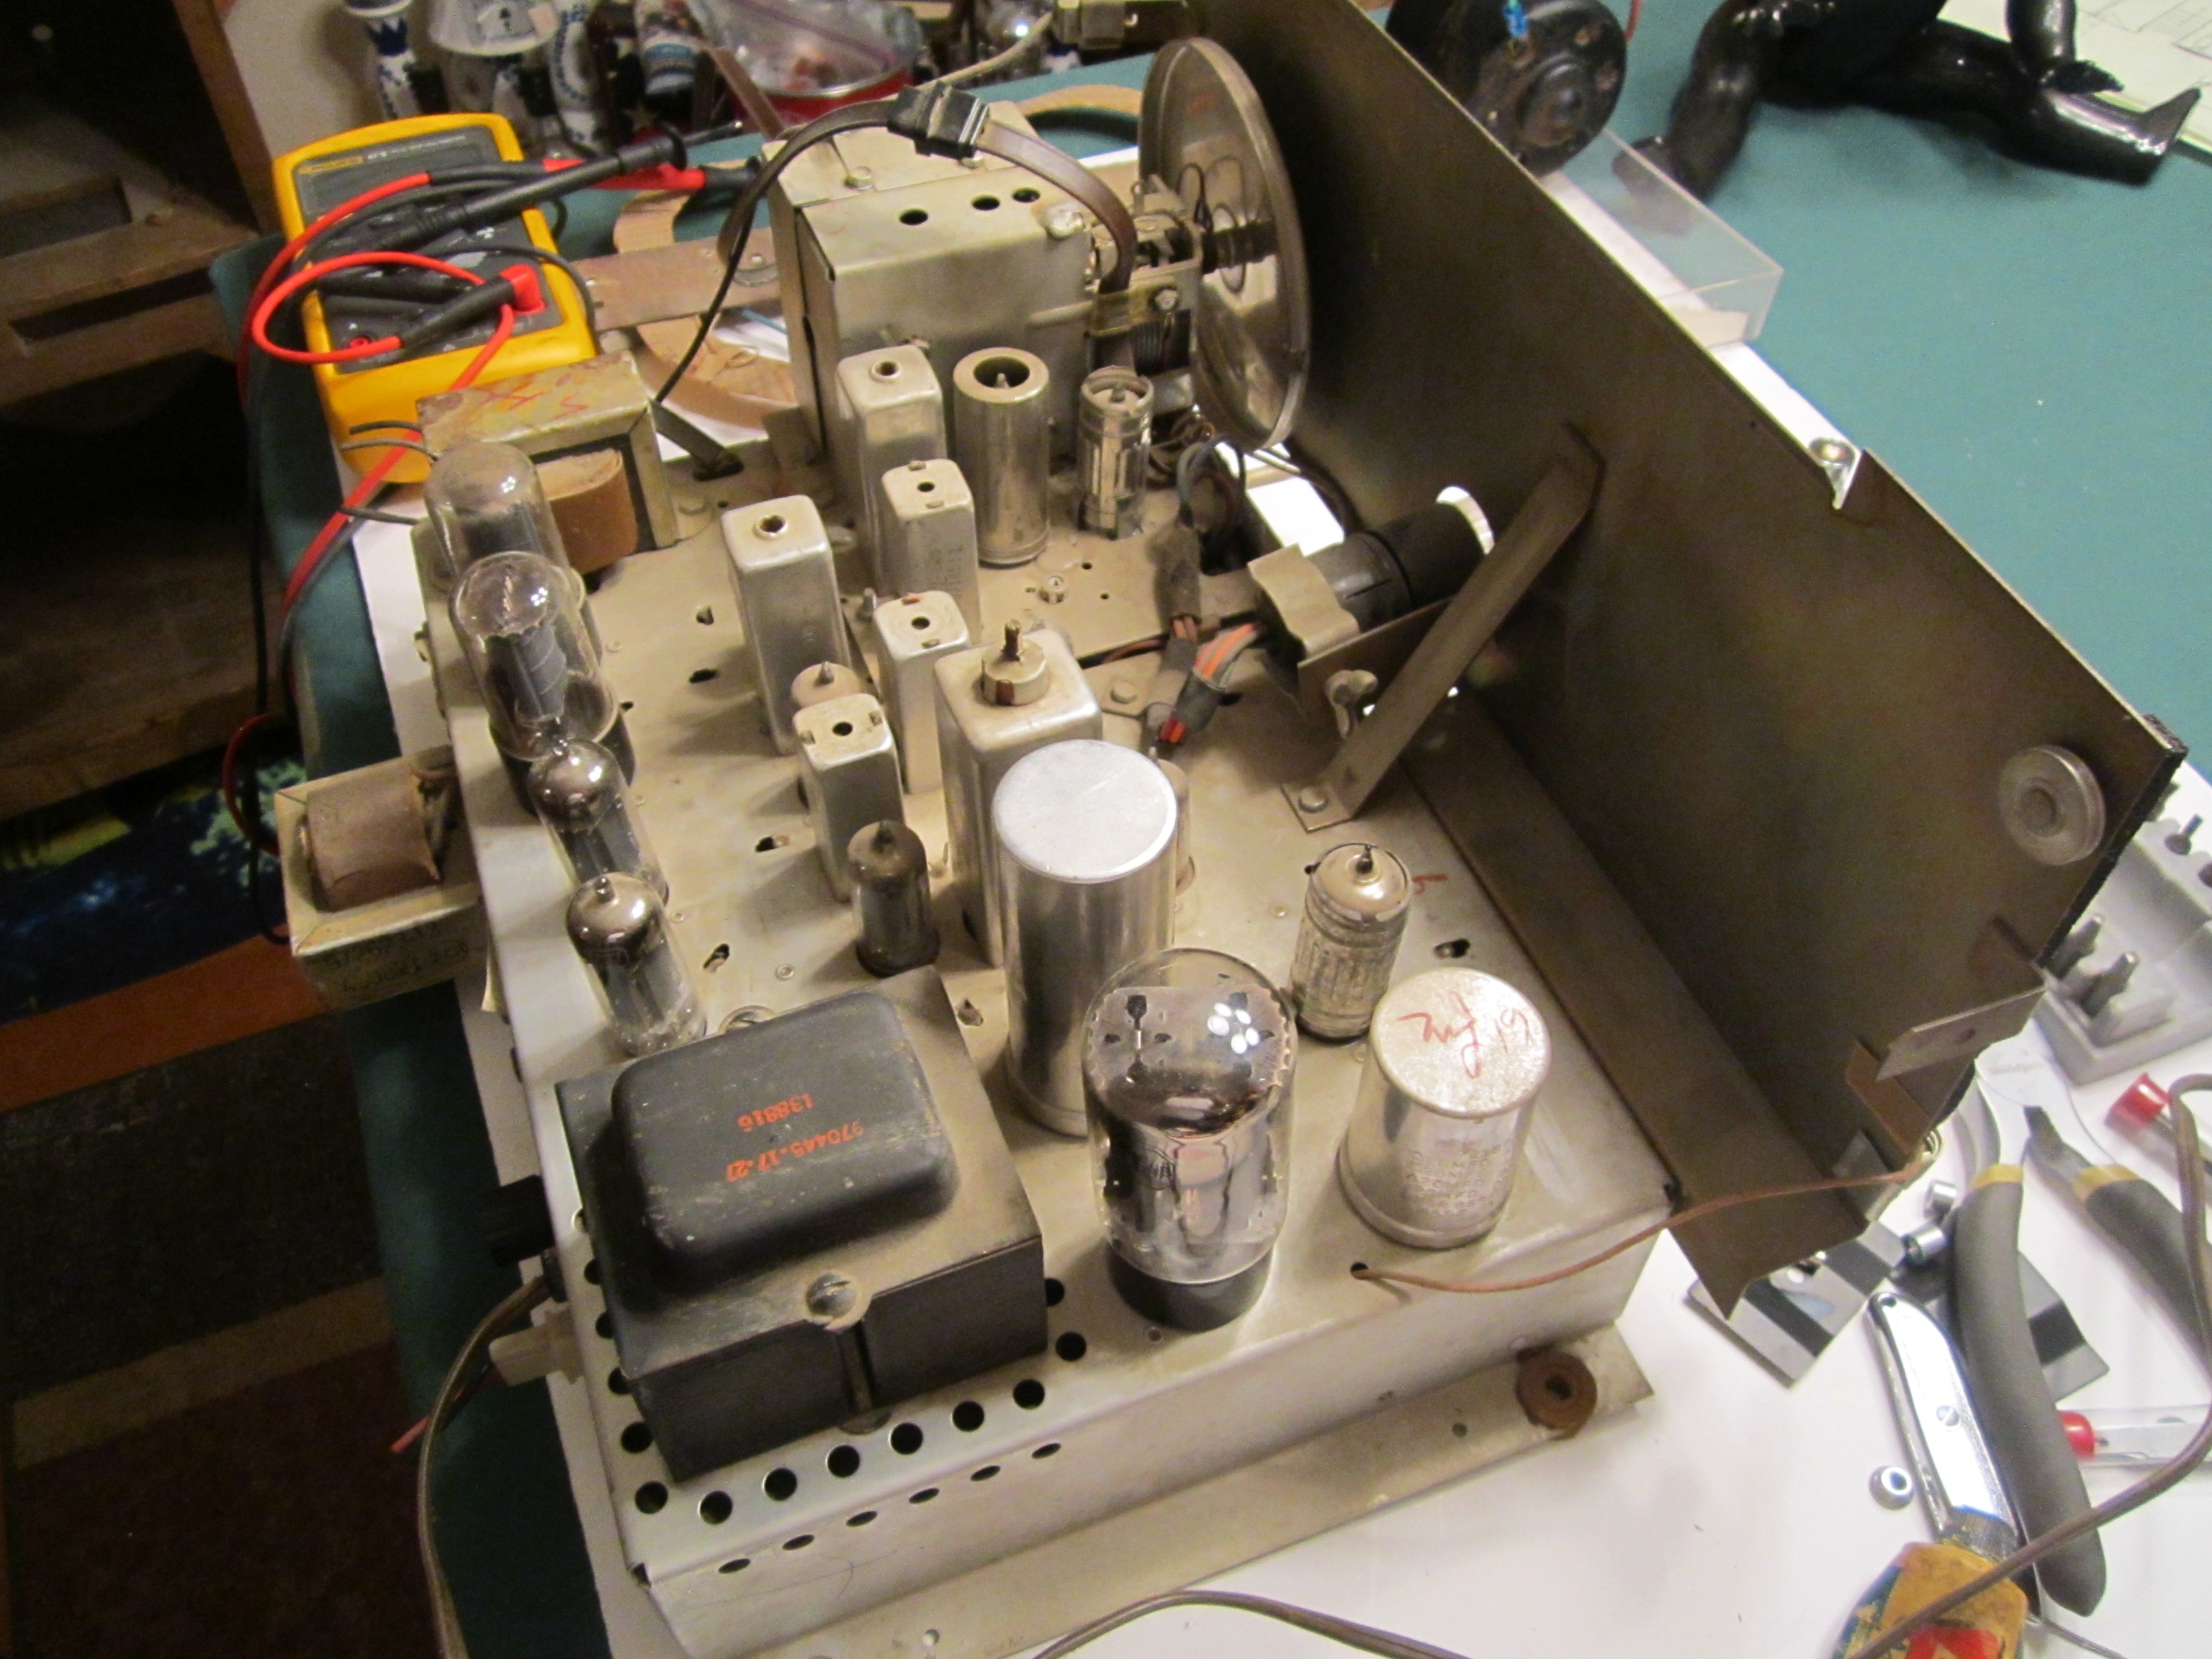
I started last night working again on the RCA console and decided prior to a thorough cleaning, I would check all of the tubes for good gain, emission, shorts and quality.
I first draw out the map of all the tubes, place the correct tube designator and Tube number. This ensures i have the correct tube placement and that as I test i can mark off “bad” or “good” or “weak”. The weak might be good enough to get the amplifier working, but will need replacement for long term use.
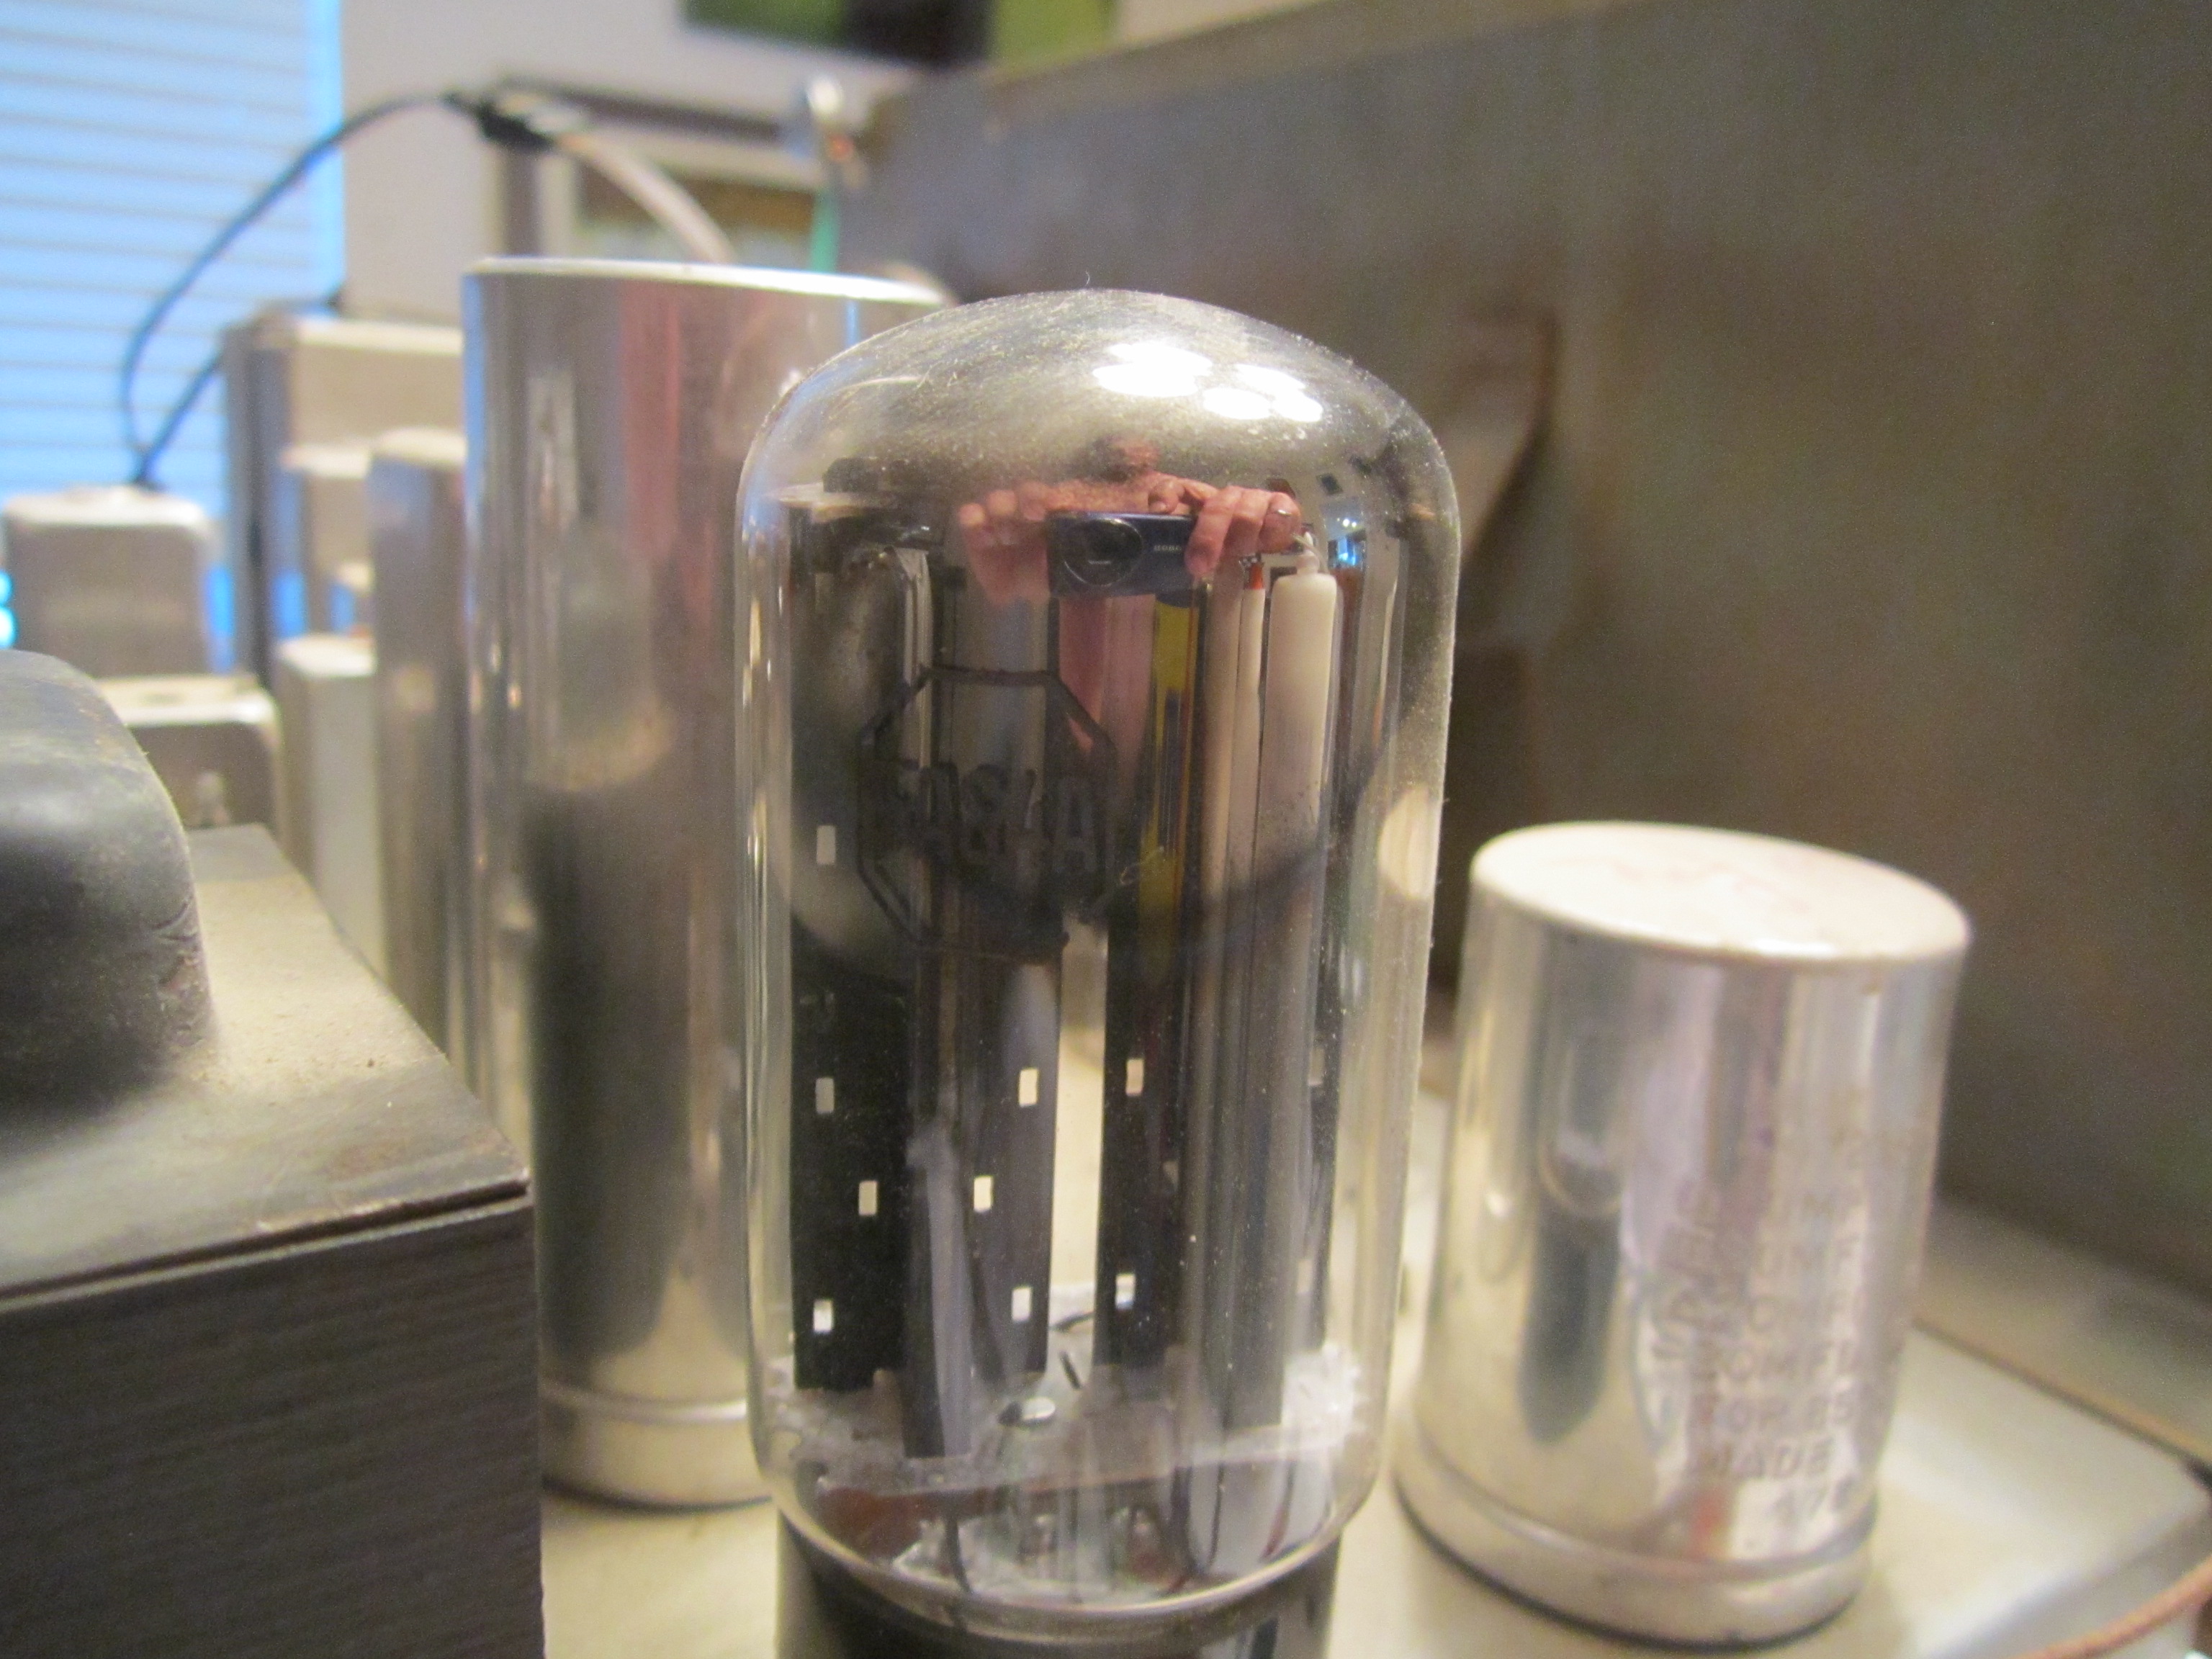
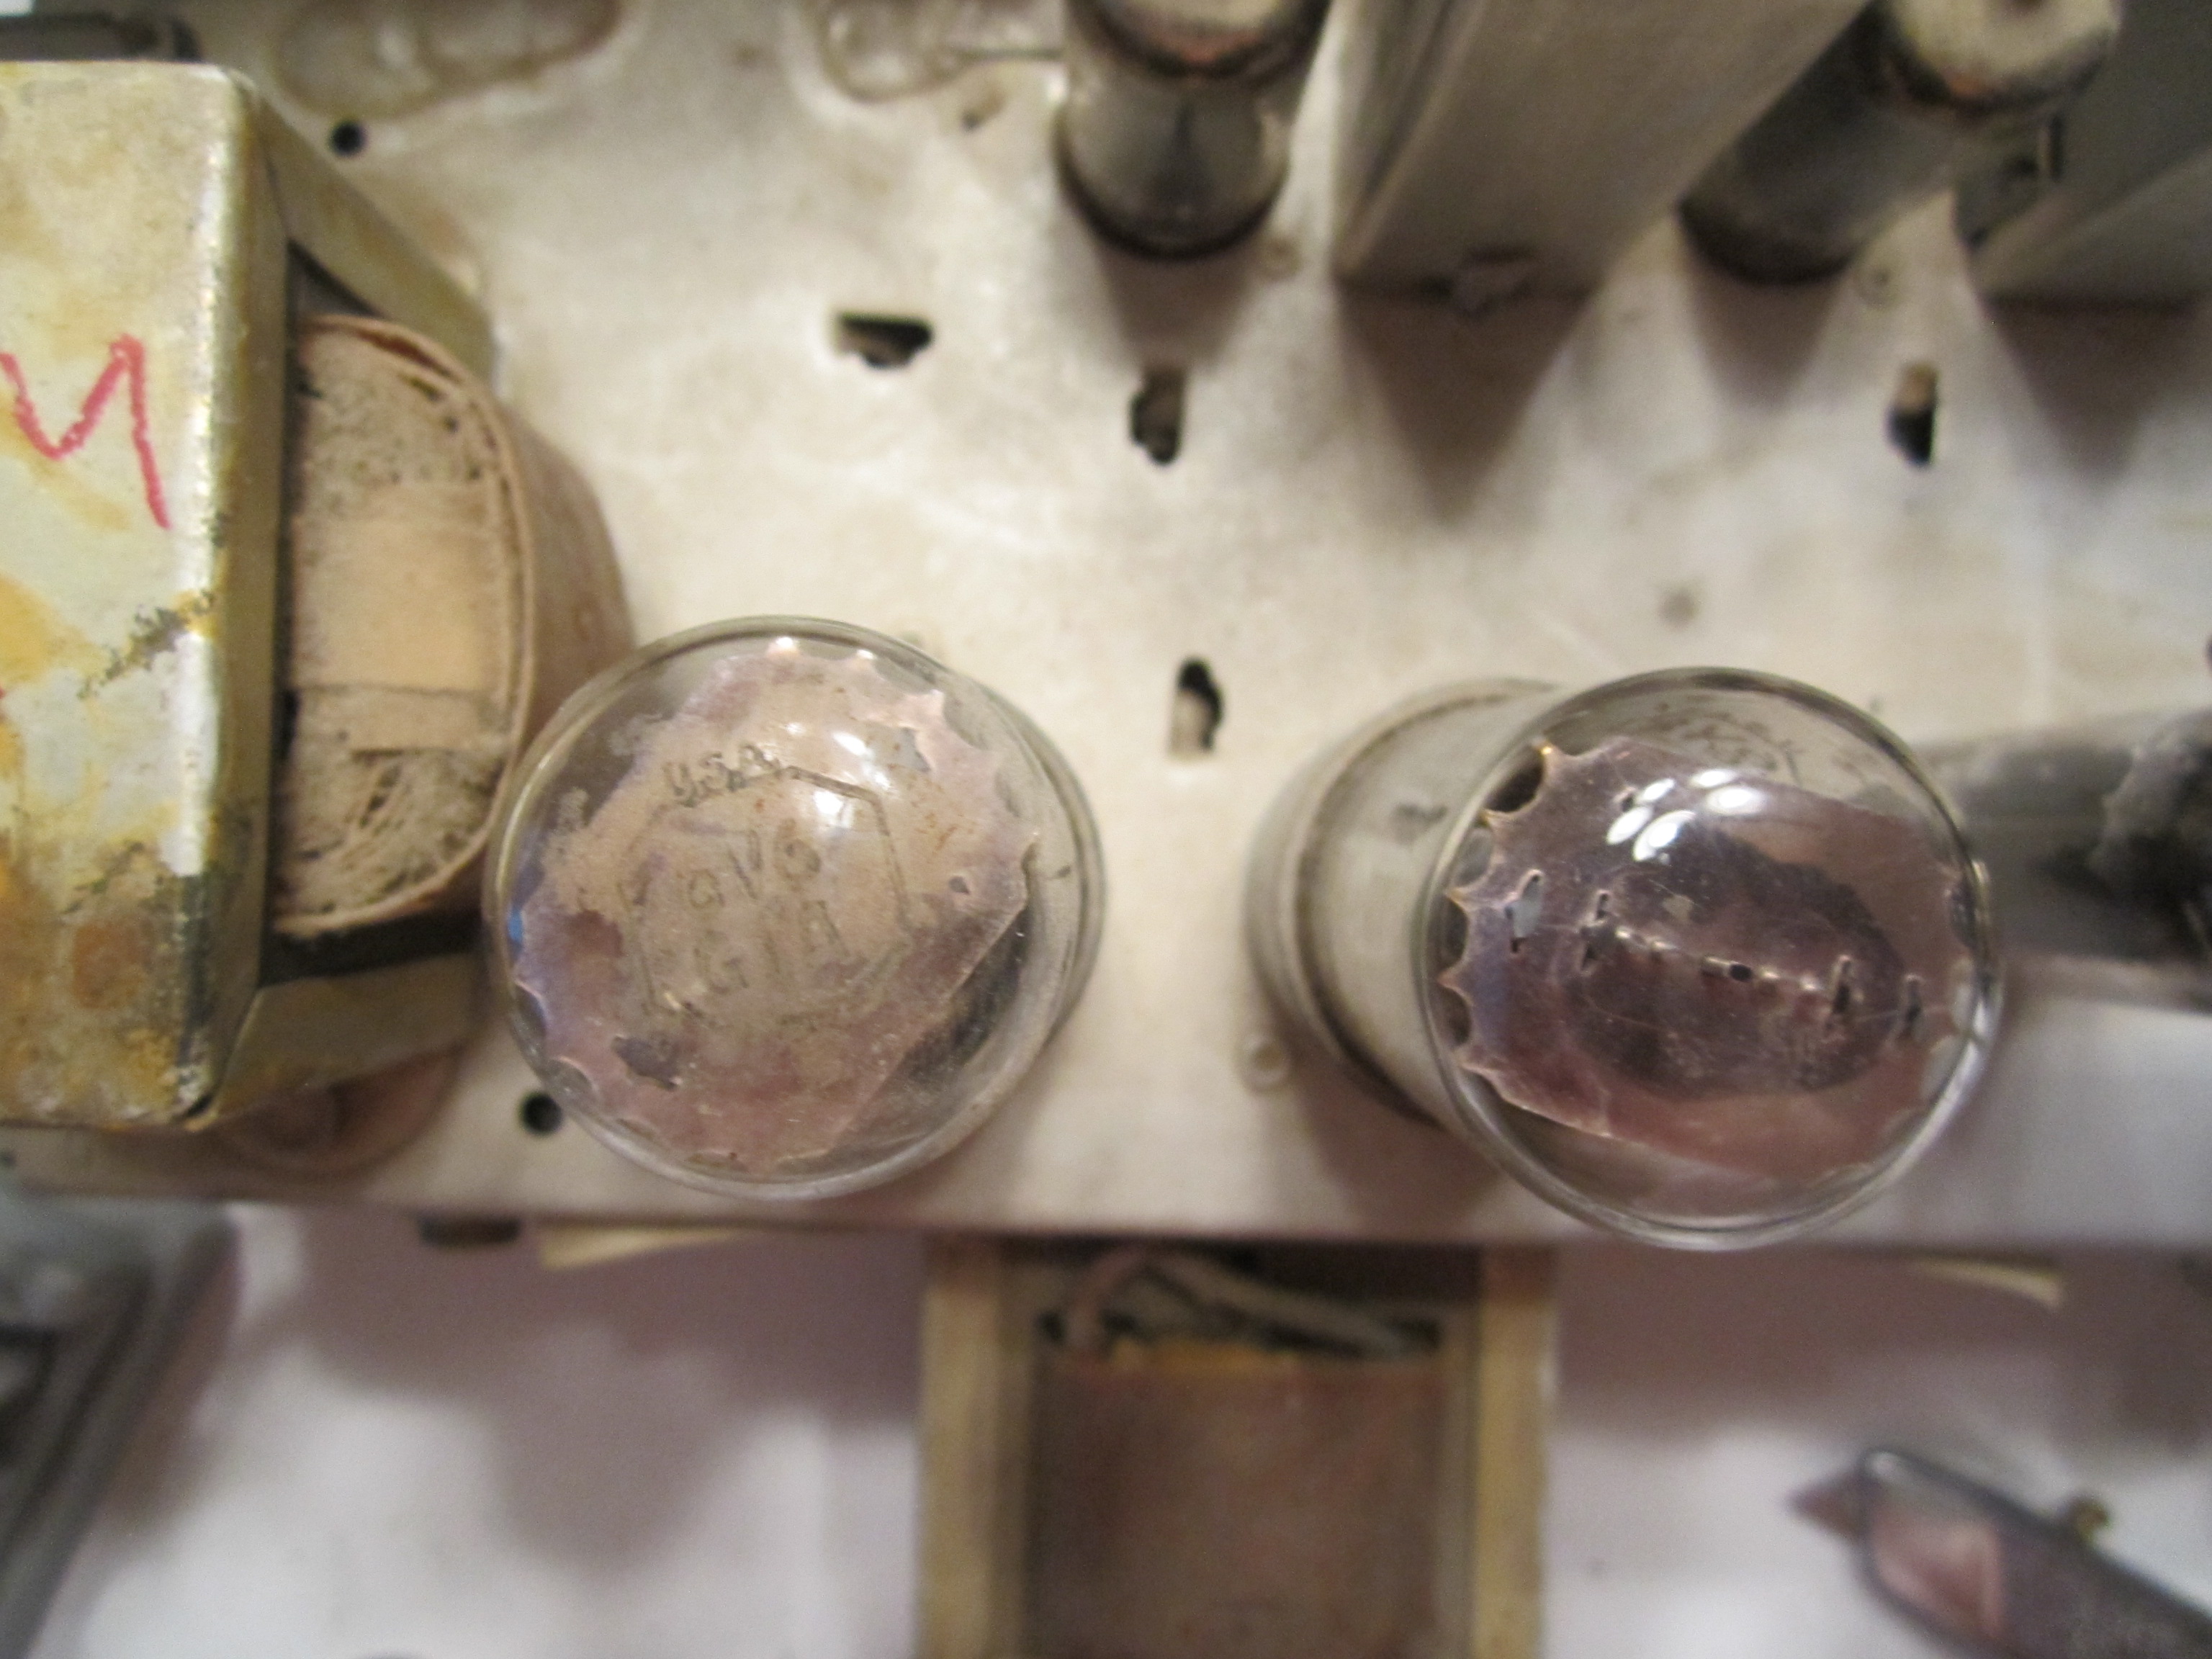
Next I select a tube and and gently remove the glass electron masterpiece.
As you can see, some tubes are in great shape and others need some cleaning to be able to read the tube part number.
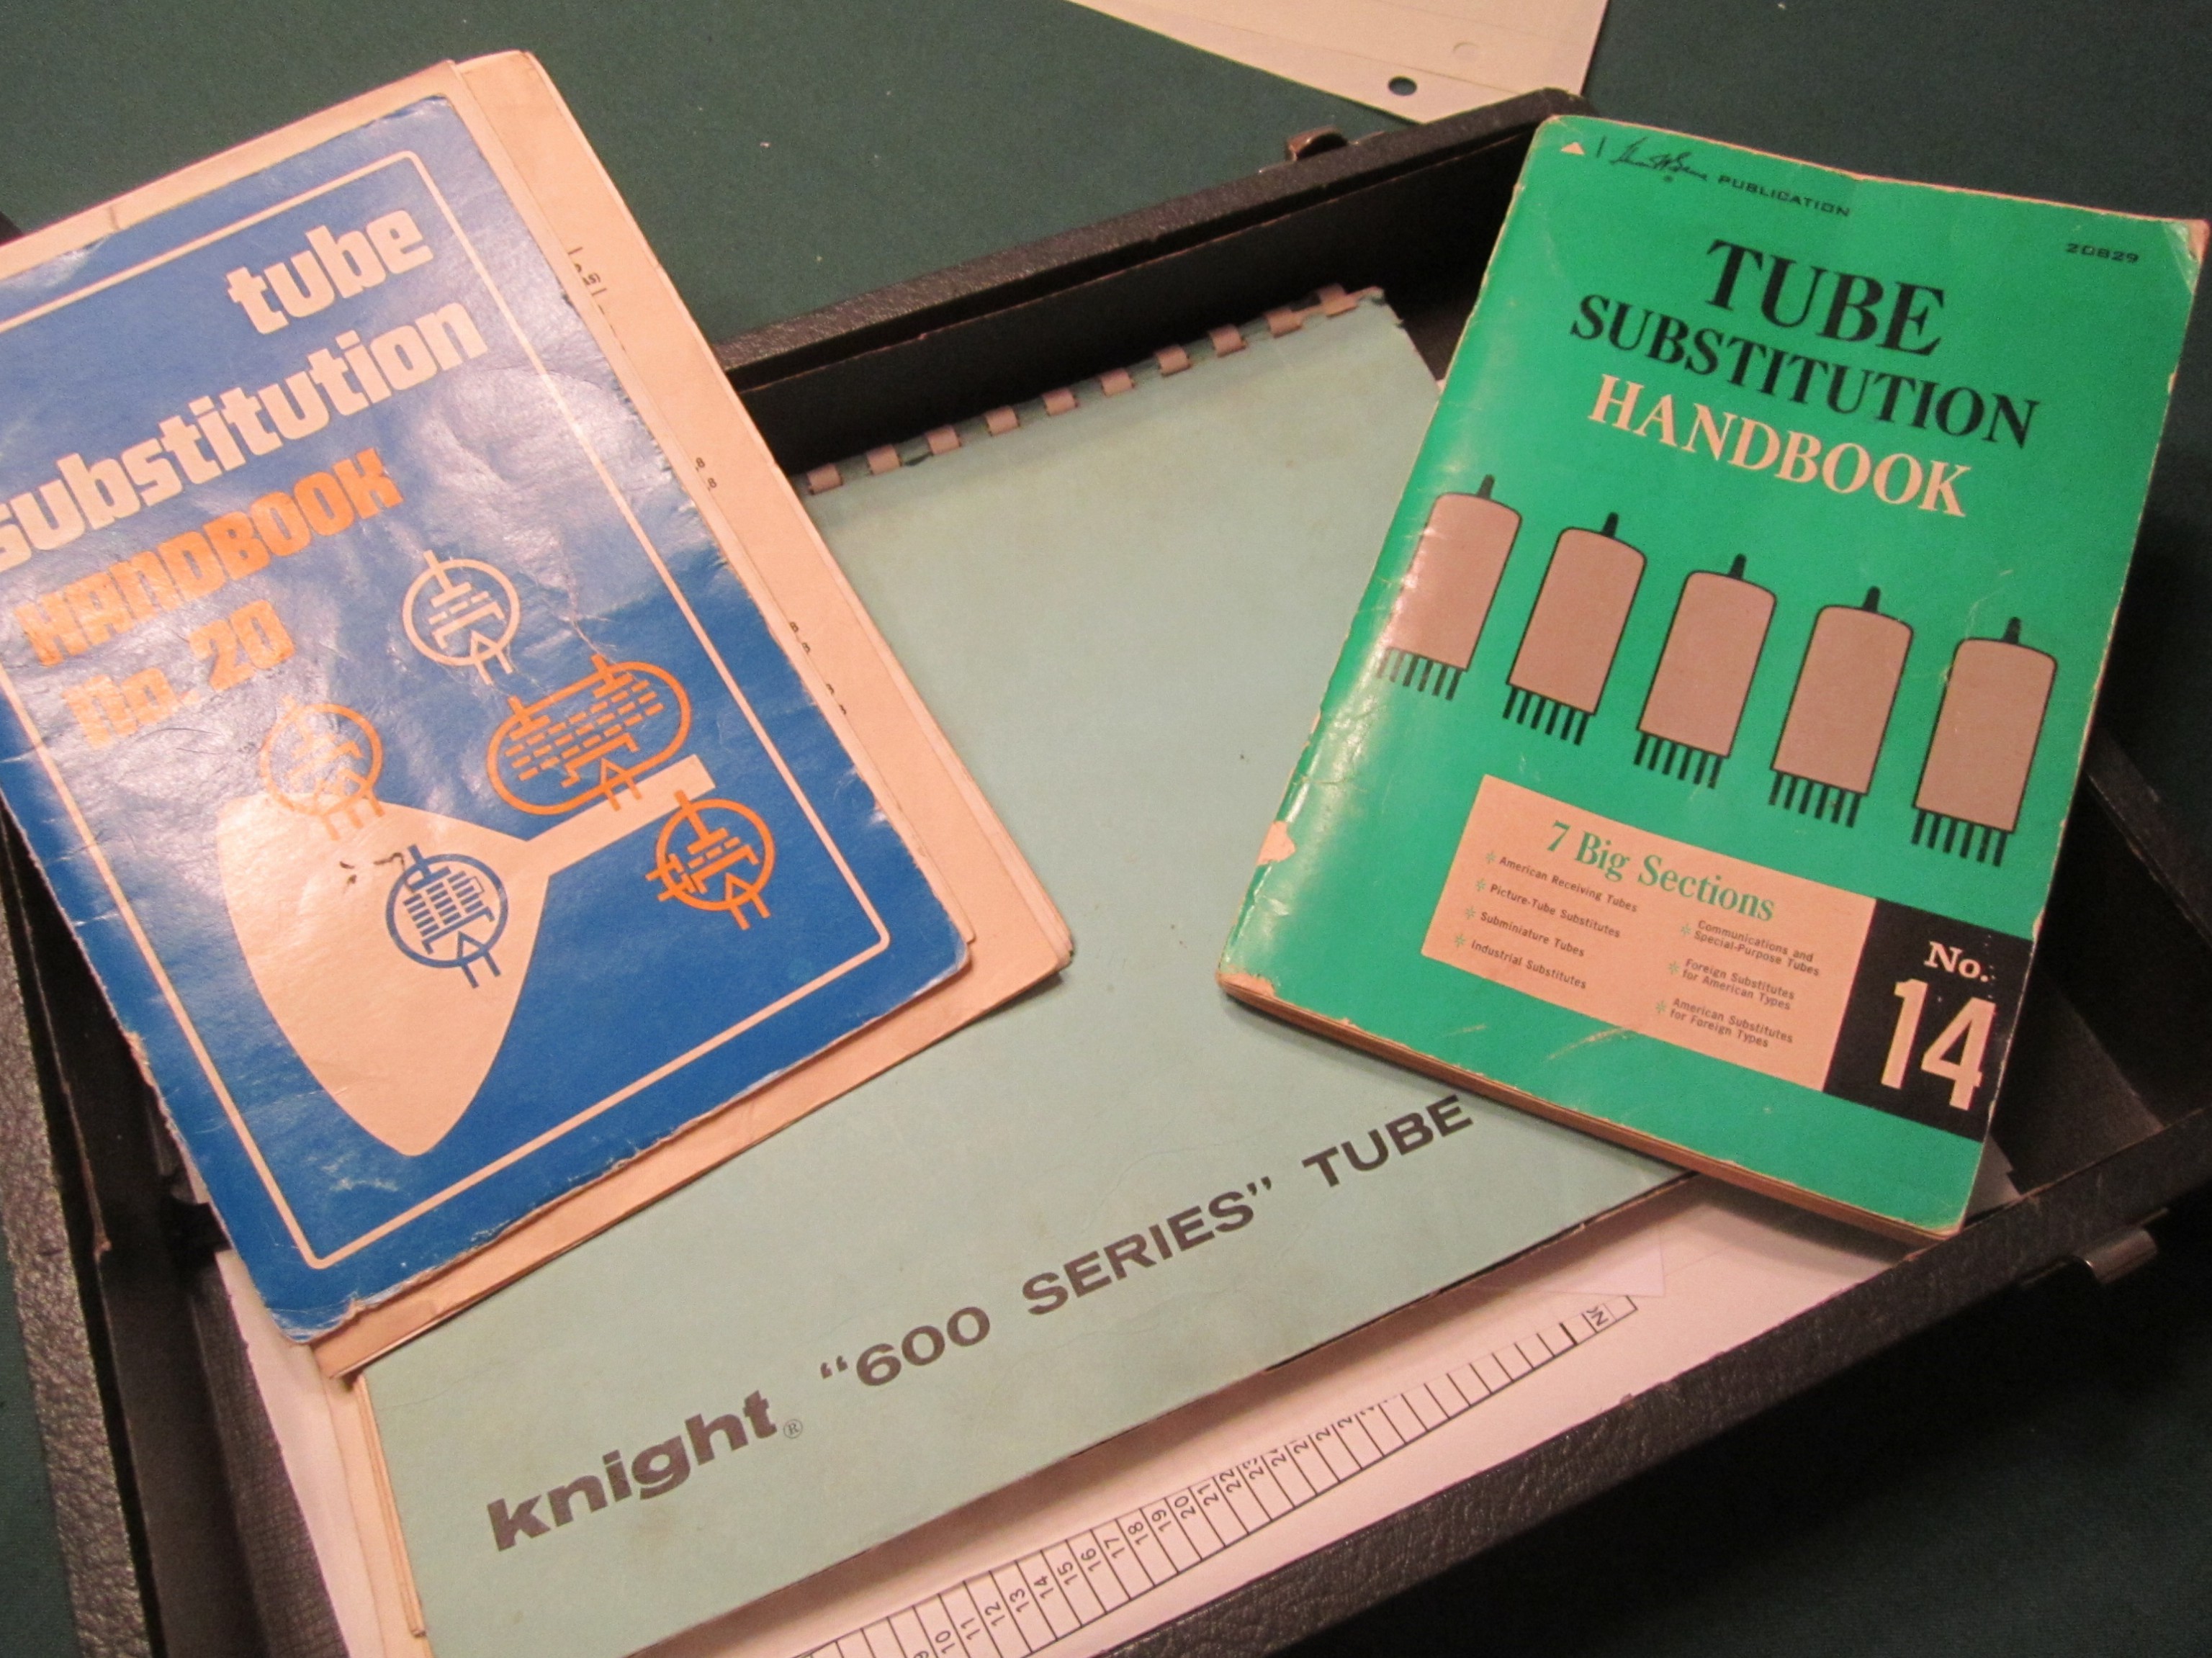
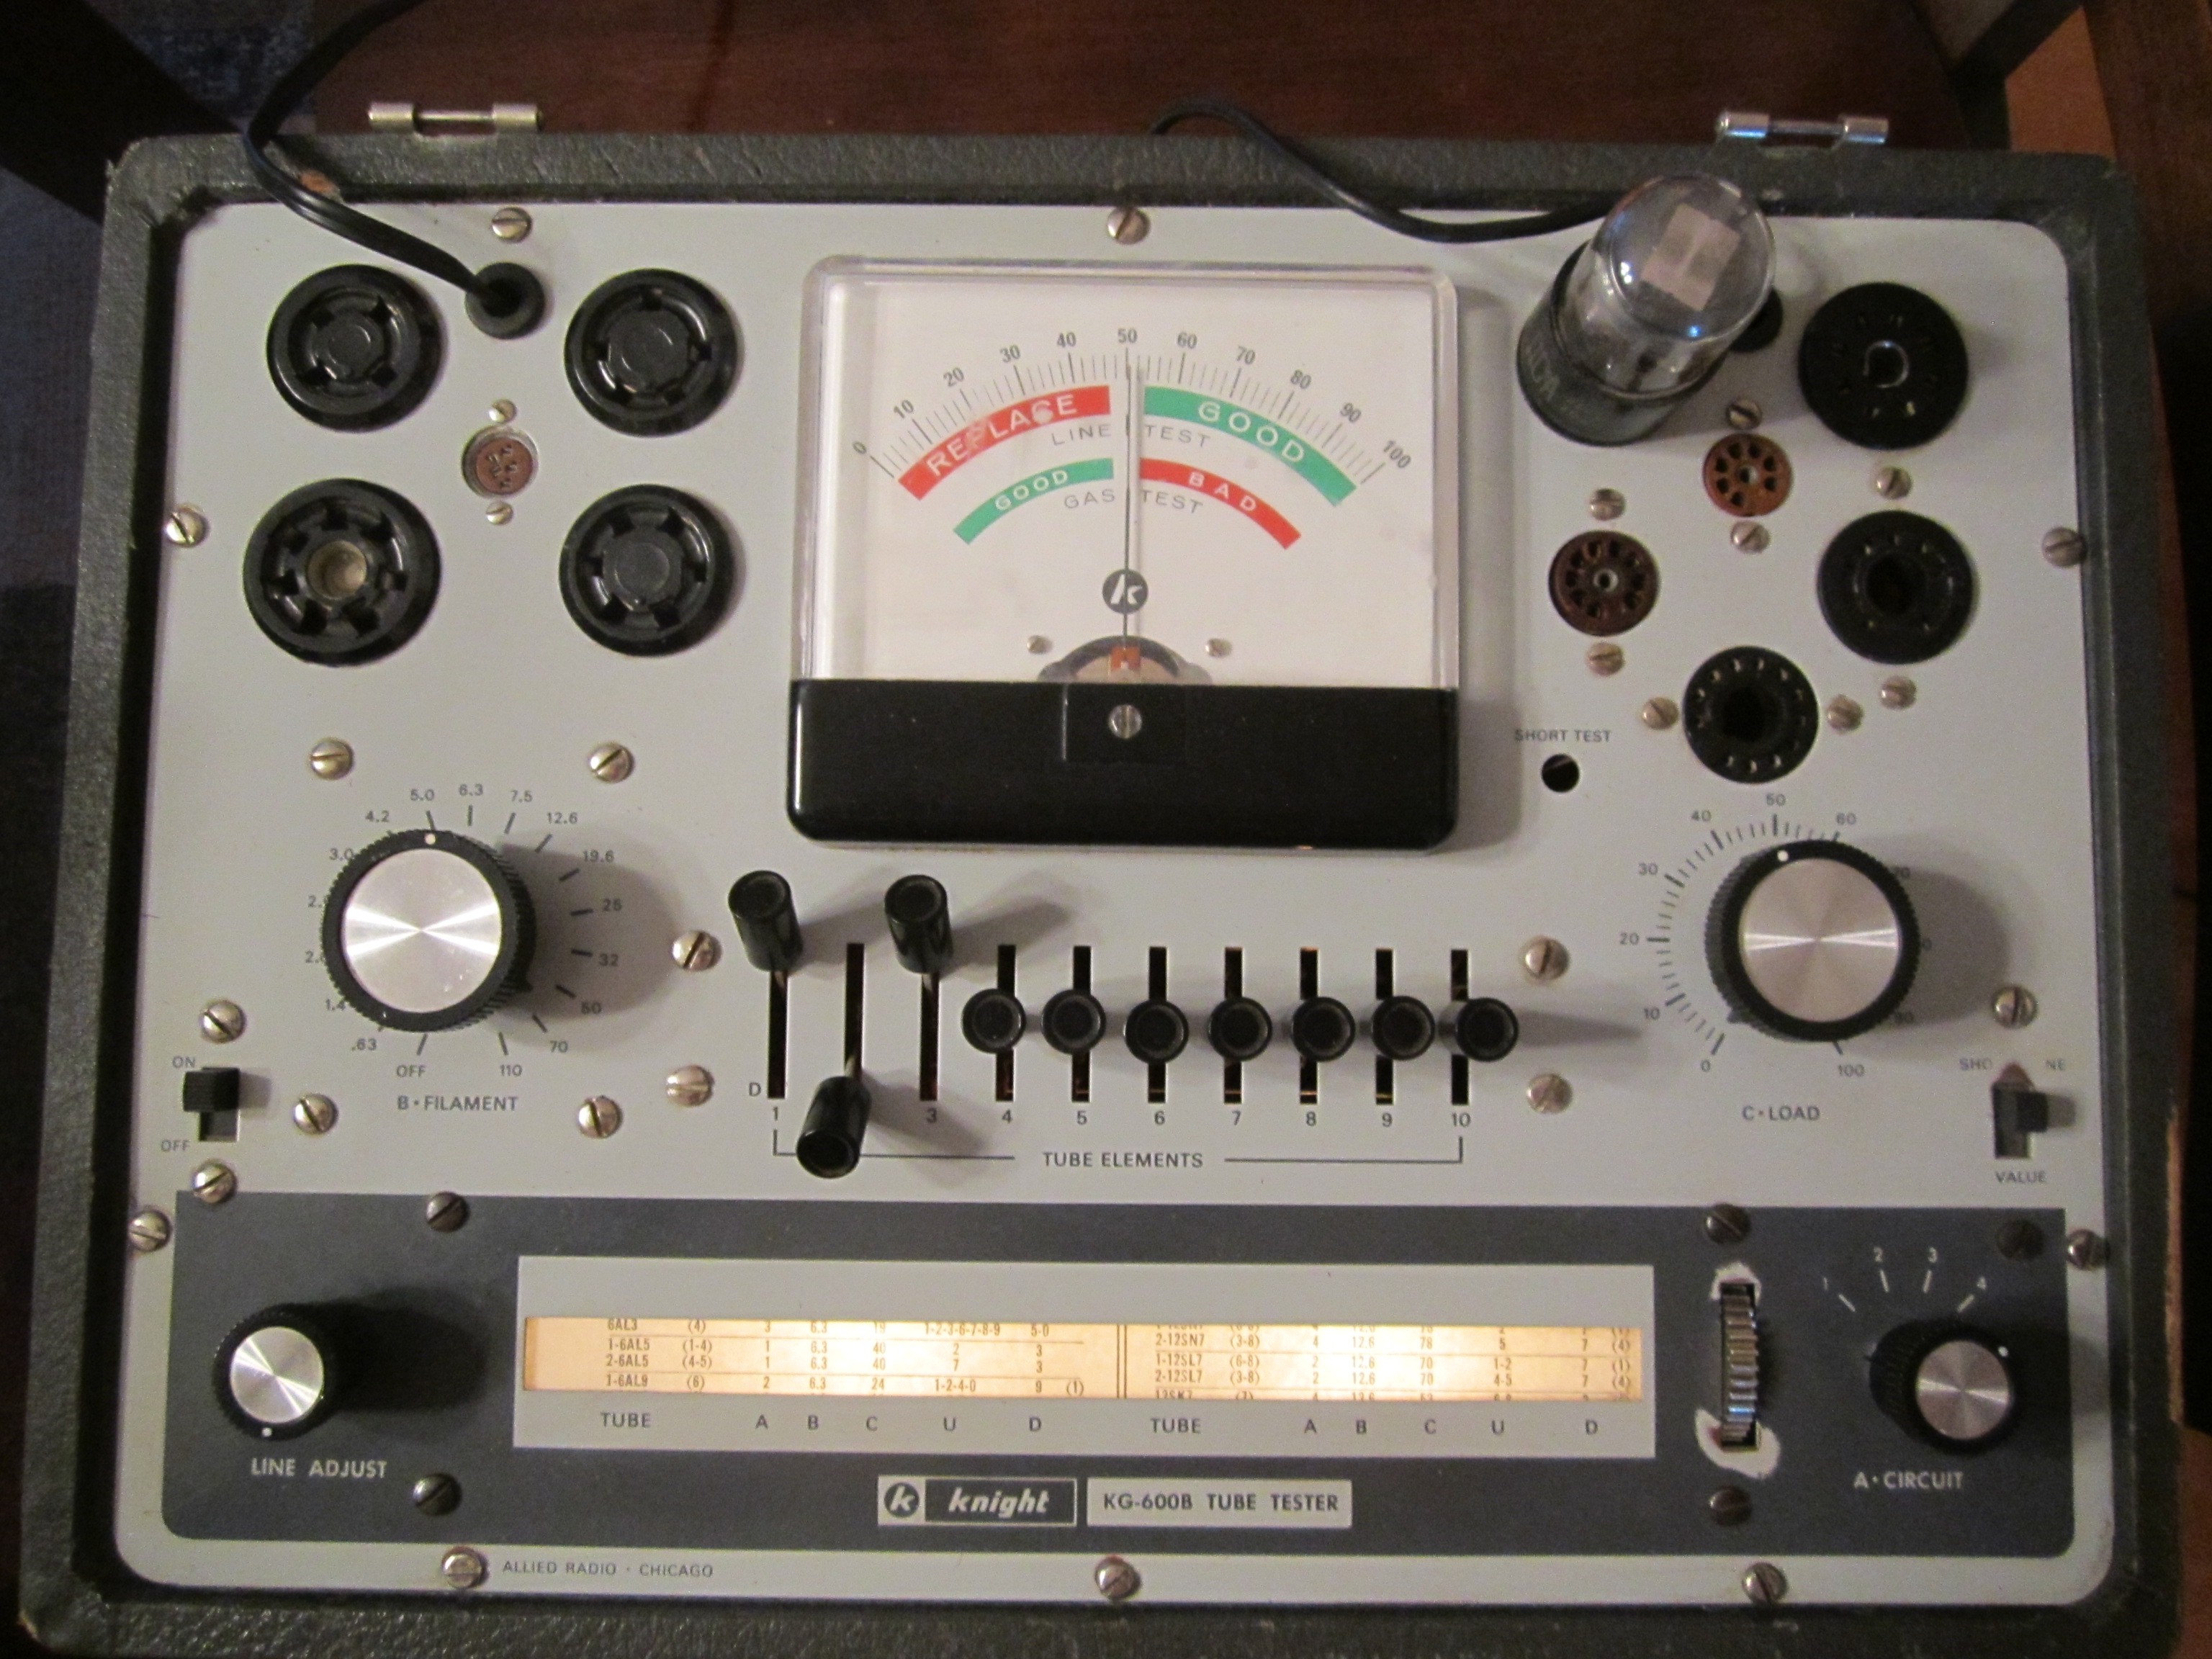
I have several resources to verify that the tube I have can be tested in the Knight Kit Tube tester that I have had for over 20 years.
If the tube is old enough I can use the scroll paper inside the KNIGHT “KG” 600 “B” (Why they had the letters KGB in the nomenclature of the tester I have no idea!) Kit test kit with the back lit scroll.
If not I have to turn to my other resource book with newer tubes. As the case for this very cool 6AL7 radio tuning tube. The tube lights the upper part of the glass on a grid that allows the user to “see” how in tune the radio station is getting. (I was very impressed as i have never see a working signal strength tube in working condition, and was surprised about how bright it really was.)
It was go time… setting the correct switches, turning to the correct voltage and socket selector I was ready to test!
Even bright enough with the lights on!
Checking for the gain of the tube you can see the upper scale read “Good”
After a test of all tubes my failed list will be easy to acquire from E-Bay as I have already started the bidding process!
Here is a good picture of the Knight tube tester. It has been working perfect since the day i bought it!
My friends found a great AM/FM Record player console at a garage sell and picked it up for steal… my part, I am going to do a restoration on the amplifier, receiver and turntable. It is in great condition except for the missing speakers. I did my research and found out that this console is a real top of the line for the year. A 1958 RCA Orthophonic Stereo SHC-4 console in blond wood. High Fidelity, so close your eyes and see if it sounds like you are sitting with the musicians as they play. (I will continue to post as I go, the detailed steps and the finish product). Here is a good 1957 advertisement that just now a days seems silly, but the information is great! https://www.youtube.com/watch?v=lbG-ps0CSkQ
I have removed everything from the cabinet and will start to clean everything. I have not powered up any of the electronics as I do not want to damage anything or the tubes until I know exactly that all the components are in at least working order. I will go back and use an oscilloscope to verify the quality of the amplification of the sound and check the stages of the quality.
More soon…. I hope you will enjoy the next few post as I dive into something fun!
I am kind of a pack rat.. I have an idea that the stuff I collect will someday be used in one of my great projects or that one of a kind reel to reel player some day will sit perfectly in a swanky retro nightclub and impress the bar flies.
When I look back on my collecting, it was never a focused venture… everything I collected could go into the garage, be cleaned up , restored and made to work (a lot of the time it was the challenge to make it work that fueled my desire to collect) and then brought into the house to be displayed like a trophy, a prize, an artifact that was from the past. At some point, i think to myself, there was a person who bought this item and had some amount of pleasure using, working, listening, playing with “said” item. And now I, the new owner, want to make sure that this item can be used again, in a way that the person who bought the item would use it… an old tube radio, clicking the power on, waiting for the tubes to warm up, the static of the speaker as the electronics inside warm to a buzz and allow the FM radio station to tune in… of course now, it is a modern rock station playing through the whizzer speaker… back then though, back in the 1950’s …then maybe it was some Glenn Miller, or the local news… simpler times.
My 1968 BMW 2002
Feeling a wave of nostalgia… IT IS the reason i ride a 1956 motorcycle, the simple cloths i wear, the idea that all the NEWER things in life, don’t really make us any happier… the latest greatest cell phone can do pretty much everything, email, google search, video chat, play a game, tell us where to go and how to get there, and once we are there, we take a photo for evidence…also it will answer any question you have.
Ask your phone if you are a good mother or father, ask it to do your job, ask your phone to take a test for you… or spend time with your lover.
Is this really better than the simpler times… do we as a society need to take over a million selfies a day?
I promise… it will not have a good outcome, but yet this is what americans do… A father says, “I am friends with my son on facebook, I know what is going on with Johnny!” or “Siri … How do I manage anything in my life.. tell me what is on my calendar?….. OH REALLY it is my anniversary!?” Like you are having a real conversation with a phone…
Once I thought we had a great world ahead for society… as an electrical engineer, designing and making really cool stuff seemed like the perfect world. Now I drive to work worried that the woman texting in the car behind me is going to rear end me. I fear that the simpler world is day by day being shoved out the back door to make way for the “ALL” great new things…
…I digress… back to my first thought… if you really think about it, if you see past the technology, couldn’t playing a board game like Scrabble, or a card game with your friends on the kitchen table, in the middle of summer, with the heat of the day cooling and the rain pitters outside the slider window… isn’t that what life is really about? A simpler time, meaningful time and interaction with friends…a fishing trip out to a stream, so far away from cell phone towers, a warm radio on your corner cabinet that plays a tune from yesteryear.
I don’t think anyone will really ever understand the dangers of technology… how it all is just a distraction from real life, meaningful life, a simpler life… something I long for… a simpler time.